Via XXV Aprile, Roma
In this first exercise we will study the behavior of the sun and of shadows on the facede of the house taken in exam.
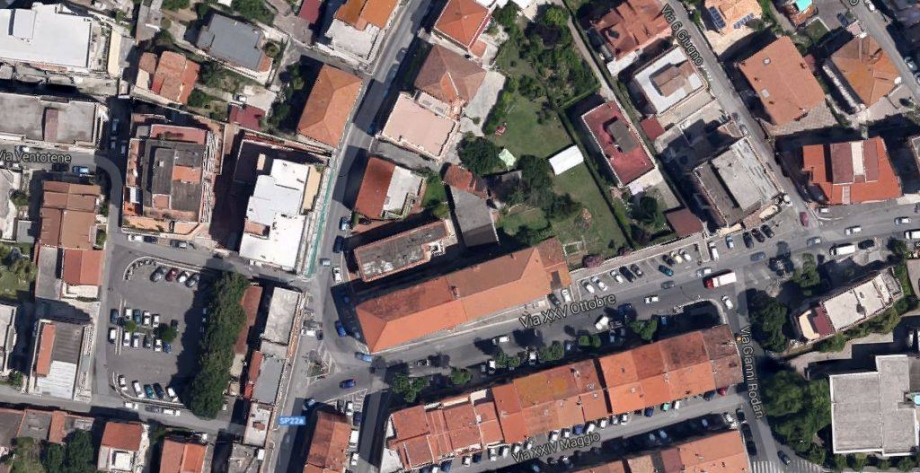
The area analysed is found on Via XXV Aprile, in the muncipal of Rome.
The building taken in consideration is a single home with two levels. It is in between two taller buildings.
The front facade of the building is orientated towards west.
We hope to be clear in the following steps and helpful to anyone that wants to use this program.
INSTRUCTION FOR USE VASARI PROGRAM
1- Open Vasari, starting a new file.
2-From the menu "manage" click on "project units". 3- Then select the metric unit preferred, in this case "meters", and select "ok".

4- From the menu "manage" click on "sun settings" to set up the geographic coordinates, which the program will use as a reference to calculate the shadows.

5- Don't forget to select the nearest weather station, and with the altimetry characteristics more similar to the place chosen, it is also possible to load the images from Google maps directly in our Vasari file, clicking on "import site image".

6- In alternative, it is possible to import a Cad file in which we have previosly traced the buildings that we will then study using Vasari. It is important to remember to previously put in scale the file also on Autocad.

7- Specify the scale and the level on which the file will be positioned.

8- From the menu "model" click on "create mass" to trace the Cad file and extrude it .

9- Click on "line" and create a closed outline following the lines from the Cad file.

10- Select the plan that has been created and drag it upwards to extrude it. Specify its height, then click on " finish mass".

11-Select the element created.

12- To color, once you have selected the element, click on "brush" on top of the menu "modify", and select the color and type of material from the menu "surface patterns".

13- In this way, the building we are studying outstands next to the others.

14- To activate the shadows click on "shadows on" (lower screen), then on "sun path" and "sun settings" to select the day and the time, and in consequence the position of the sun and the shadows. Click "ok".

15- To create a render of specific part of the building taken into consideration , click on " camera" from the menu " menage" select the level and the offset ( the height from which we have taken the photo). Move the mouse to select the direction of the photo and click.

16- If the photo is in the right position, we can procede and create a rendering, click on "render" on top of the screen, select the option defaulted from the menu, and click on "render".

17- When we are through with the render, we can save it or export it in various forms.

SUMMER AND WINTER SOLSTICES
We can see how the walls facing east, south and west are sufficiently illuminated in the summer. In the winter it is the opposite, there isn't sufficient radiation anytime during the day.

This photo represents our building at 2.30 p.m. on March 20, 2015.

And this image represents the corresponding shawow created with the Vasari program.

This photo represents our building at 4.30 p.m. on March 20, 2015.
 Finally, this image represents the corresponding shawow created with the Vasari program too.

We hope we did a good job, and exspecially that we simplified the work for anyone who wants to use this program in the future!