QUARTIERE VIGNA CLARA, Piazza Filippo Carli
SHADOWS ANALYSIS
Part 1: Basic paper settings and geolocation of the chosen site
A. Opening a new paper
Run the Vasari homepage and click on “New Metric” (in the Project list)
B. Setting the view
On the left you’ll find the Project Browser window. Choose “3d view: {3D}” in the “Views (Projects)” list
C. Setting the geolocation
The location of your project is compulsory on Vasari. It is used to calculate the sunpath and the environment properties.
Set the “Analyze” menu from the main toolbar and then click on “Location”.
If you haven’t signed in yet, Vasari will ask you to do that now.
This will open up the “Location Weather and Site” window. The default location is set in Boston. You can look for the address of your project from the “Search” bar.
Check on the map if the location is right: the red house icon should be on the address given.
When the location of the project is set, you should choose the weather station. It is very important to do that carefully, otherwise the environmental analysis will be wrong. Your choice doesn’t depend from the distance between the station and the project site, but from the elevation of them, which should be similar. You can check the elevation of the site on zonums.com
Weather stations are represented with a sun and cloud icon. The orange one is the one chosen.
D. Importing a site image
Stay on the “Location Weather and Site” window. Zoom in on the project site and click on “Import Site Image”. If you need to consider the daylight savings time you should choose the option before importing the image.
This will open up the “Import Site Image” window. Place the image at level 1 and then click on “Import”.
E. Setting the paper unit
Set the “Manage” menu from the main toolbar and then click on “Project Units”.
This will open up the “Project Units” window. You can change the project units in use by clicking on the current units on the format column. When you’re done setting the units, click on “Ok”.
Part 2: 3d modelling
A. Basic drawing settings
Set the “Model” menu from the main toolbar and then click on “Create Mass”. Make sure that the Work Plane is set on “Show”. When the “Create Mass” mode is on you can shape your buildings. Vasari is a software designed for concept modelling, this means that the drawing procedure will start by shaping volumes which will be detailed afterwards.
B. 3d shaping
First, you should draw the plan of the buildings you want to model.
Many drawing tools can be used, in our case we mainly used the line. You can find these tools in the “Draw” part of the “Model” menu.
We drew the plan of the ground floor following the satellite site image. In order to avoid distortions in the view output you should follow the following tips: click “Model” on the “Model” menu and set “Draw on Workplane”. You should place the plane on the Level 1 of the model.
Then you should set the “top” view from the view cube that you can find up on the right part of your screen.
Now you should be able to draw a quite accurate plan. Pay attention to draw close shapes in order to let Vasari read them as faces.
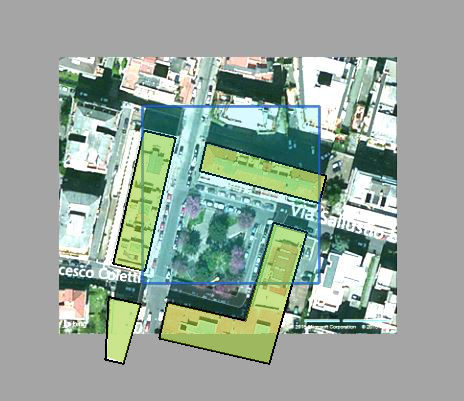
Once you finished drawing, go back to the “Modify” viewport and select an object that you want to extrude.
Then click on “Create Form” and choose “Solid Form” in order to create a volume. Otherwise, click “Void form” if you want to create a hole.
If you need to change the height of the volume, you should set a perspective view from the view cube, select the upper face of the building and edit the dimension length.
You can also select one of the upper vertexes of the building and click on the height measure in order to modify it. In our case, we had to change it from 20 m (default setup) to 16m.

Repeat the process as many times as you need to complete your model. Once the model is done, click on “Finish mass”. In this way, you won’t be able to shape the model anymore.
If you need to modify it again, select the volumes and click on “Edit in place”.
Part 3: Shadows analysis
A. Basic shadows setting
Once you’re done with the modelling part, you can access the sun and shadows settings from the lower panel of Vasari.
Click on the 3rd icon in order to visualise the sun path, and on the 4th to activate the shadows.
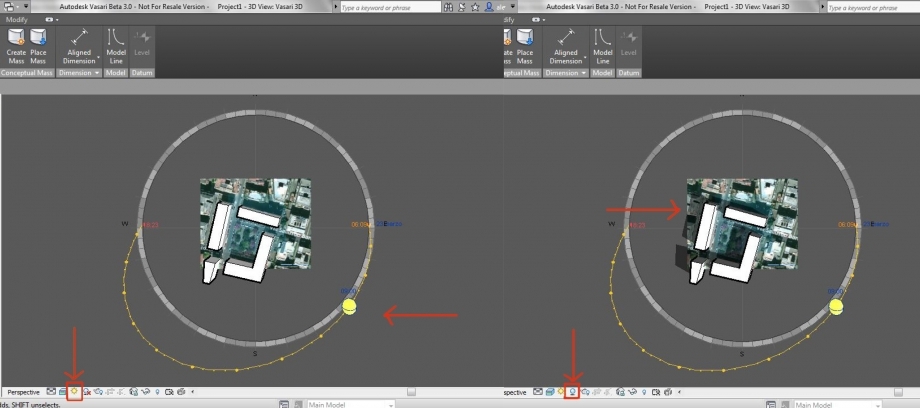
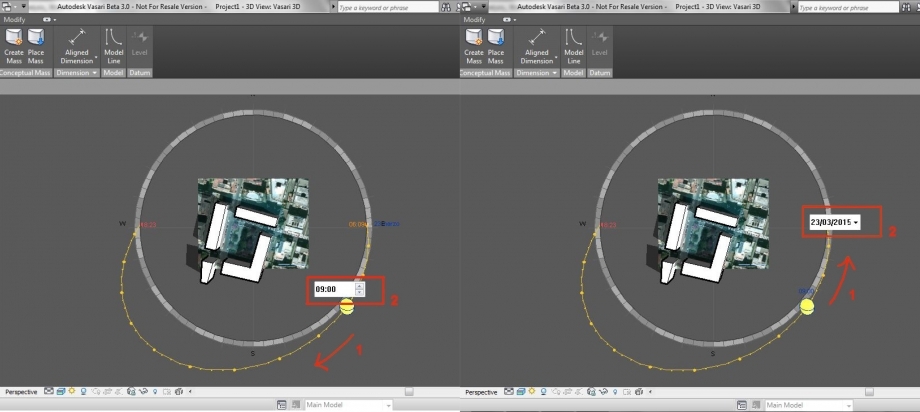
Define date and time of your analysis. There are 2 ways to do that. You can change the date by moving the sun represented in the sun path from North to South, and the time by moving it from East to West. Otherwise you can click on the date or time and write it by hand.
B. Shadows analysis and considerations
Once date and time are defined, you are free to do your analysis and personal considerations.
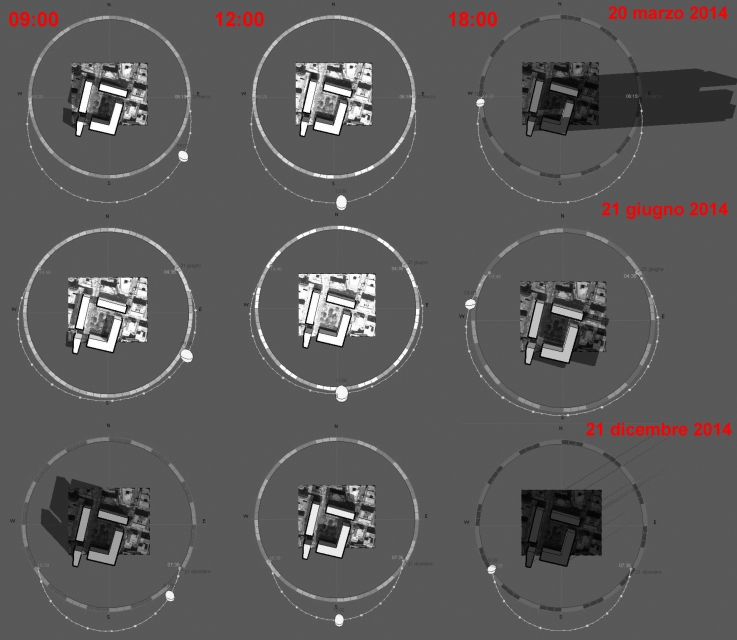
First, we decided to analyse the public space of the square Filippo Carli. In order to understand the solar exposition of the playground, where children play during the whole day, we considered several situations during the year 2014. We picked up the dates of the equinoxes and solstices and 3 different moments of each day (9:00, 12:00, 18:00). We activated the top view from the view cube and screenshot the different situations to make a comparison.
Then we made a comparison between the render prospective view and the real photo of the building. We picked up the date of the 23rd of March at 9.00 am.
23rd of March, 09:00
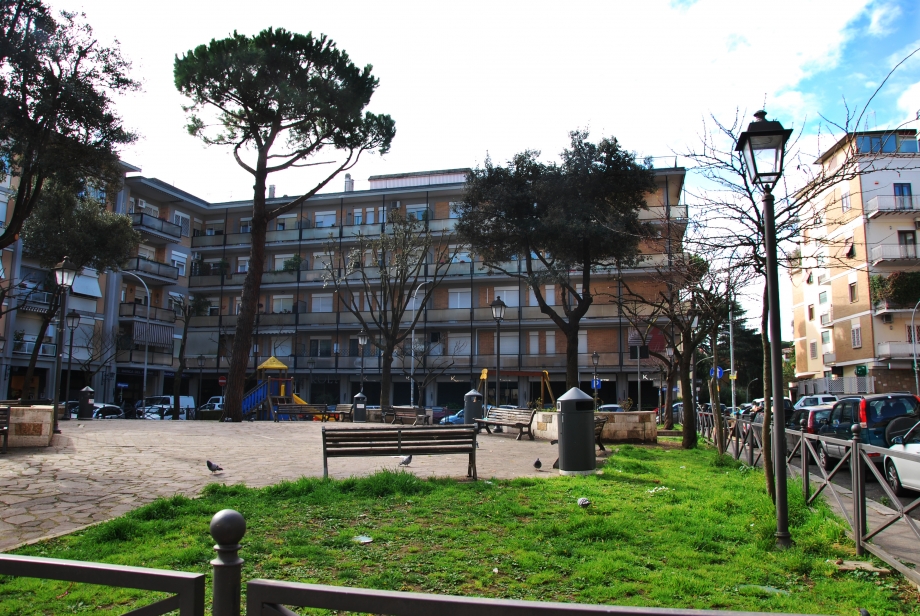
We can make now some considerations. The worst exposition of the playground is clearly during the winter. It is shadowed almost all day long, so it must be quite cold and unappealing for children to play. We can also notice that it is too hot in summer from 11:00 am, while it is too cold in spring and fall during the morning. To sum up, the best condition for children to play is during the morning in summer, and from 11:00 am in spring and fall.
Then, we focused our attention on the facades of the L-shape building on the square. In order to obtain some render perspective views, we set the “Manage” menu and we chose the view settings by clicking on “Camera”.
Then we set the “Ray Trace” mode from the “Visual Style” icon that you can find on the lower panel of the software.
This time we made a comparison between those views and some real pictures of the building. We picked up the date of the 23rd of March and 2 different moments of that day (12:00, 18:00).
23rd of March, 12:00
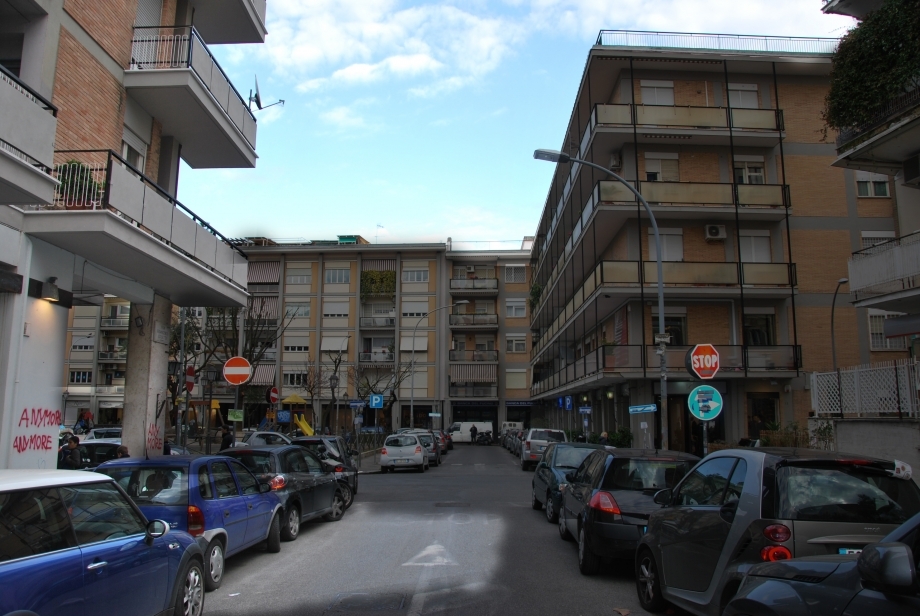
23rd of March, 18:00
(Coming soon the real photo that we couldn't make because of the weather conditions)
The facades of the building on the square are the North and the West ones. The North facing rooms are mostly living or dining rooms. The architects probably made this choice because they wanted to design living rooms with nice balconies facing the square. As far as the solar exposition is concerned, this façade is always shadowed and quite cold to host living spaces. On the other hand, the West facing living rooms are enlightened until 6 pm and this can be nice, at least in this period of the year, when the sun is not too hot.
C. Comparison with Masdar City
Masdar City is a sustainable mixed-use development designed by Foster and Partners in Abu Dhabi. The city is designed to encourage walking, while its shaded streets and courtyards, created by clustered close buildings, are sheltered from climatic extremes. The architect’s team focused its attention on climate conditions and solar exposition. The city’s streets have been built to be optimally oriented on a southeast-northwest axis, thereby providing shading at street level throughout the day. The materials used for the building façades are also chosen for cooling purposes. Communal areas have been intelligently landscaped and designed to provide cooler air temperatures and to offer an attractive pedestrian environment.
It can be clearly noticed that this doesn’t happen in the project of Filippo Carli Square. The square isn’t designed to be an attractive place, because climate conditions clearly weren’t taken into account when the surrounding buildings were built. As we said before, there are only few moments of the year where the square offers an effective friendly environment.


