1_ES LAB_6 - SOLAR ANALYSIS: Via Antonio Dionisi - ChimentiMarini_Gentile
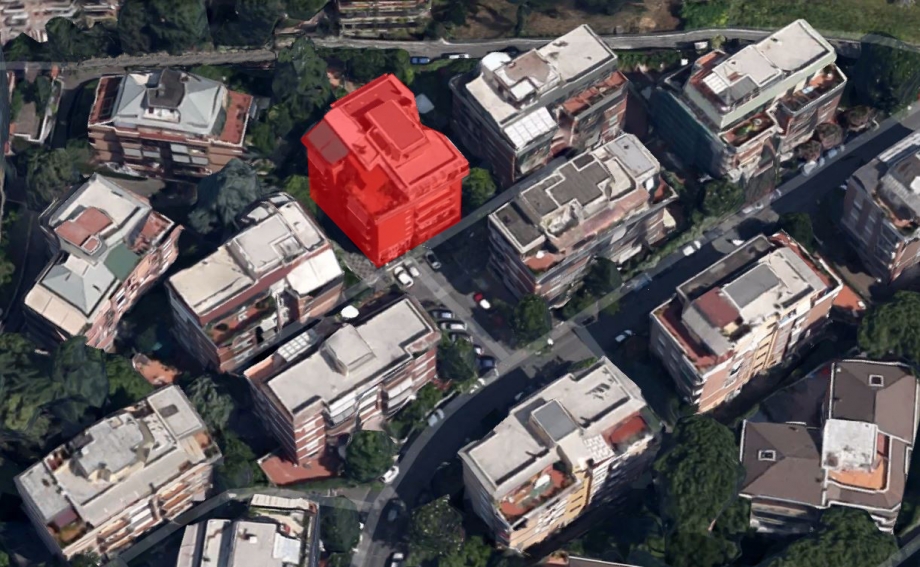
THE AREA
The building is located in Via Antonio Dionisi, a side street of Via Portuense, in an area characterized by residential buildings of 4 maximum 5 floors. It is part of a complex of five buildings that share a little central square that is separated directly from the main road.
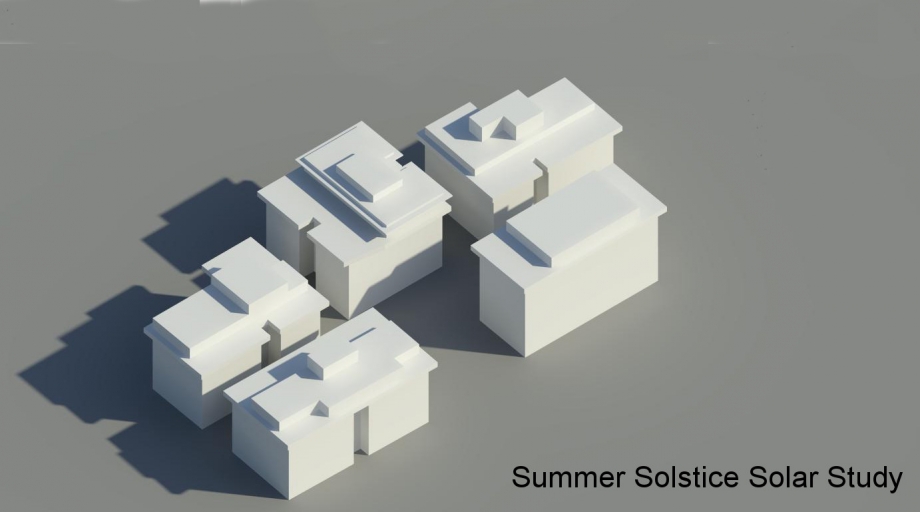
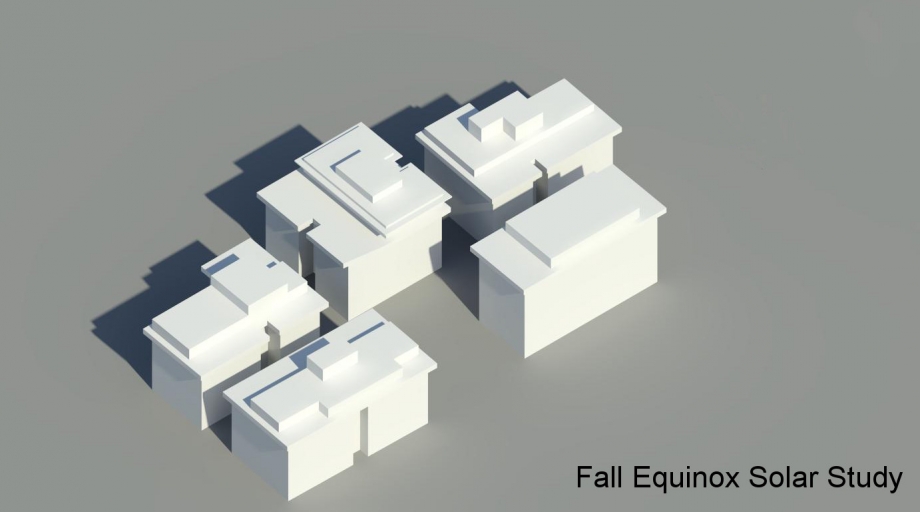
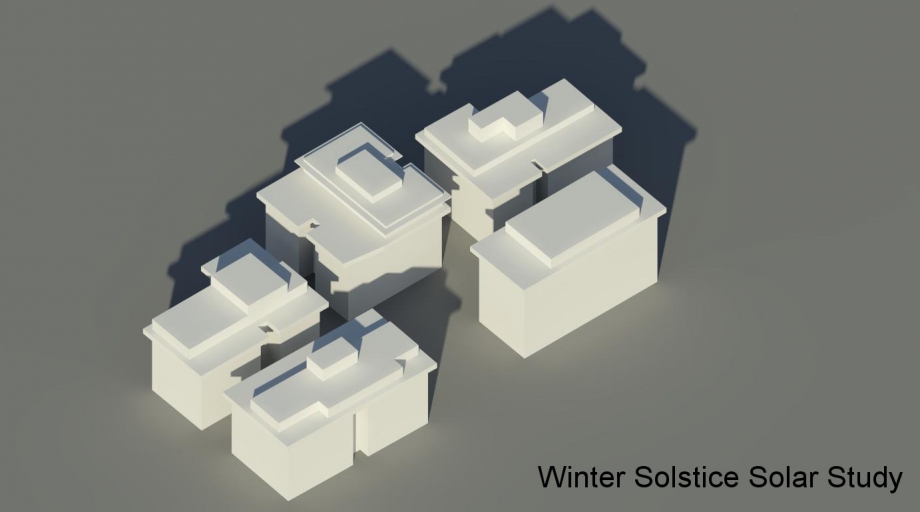
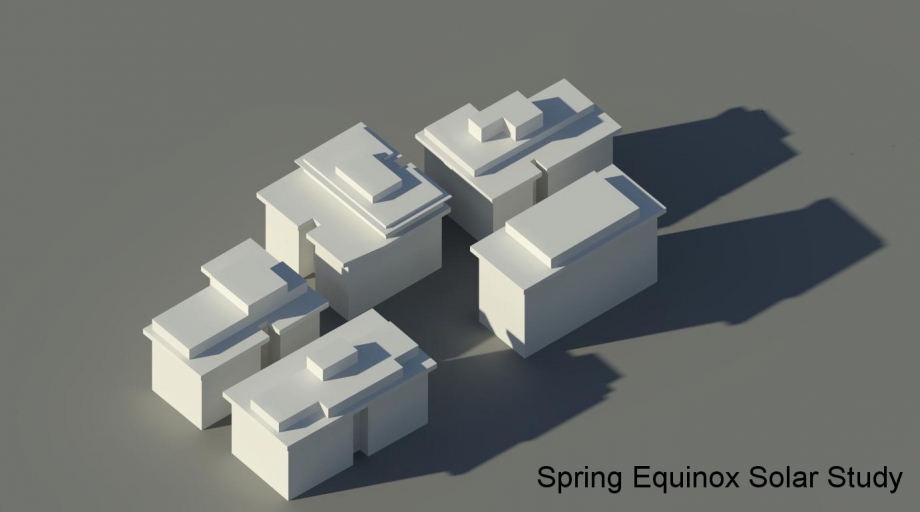
SOLAR ANALYSIS
The small size of the buildings mean that despite their proximity to any of the main facades is entirely in shadow. Being exposed to the southeast square usually turns out to be sunny as well as The facade of the building in the analysis. The only time of year when both appear to be shaded is close to the spring equinox. On the contrary the side facades are usually be in shadow because of the neighboring buildings.
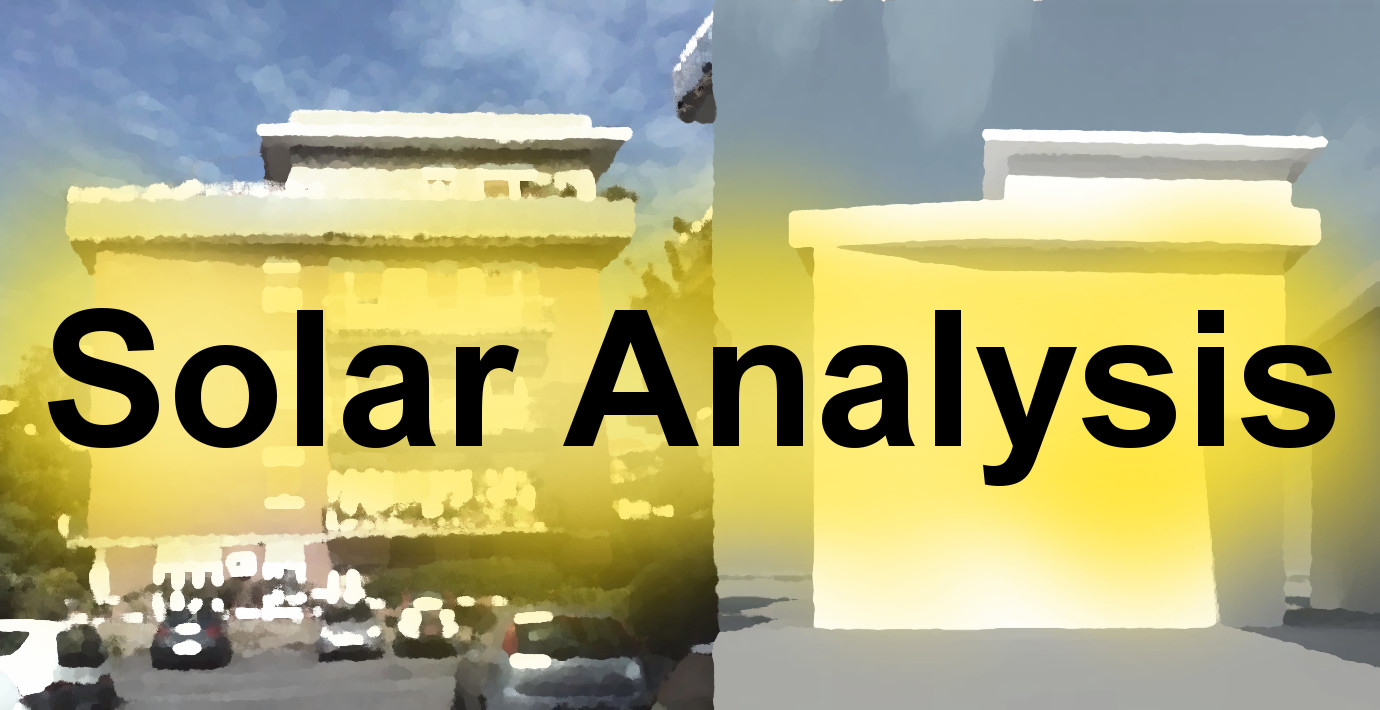
COMPARISON BETWEEN MODEL AND PHOTOS
23/03/2015 10.00 A.M.
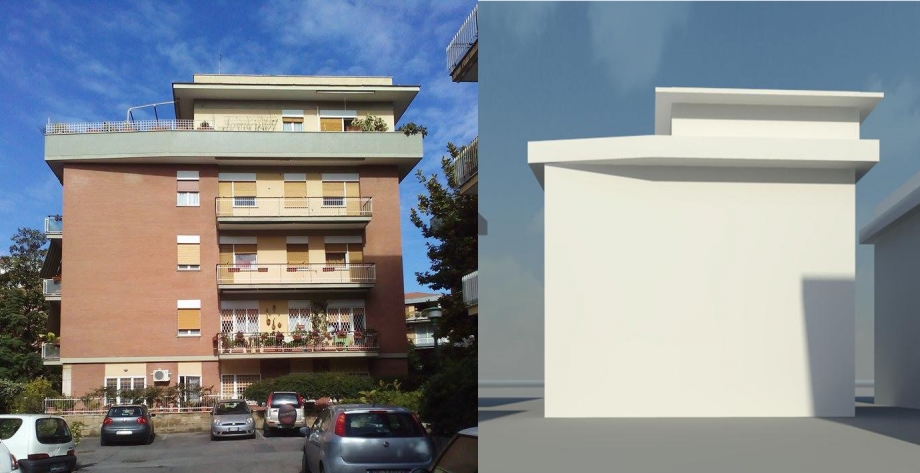
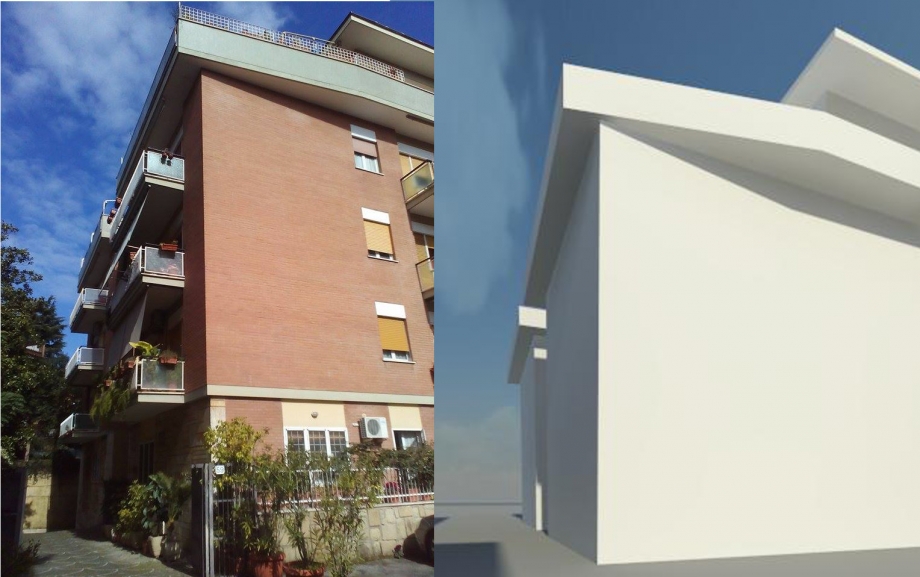
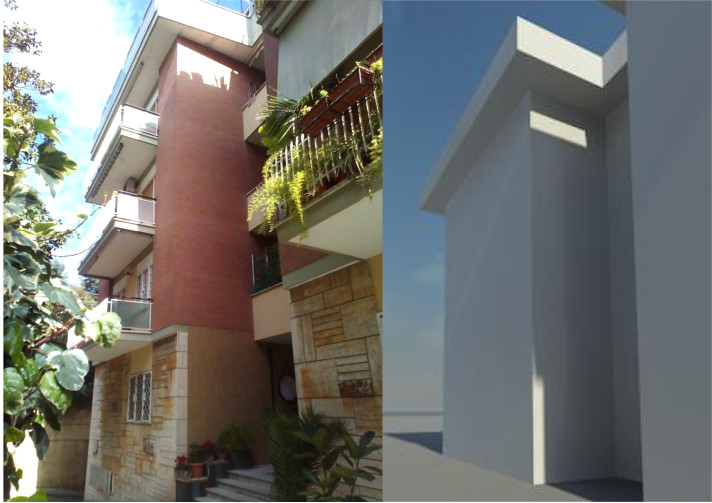
(Causa nubi non è stato possibile realizzare immagini idonee per un confronto tra differenti fascie orarie verranno inserite appena possibile)
TUTORIAL
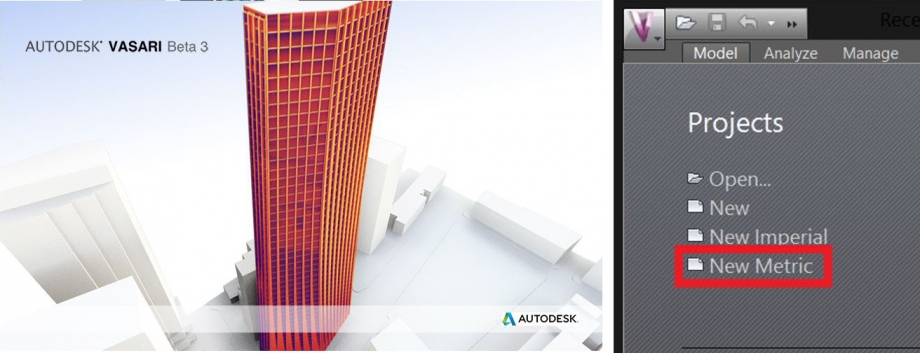
1. OPEN → NEW METRIC
First of all open "Autodesk Vasari" and click on New Metric to create a new project.
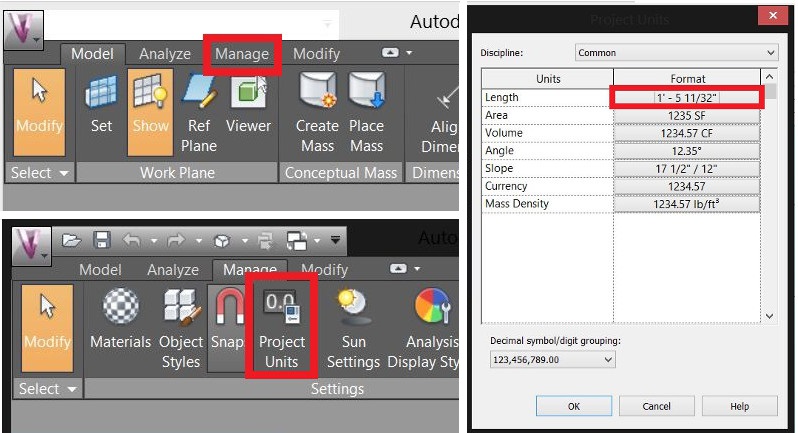
2. MANAGE → PROJECT UNITS
Vasari default unit is millimiters, to change it in to meters or whatever you prefer click on Manage, Project Units and then choose the unit from the flags under Format.
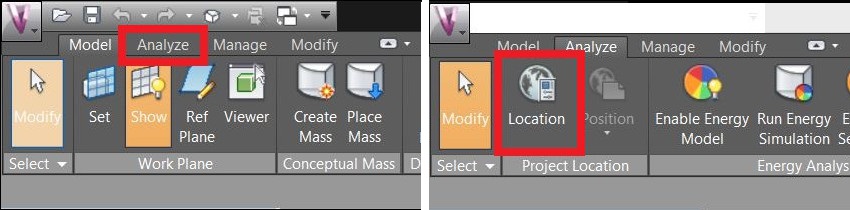
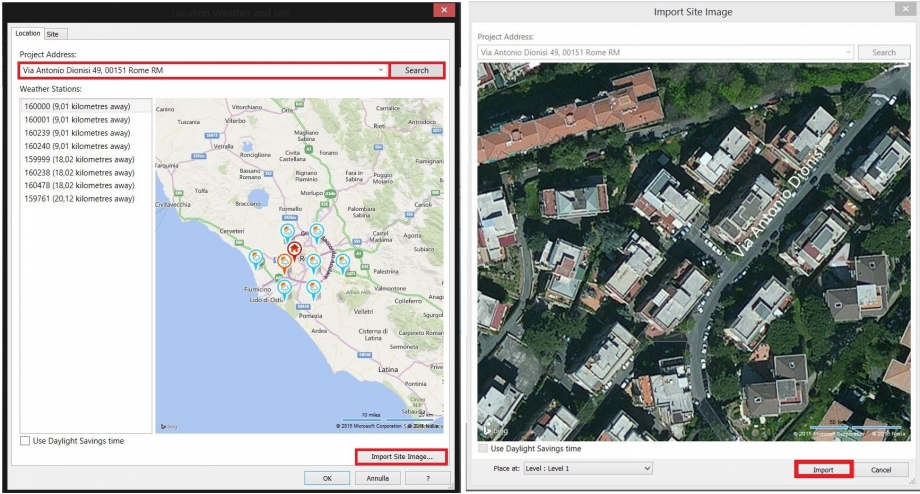
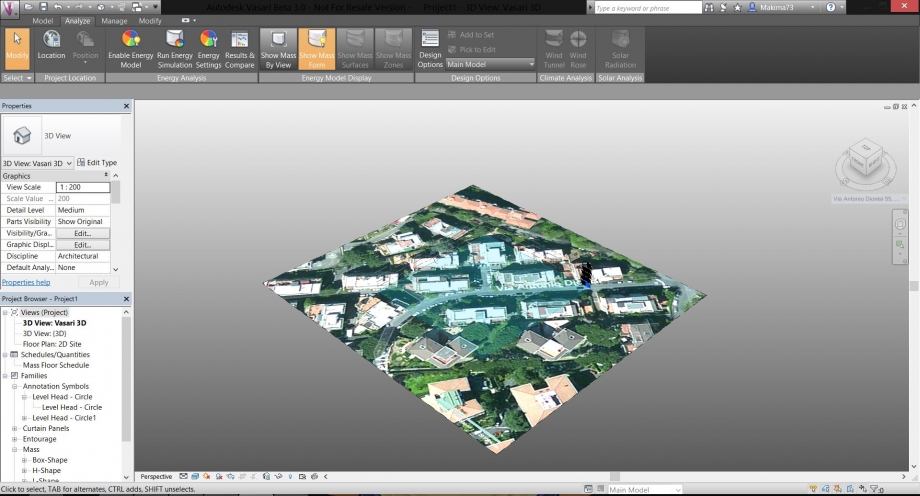
3. ANALYZE → LOCATION
To set the location of the project and import the basic raster click on Analize, Location and insert the address. Than click on Search and Import Site immage. Adjust the immage and click Import.
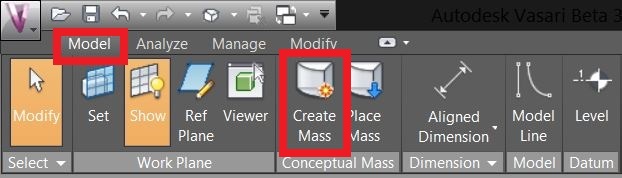
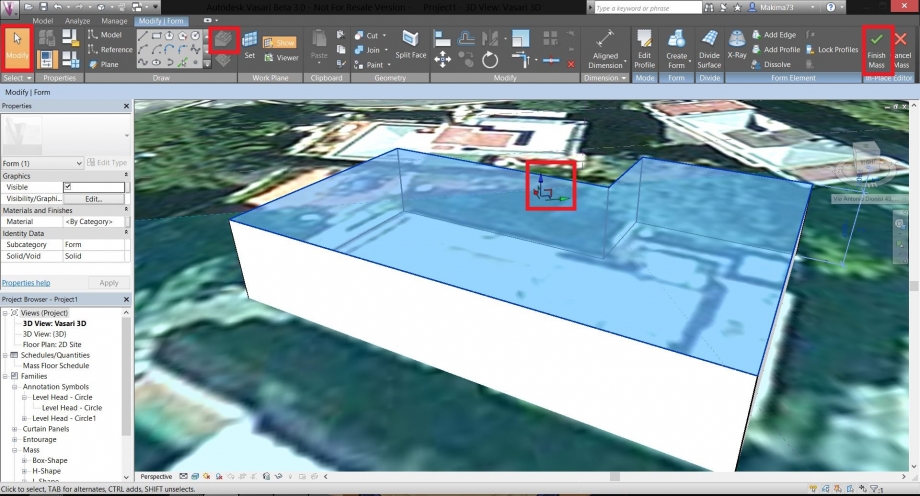
4. MODEL → CREATE MASS
To begin creating a building click model, create new mass and use the drawing tools to draw its plan.
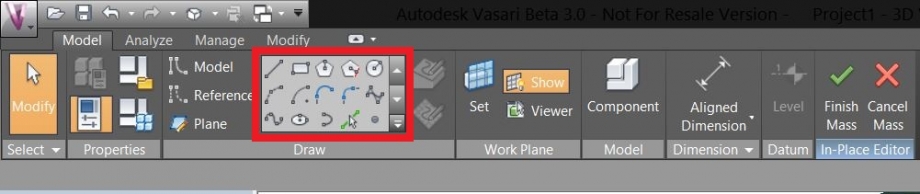 To extrude the plant created click Modify and use snaps pre drag the faces. Click Finish Mass at the end of every mass.
5. LEVEL
Create and use layers to manage the storey height and the overall height of the masses.

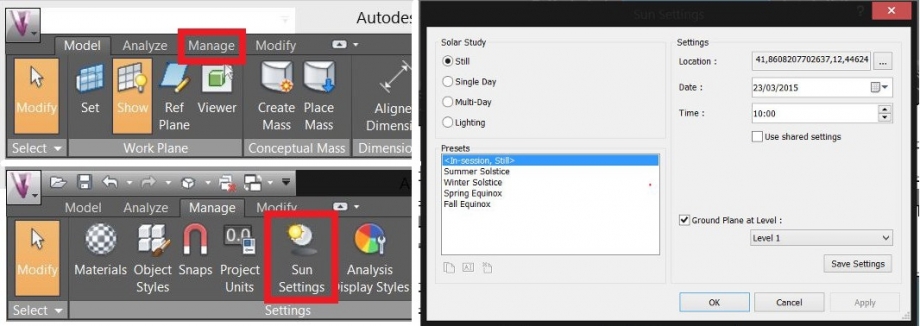
5. MANAGE → SUN SETTINGS
Click on Manage,Sun Settings and set date and hour or the interval to study.
6. RENDER
Use the command below to se the wiews and render.

Questo è il link del blog vecchio di GIULIA GENTILE http://design.rootiers.it/tecniche2012/node/2838