


Quartiere aurelio, VIA GIROLAMO VITELLI
Process
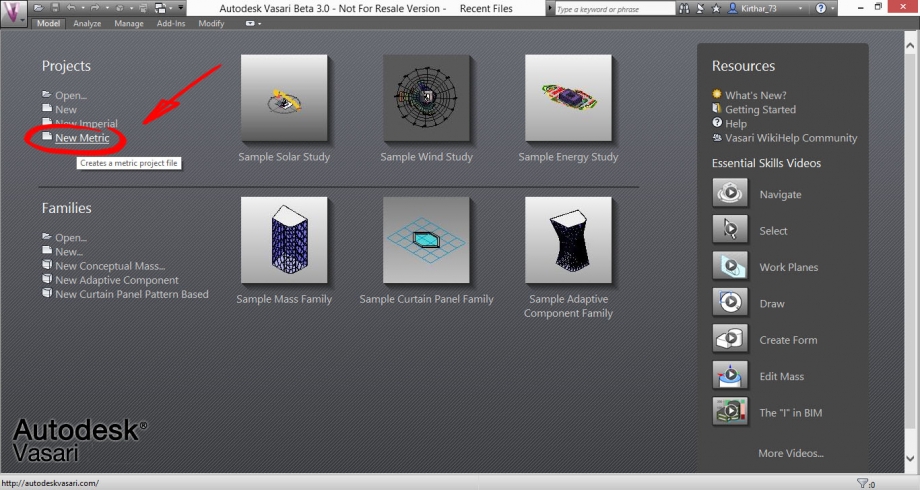
1.To get started, open Vasari and, in first display, click on "New metric" to start a new project.
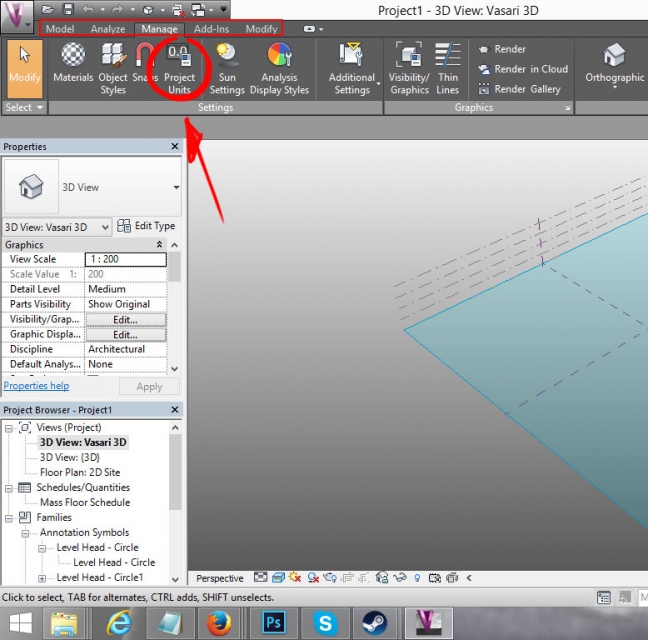
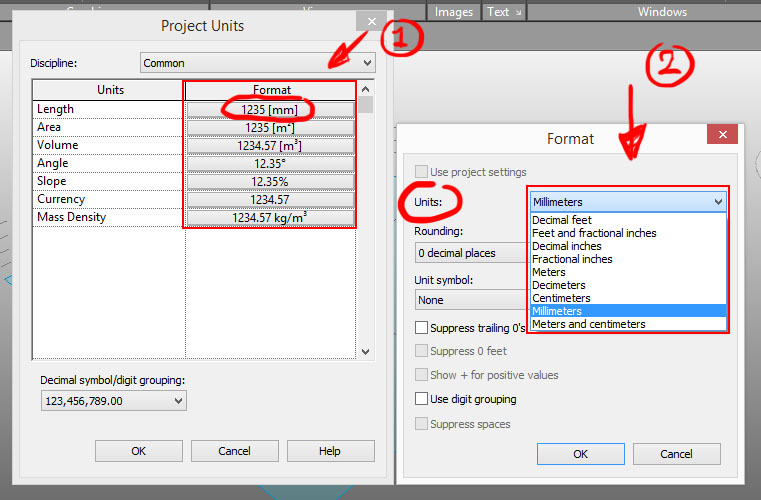
2. You'll need to set the metric scale depending on the objects you are working on. I need meters for my analisys: Click on "Manage" in the main toolbar, then on "Project Units" and set the unit type you need in the window that will open.
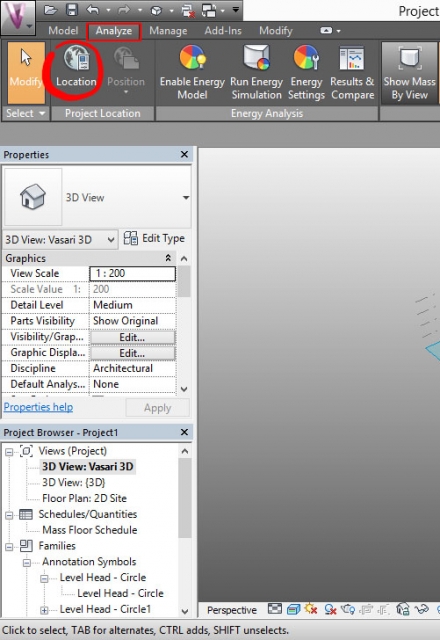
3. Now we need to locate our analisys. To do so, click on "Analyze" in the main toolbar, then go on "Location".
4. You'll need to be online and you'll be requested to log in with your autodesk account.
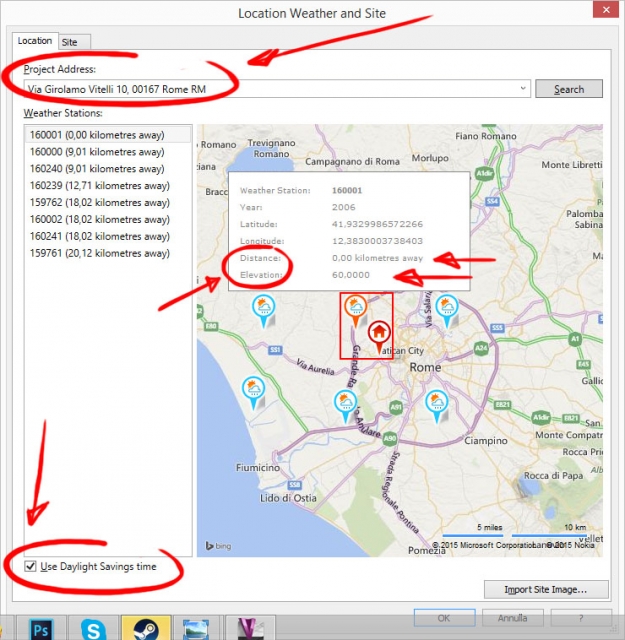
5. After you signed in, you'll be able to insert the Project Address in a window that will pop up. As you'll do this, make sure to select a wheater station too, considering not only the distance, but also the elevation. also remember to tick the "Use Daylight Savings time" box. After this click on the "Import Site Image" button.
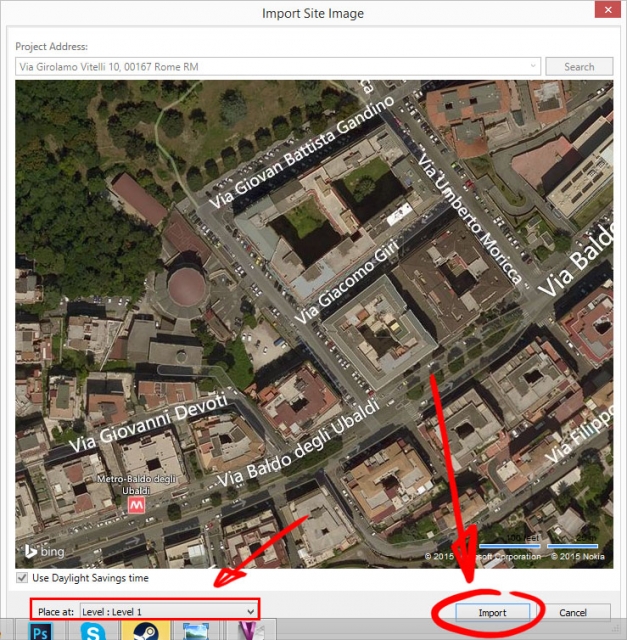
6. For the next step, you have to chose the part of area that you want to import. After that, be sure to put it on your first level and click on "Import".
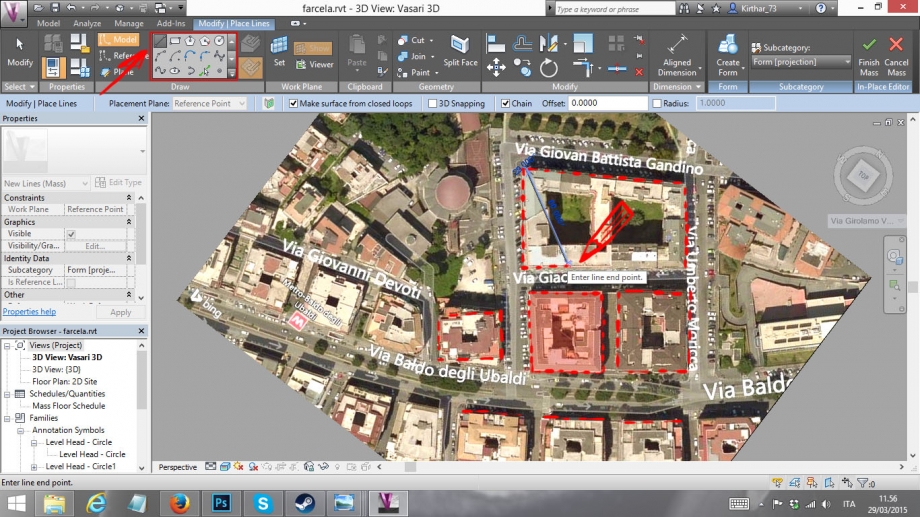
7. Now you can start modeling. First of all go on the "Model" menu and click on "Create Mass".

8. Before you start drawing the outlines of your buildings, click on “Model” on the “Model” menu and set “Draw on Workplane”. You will draw easily if you activate the top view from the view cube on the right.

9. Start drawing the outlines of your buildings and keep it simple. You can also draw the outlines of the "holes" that you need for your buildings.
10. When you are done with the outlines, you need to extrude the volumes. Go on the Create form menu and choose "Solid Form" to extrude the volumes or "Void Form" to extrude the voids
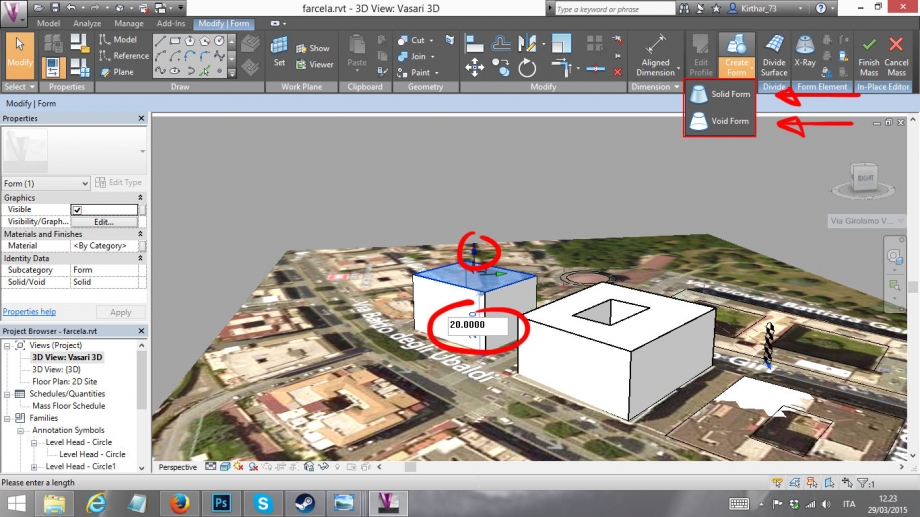
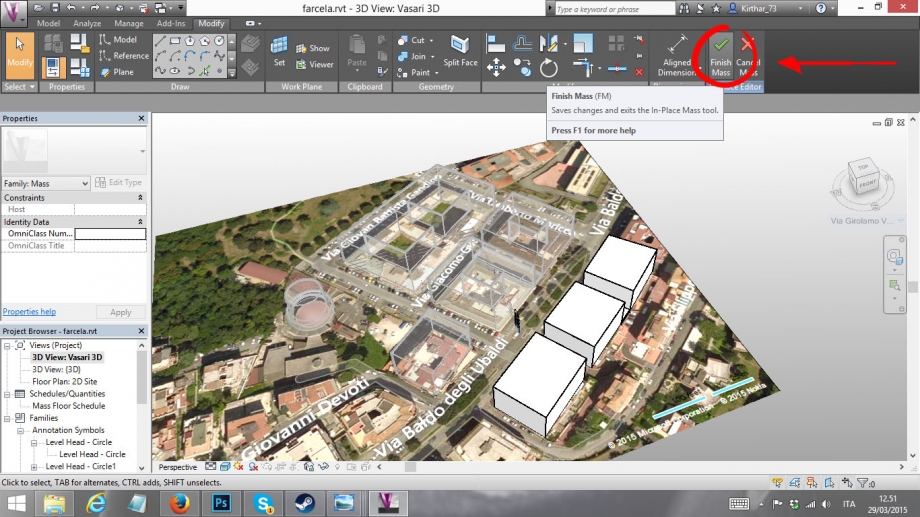
11. When you are done, be sure to click on "Finish Mass". Repeat this process for all the volumes you need.
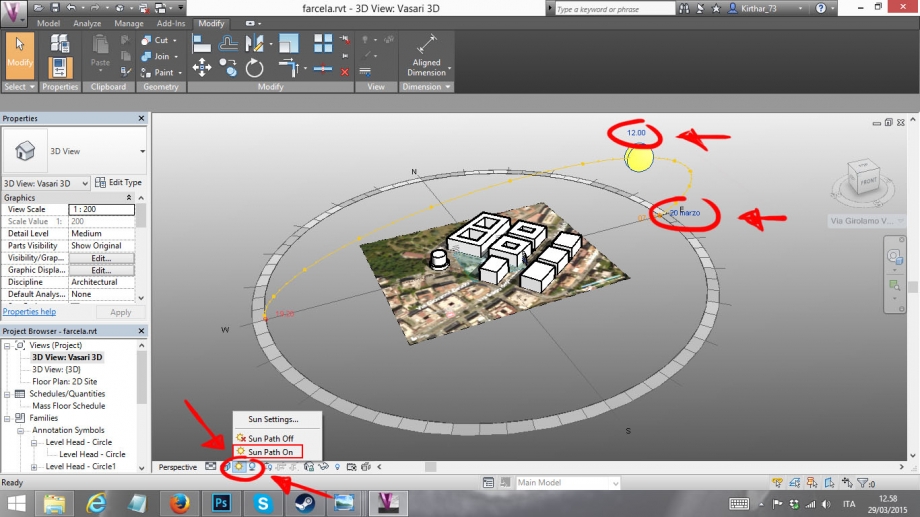
12. For our anallisys, we'll need sunpath and the shadows on our model. You can get those active by clicking the two ittle buttons in your bottom left corner, setting the shadows and the sunpath on.
13. Lastly, you'll need to set the views of your model for the renders. Go on the "Manage" menu and click on the "Camera".

14. There are multiple ways to set your camera. I decided to place it by using the top view: I selected the "Floor Plane: 2d Site" option in the Project Browser. Then simply place your camera by clicking on a spot and select the view range keeping the left mouse button pressed and pulling you cursor in the direction of your model.
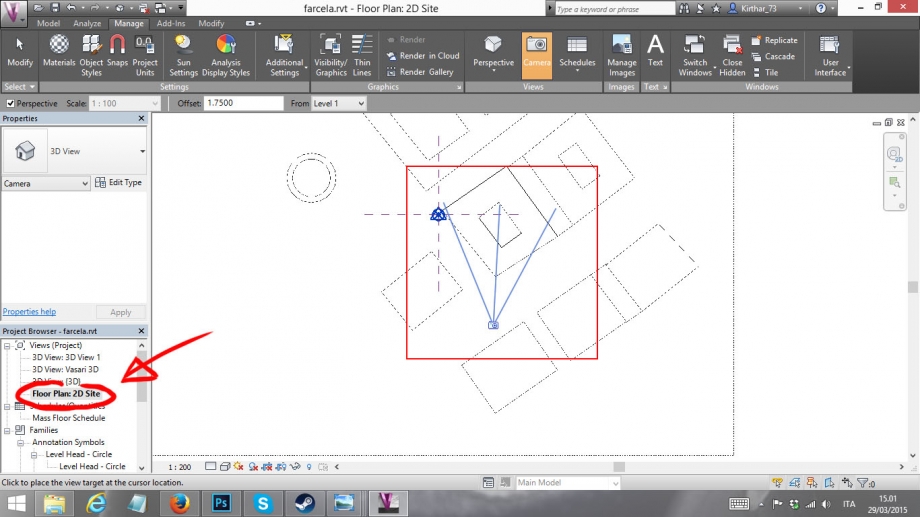
15. You can adjust the view in the window that will open, select the style of your image clicking on the little button near the sunpath option.
Solar analisys
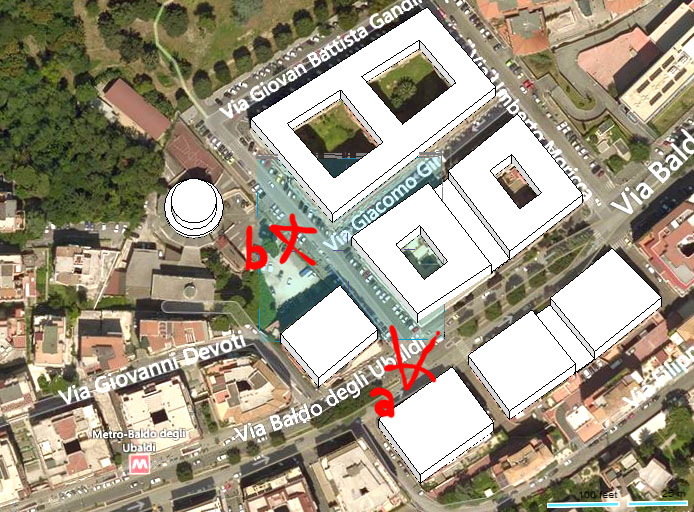
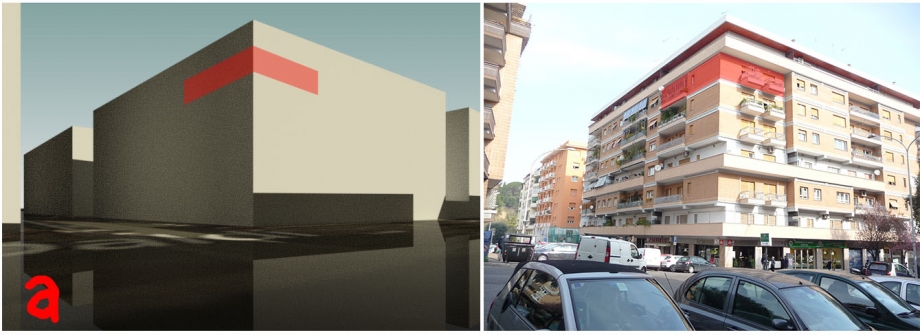
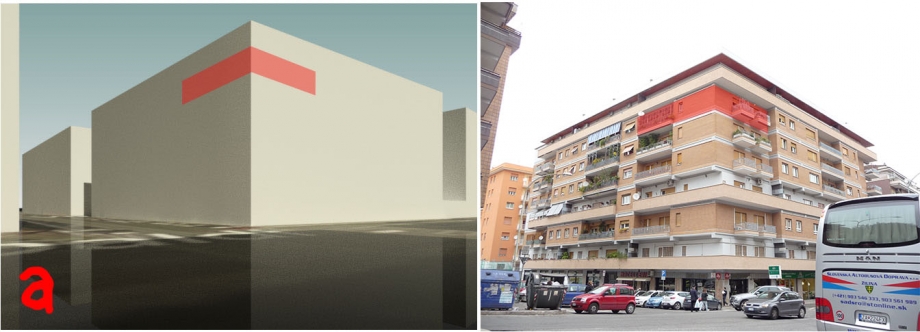
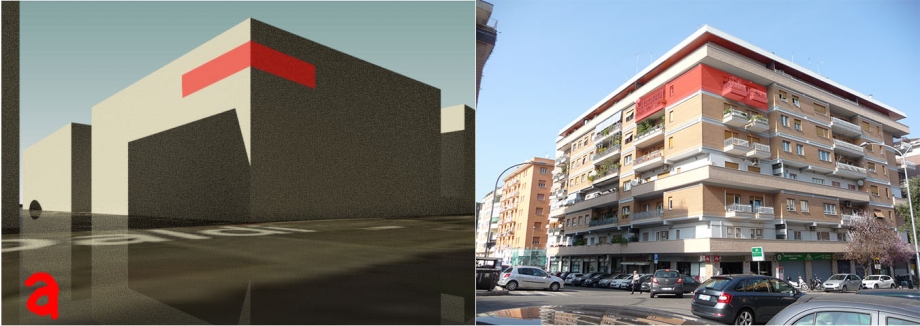
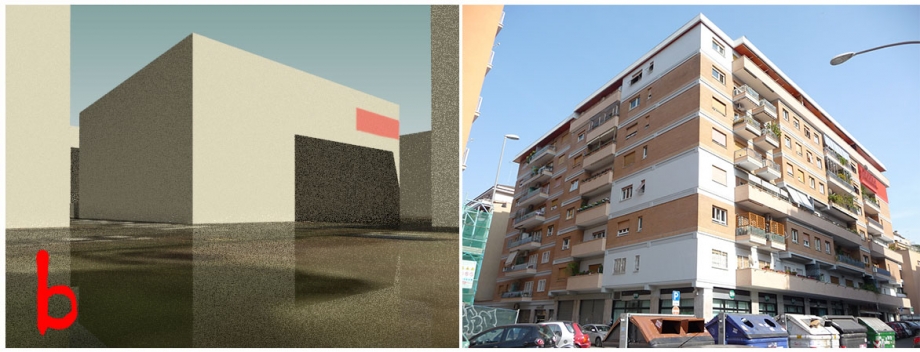
I live in a flat in Via Girolamo Vitelli, a cross street of Via Baldo degli Ubaldi, in the Aurelio District,Rome. My flat is located in a 7-storey building, that belongs to a block of 4 buildings. In particular,, the flat is located in the South-eastern corner of the construction at 6th floor. because of the height, the orientation reppresent an important part of the shadowing and for the internal confort, also because the building is dated in the first part of the 50s and it's not properly termic-isolated. So, for its placement, the flat benefits from a good natural enlightenment during the day. On the other side, we have a luck of shadowing, especially during the hottest hours of the day.
For my analisys, I decided first to evaluate the sun exposure of the two secondary streets close to the building where I live. In the image below I signed in blue Via Girolamo Vitelli and in red Via Giacomo Giri. I choosed those two because of their different situations. I picked the solar data of 9.30 am, 12.30 pm and 17.30pm of the two solstices and of today.
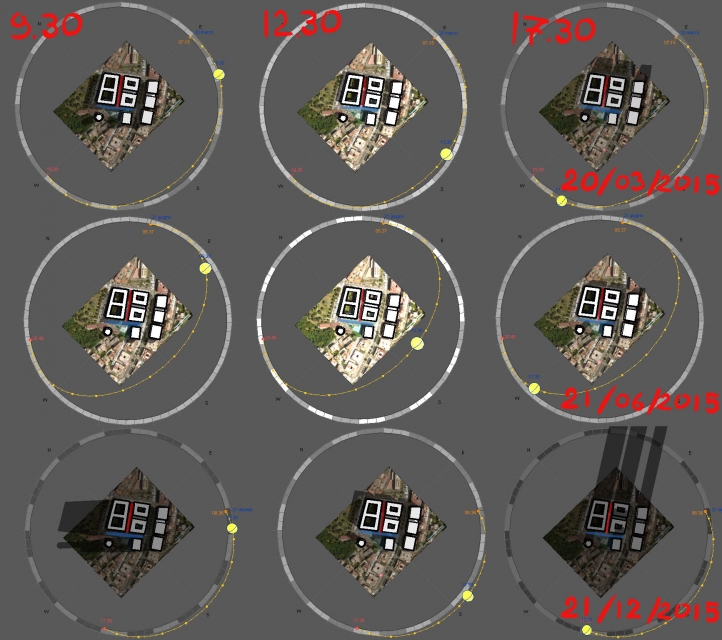
From the analisys of the area, it is clear that Via G.Vitelli gets a better illumination during the day. For this reason, the street appear quite pleasant as a place to walk: there are also some shops and activity on the building's bases. On the other side we have Via G. Giri, that is darker in general, with no economic activity and few garage entrances. It seems like that the illumination defined the Via Giri side of the building s as a sort of "rear".
For the study of my flat's balconies and windows i took some pictures during diferent hours. The result helps to understand the problems linked to my home internal confort.
At 9.30, the sun enlight directy the 2 balcony on Via Baldo degli Ubaldi.
At 12.30 both the sides are enlighted and means that the rooms side get the direct radiation from the early morning to the hot hours.
 17.30
17.30
At 17.00 , the sun keeps hiting the living balcony, projecting a lower shadow on the facade, too low for reaching the flat.
Final thoughts
Considering the enlightenment aspect, the flat is placed in a way that in the morning the illumination reach the bedrooms side of the flat (Via Baldo degli Ubaldi's side) and during the day the light reach both the living and the rooms. On the other side we have some general problem linked not only to the fact that this direct sun radiation makes the warm season even hotter for us, but also linked to the fact that, during the winter seasons, the sun doesn't reach the flat for a good amount of time. Plus the fact that our windows fixtures aren't properly termic isolant and the balconies represent a large surface of thermal bridge: it ends that the house tend to be ht in summer and cold during the winter's seasons.
Commenti
Federico_Zap
Lun, 23/03/2015 - 23:57
Collegamento permanente
Via Girolamo Vitelli, Rome, Italy
Via Girolamo Vitelli 10,Rome, Italy
Federico_Zap
Lun, 27/04/2015 - 05:39
Collegamento permanente
Modificato
27/04/15
StefanoConverso
Lun, 27/04/2015 - 17:19
Collegamento permanente
Very Interesting Federico, great update
Very Nice Federico,
it will be very interesting to see now the solar radiation analysis on your windows,
in Summer and WInter. Please share! It's strange, since the overhang on top of them
should protect them, at least in summer.
Keep up the good work
S.C.