


Via di Montespaccato Roma
Roma, Via di Montespaccato
The location we chose for our analysis is situated north-west of Rome just inside the range of the "Grande Raccordo Anulare". It's a residential area with buildings in an hight range between two and four floors. The hight variety of buldings makes the shadows situations different in the various streets of the neighbourhood.
AUTODESK VASARI: Step by step tutorial
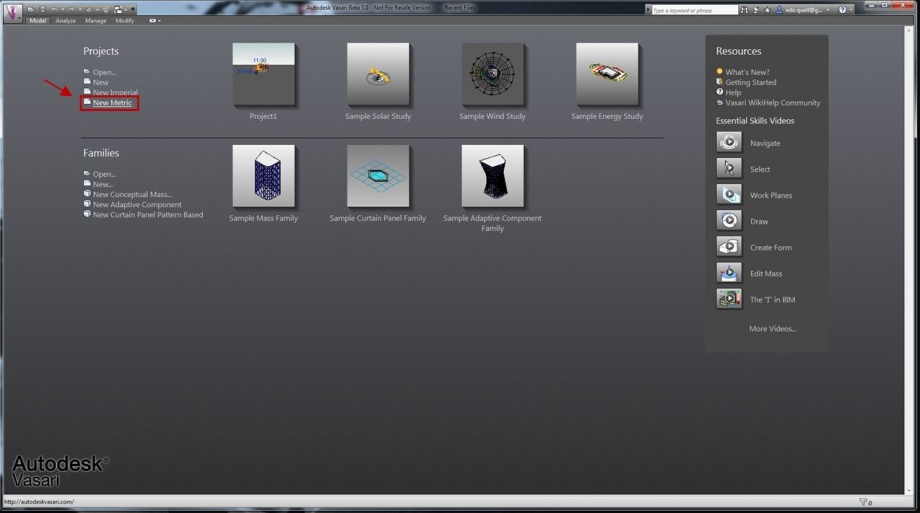
1. From the home screen select the new metric option.
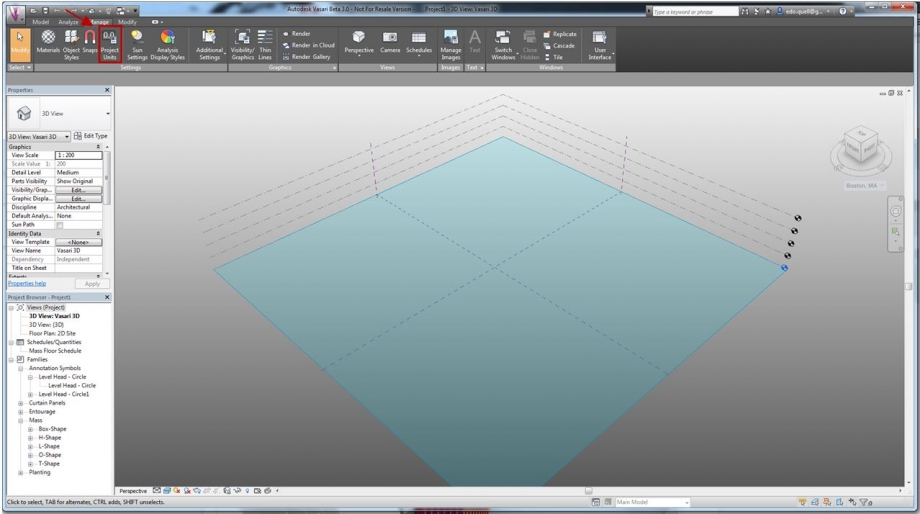
2. On the manage tab click on project units to change the measuraments units to the desired ones.
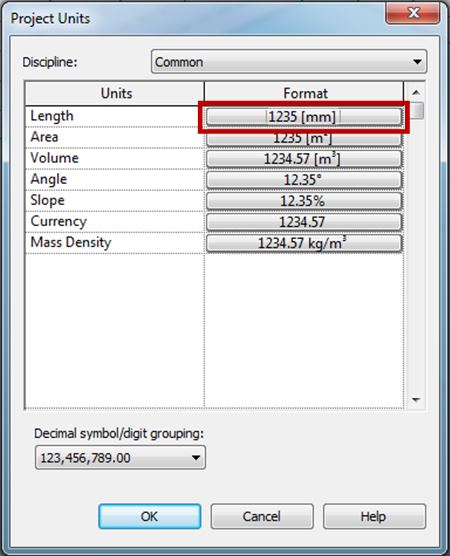
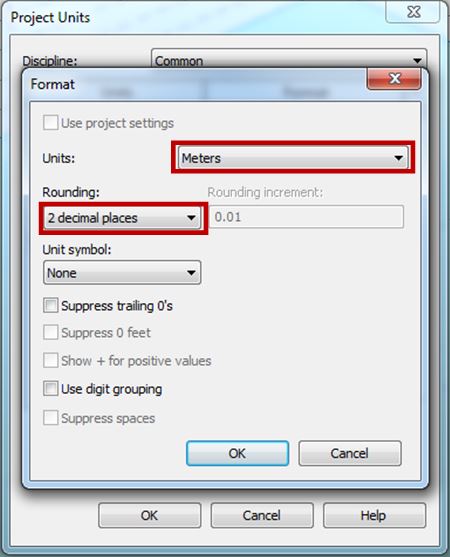
3. In the window that just opened click on lenght then set units to "meters" and roundings to "2 decimal places".
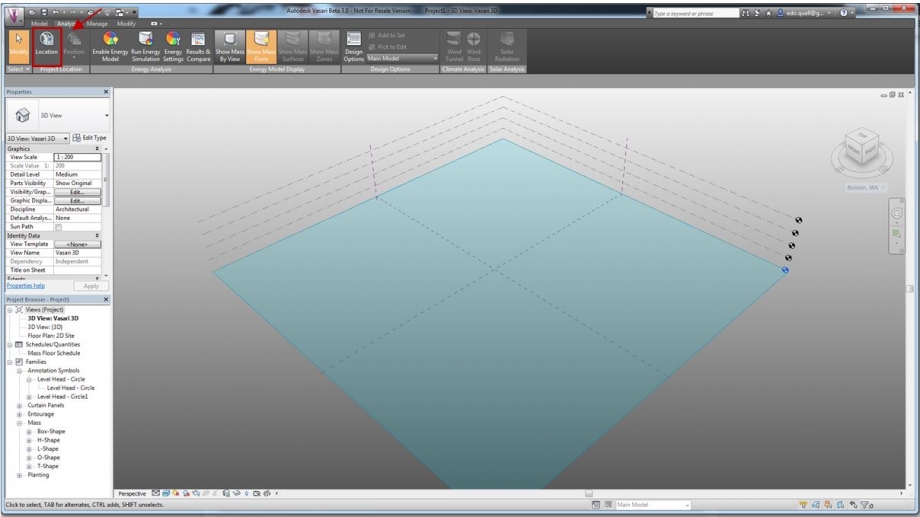
4. Now in the analyze tab click on location.
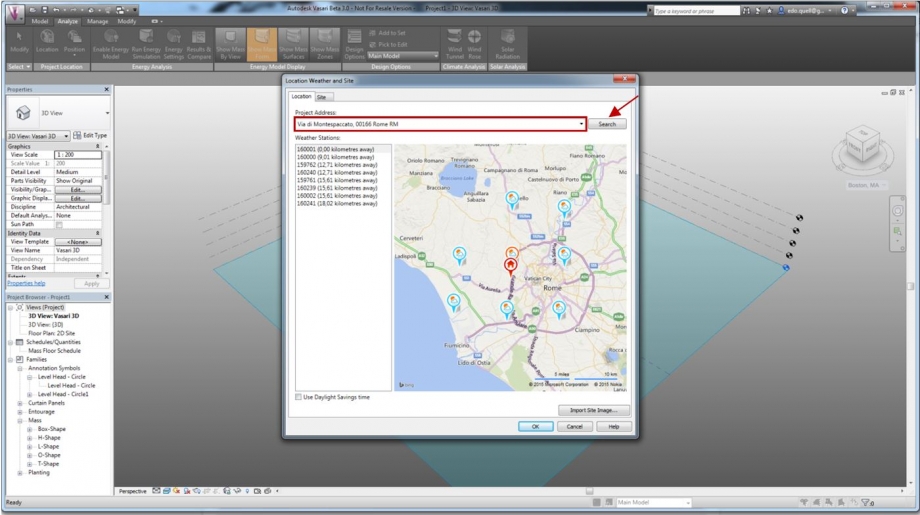
5. The following window will open, here we can set our study location: enter the address in the box and hit search. Then we can choose the weather station we want to use, the nearest isn't necessarily the most reliable, check the elevation to get the one that better suits our location.
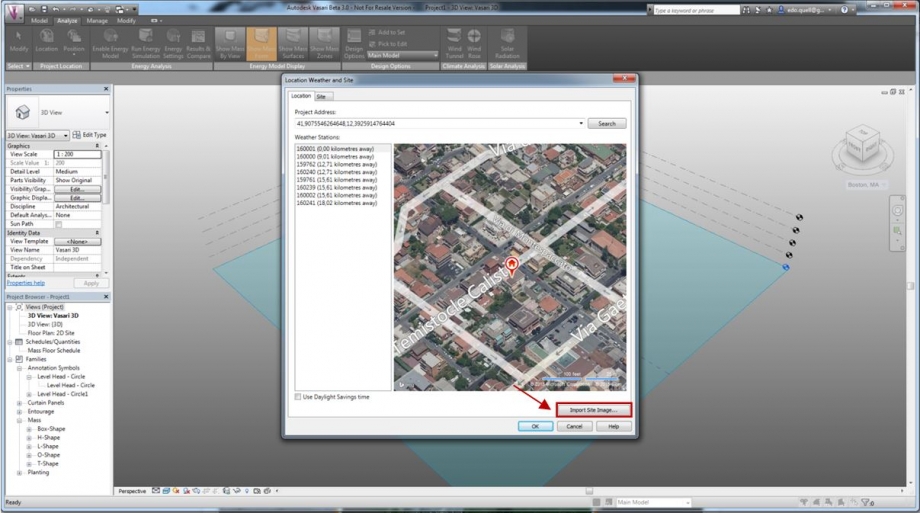
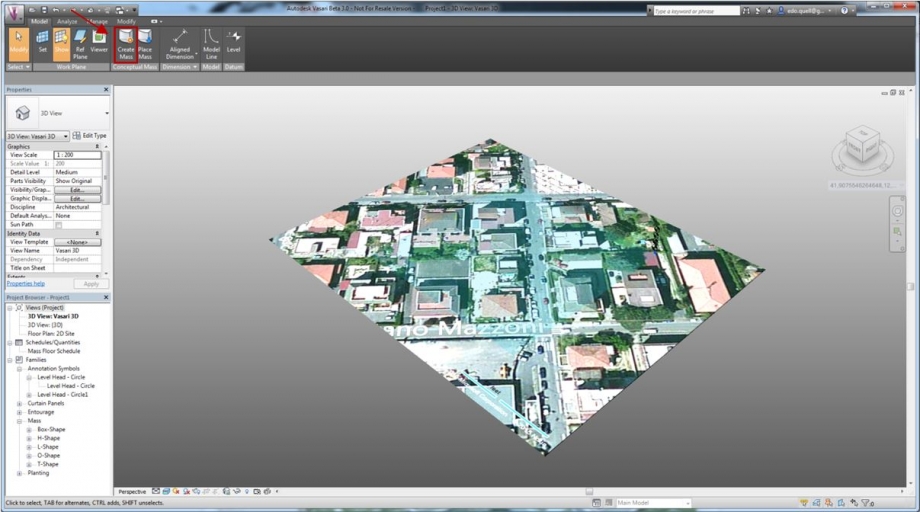
6. Zoom in and the map will switch to satellite mode, manually adjust the red pin on the area we want to study and click on import site image.
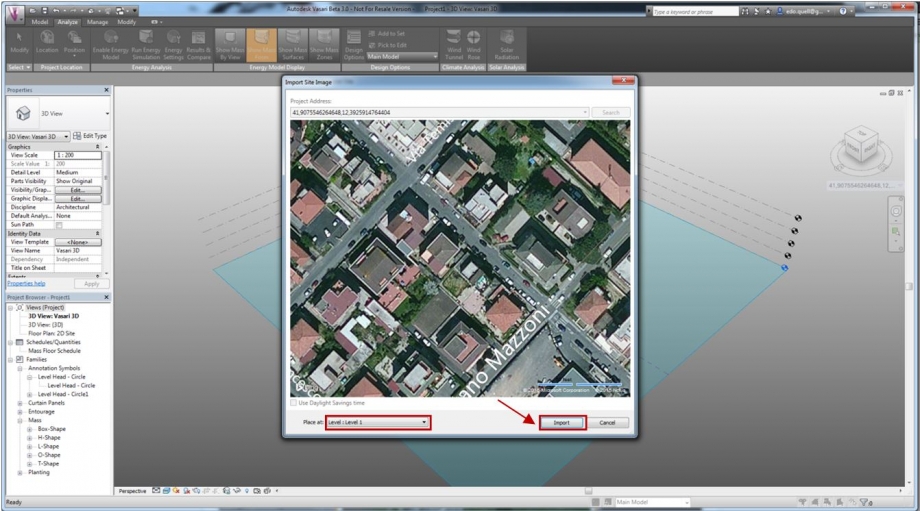
7. Click and drag the map to better center the area, make sure the place at box is set on "Level: Level 1" and click import.
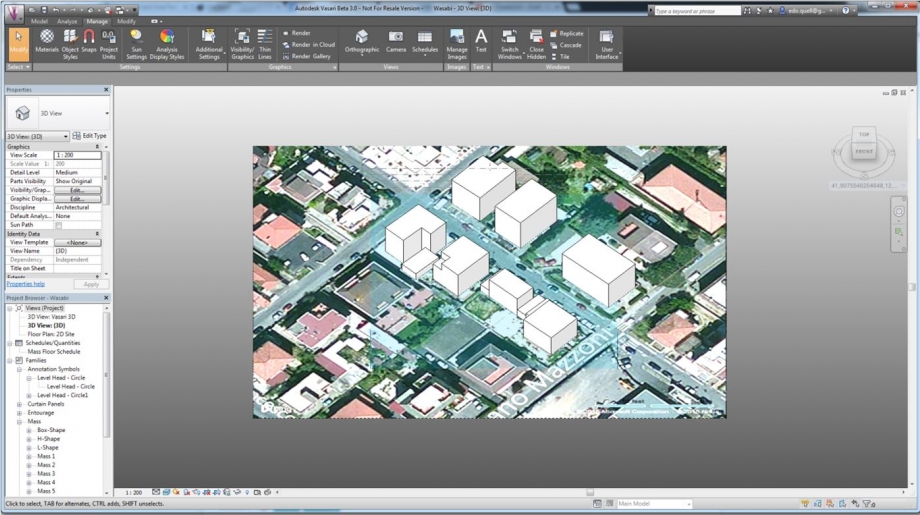
8. The map should now display in the work area and we can start creating our buildings: in the model tab click on create mass.
9. Now we can draw the perimeter of our buildings using the drawing tools (1), when we are satisfied with the result click on create form (2) and set the height of the building by dragging the blue arrow or entering it manually in the box (3), then click on finish mass (4).

10. Repeat this steps for every building in the street, every mass is an individual model and can be edited by double clicking on it.
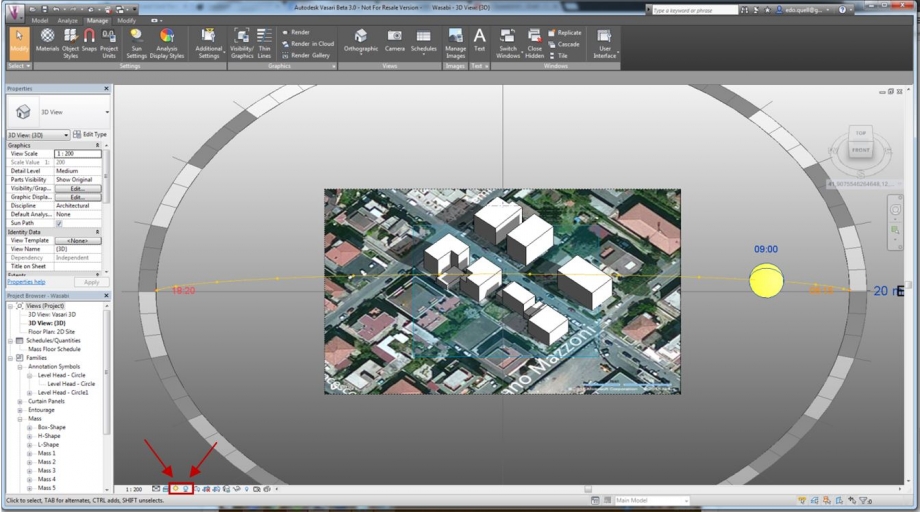
11. In the bottom left panel we can now turn on shadows and sun path, we can see how the shadows change during the day by dragging the sun along it's path, we can also change the date to see them in the various seasons of the year.
ANALYSIS:
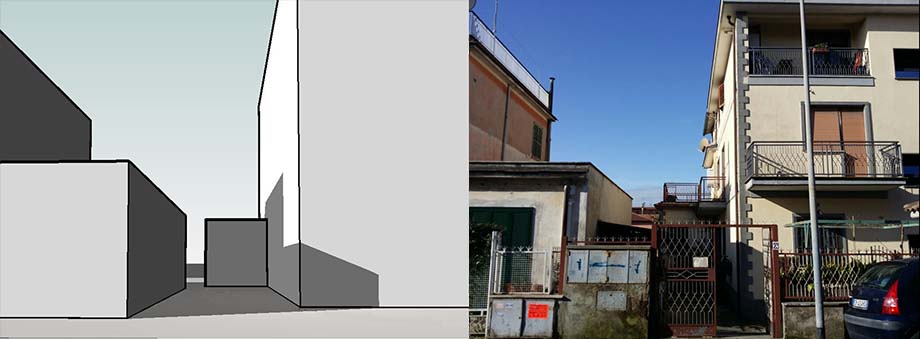
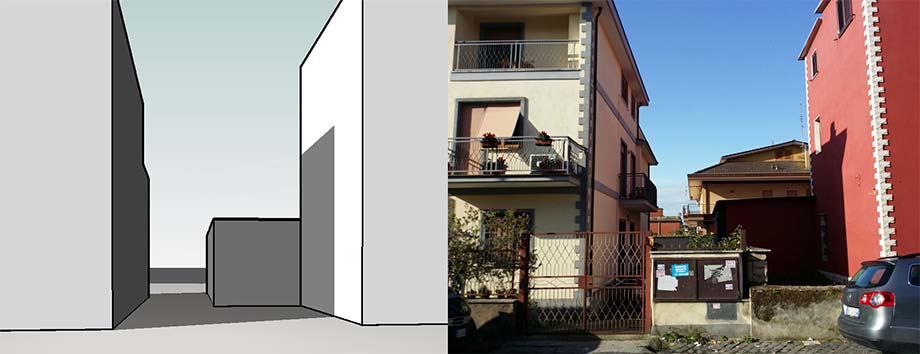
We took theese pictures at 8:40 AM and we recreated the same situation in Vasari, we can see how the results are almost identical to the real pictures.
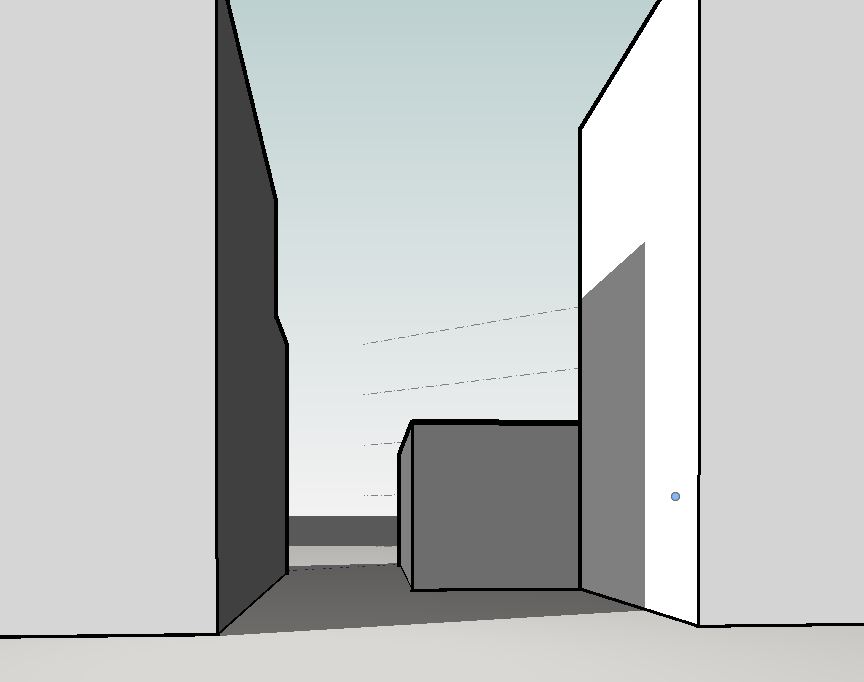
Here we can see the shadow that the adjacent building projects on the one we chose for our study:
And here we see the shadow that our building projects on the one to it's left:
CONSIDERATIONS:
Even if the buildings have different heights and seem a bit close to each others, the shadows don't cover to much of the windows of other buildings most of the day. in fact they get projected on the street after noon leaving tha facades of the buildings directly exposed to sunlight.
Commenti
Nicola Moscheni
Lun, 30/03/2015 - 15:49
Collegamento permanente
and the afternoon pics?
The process is well described but you have to add more considerations about solar effects on the buildings!
You say
Why don't you post some pictures of the "other" solar/shadows situations to valuate what you write?