


Vasi per piante
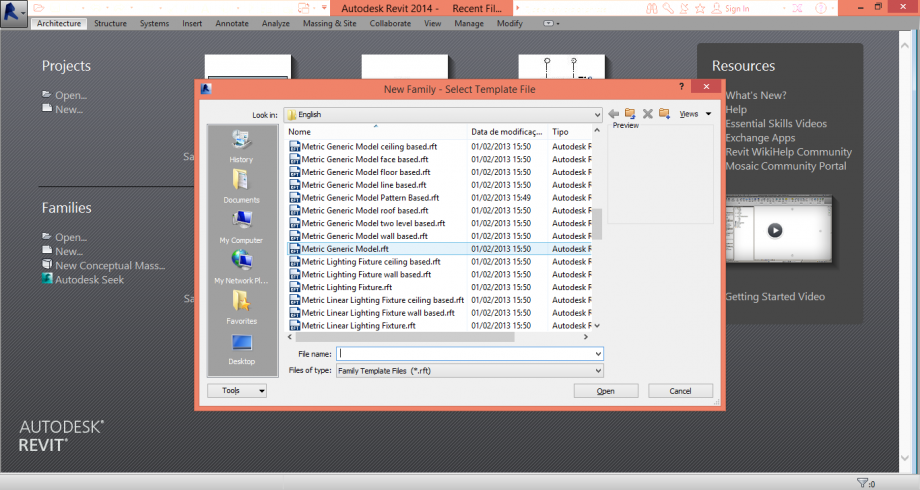 1. open a new family as generic model
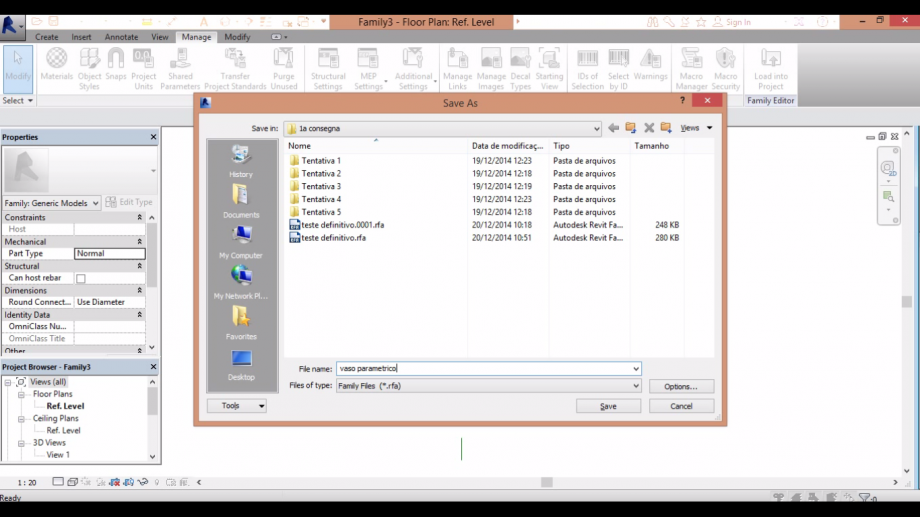 2. save the family
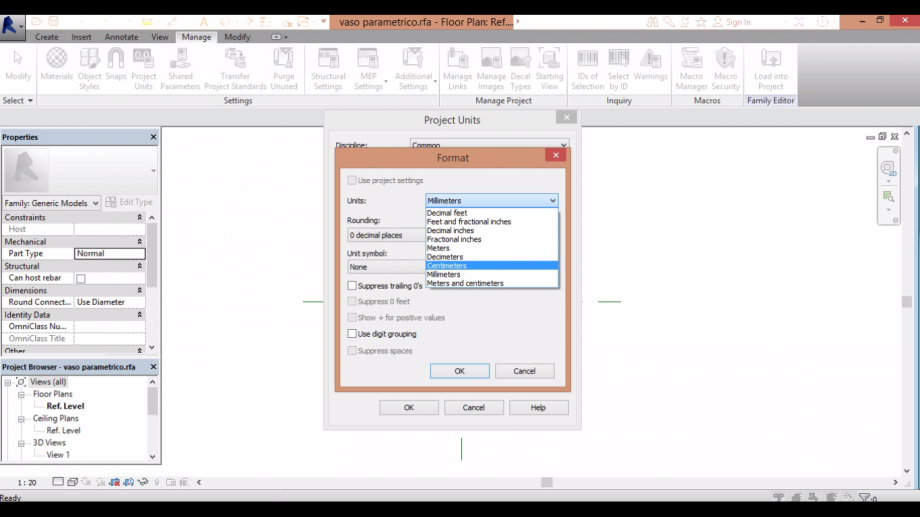 3. go to manage and change the units to centimeter
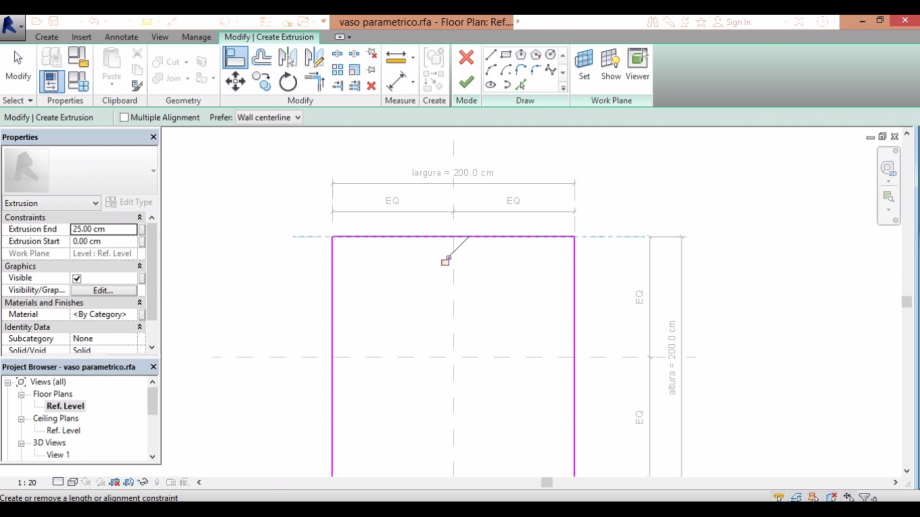
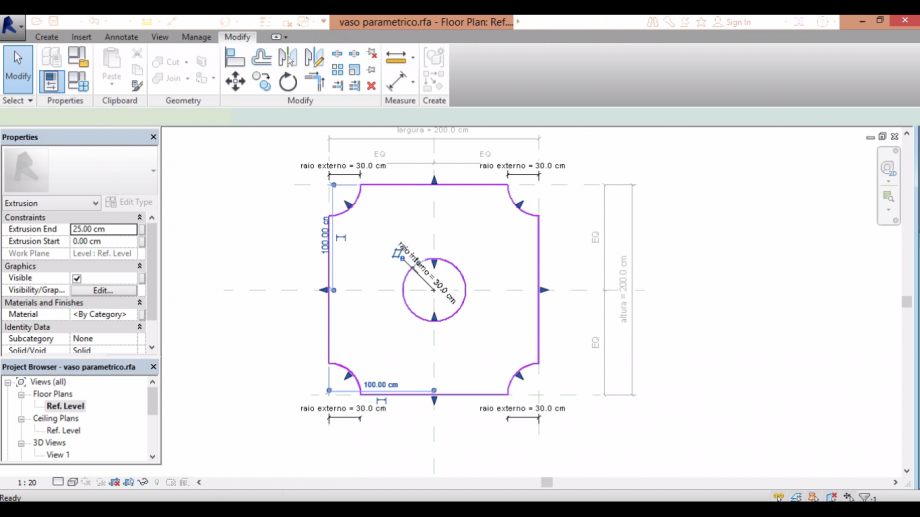
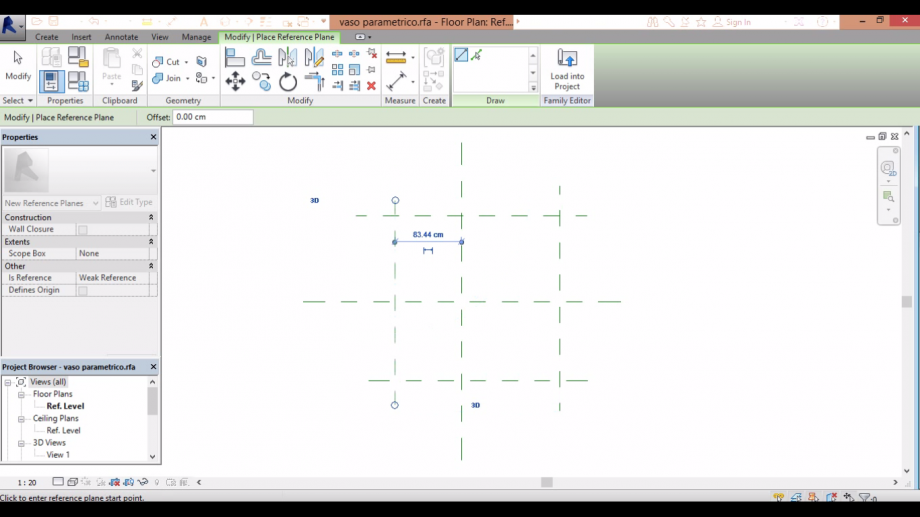 4. make 4 reference planes (comand rp) as the picture above
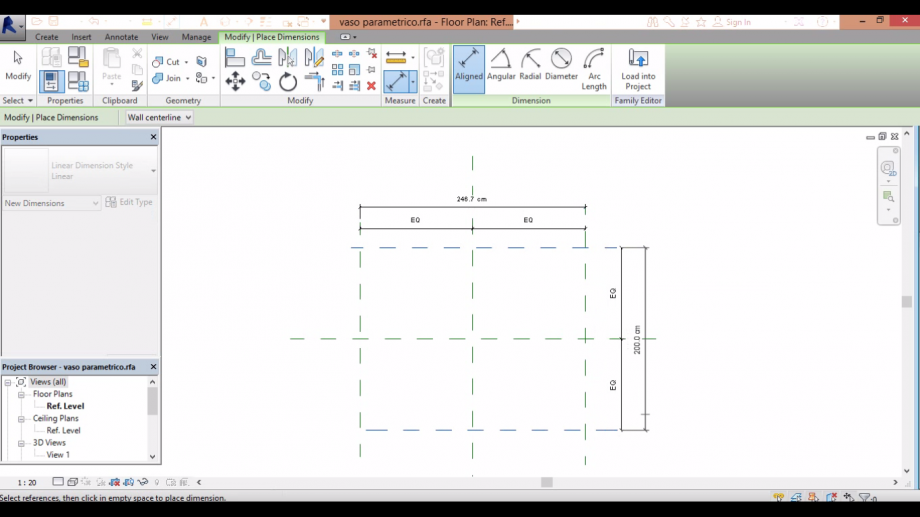 5. make the dimensions to your family and then press EQ
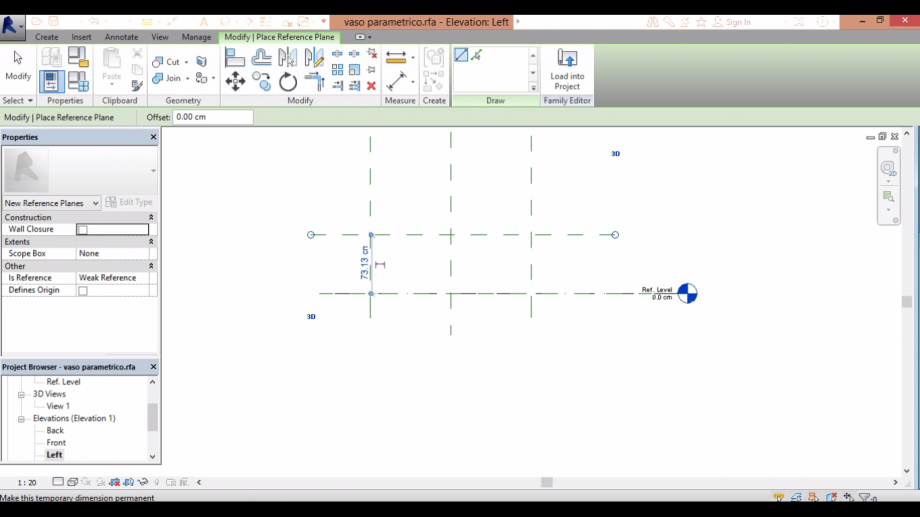 6. go to the left view and make a reference plane parallel to the reference level
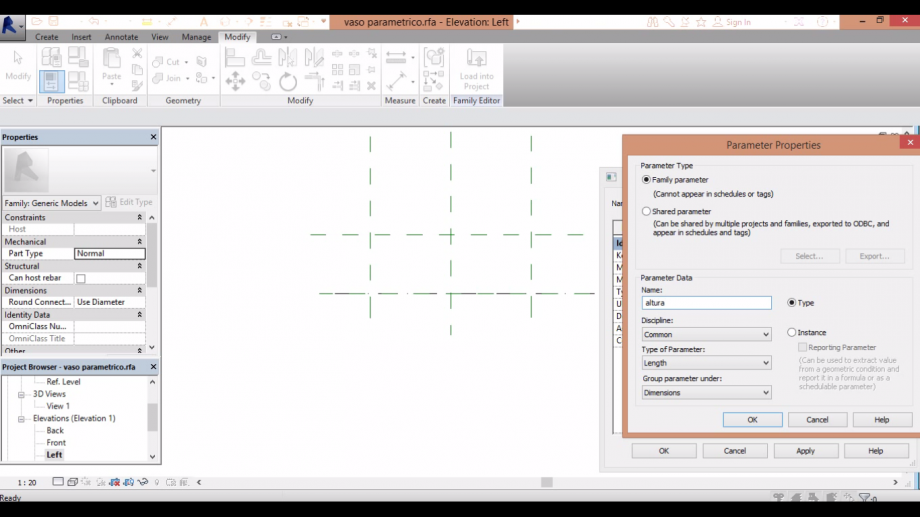
7. on the box family type, go to parameter>add>name the parameter>click on instance>ok. I named then in
portuguese, sorry about that.
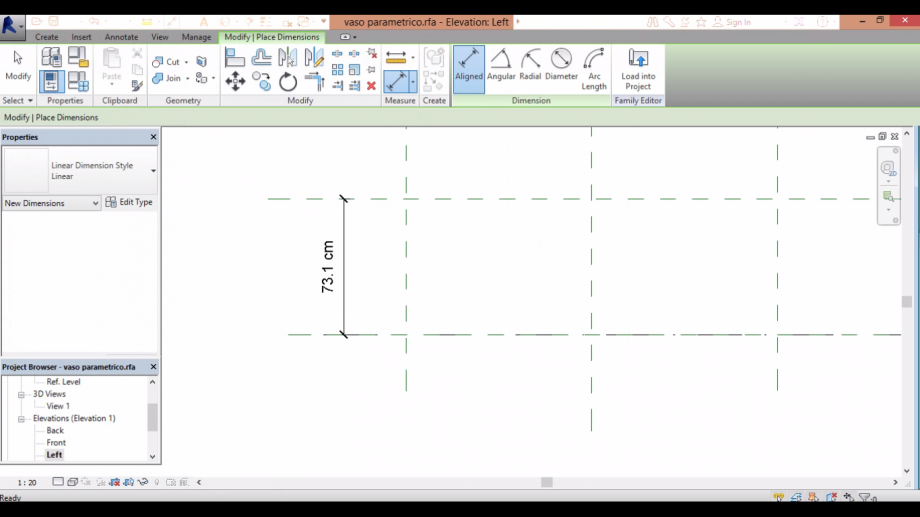 8. comand dimension (di), dimensionate you reference plane to the reference level
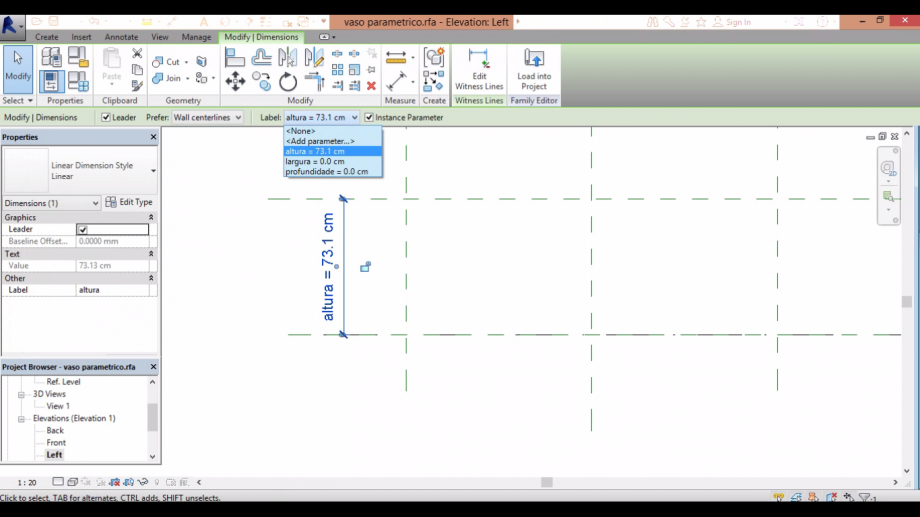 9. click on the cote, and on label choose the parameter that you create for that cote
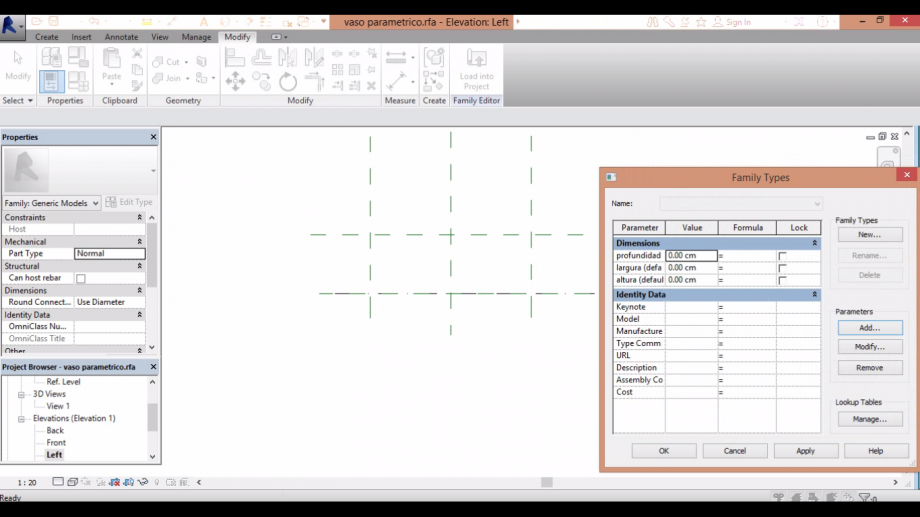
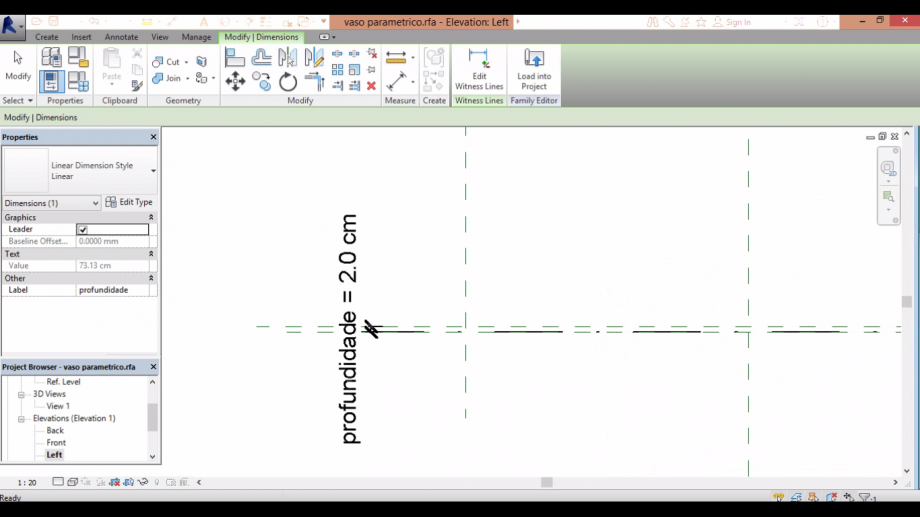 10. check if the parameter works
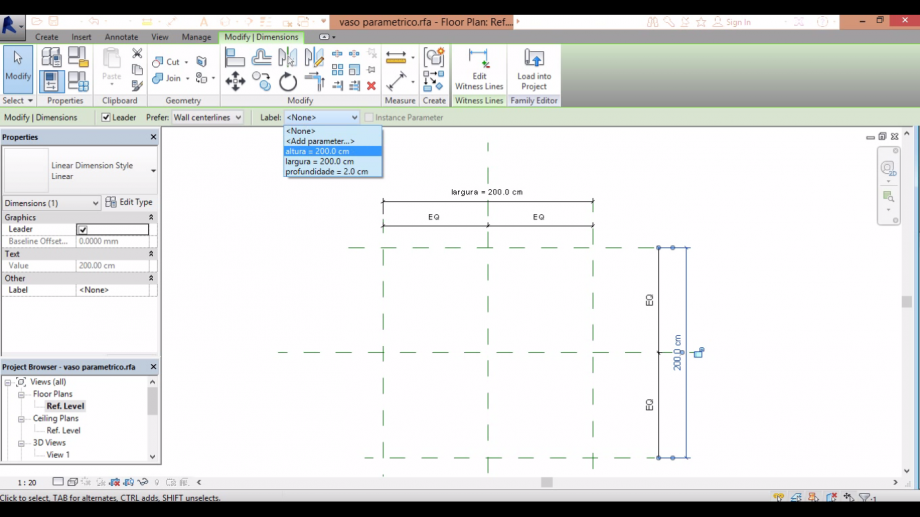 11. on reference level, name the other cotes according to their parameters as well
 12. on extrusion, start drawing the object
13. modify/create extrusion>align. To every side of the square, align then to the respective reference plane
and click on the locker symbol
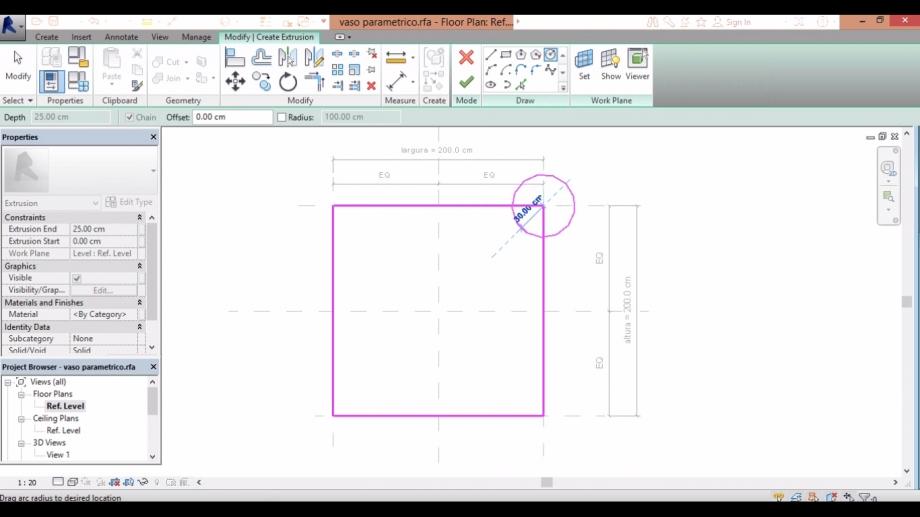 14. draw a circle at some corner
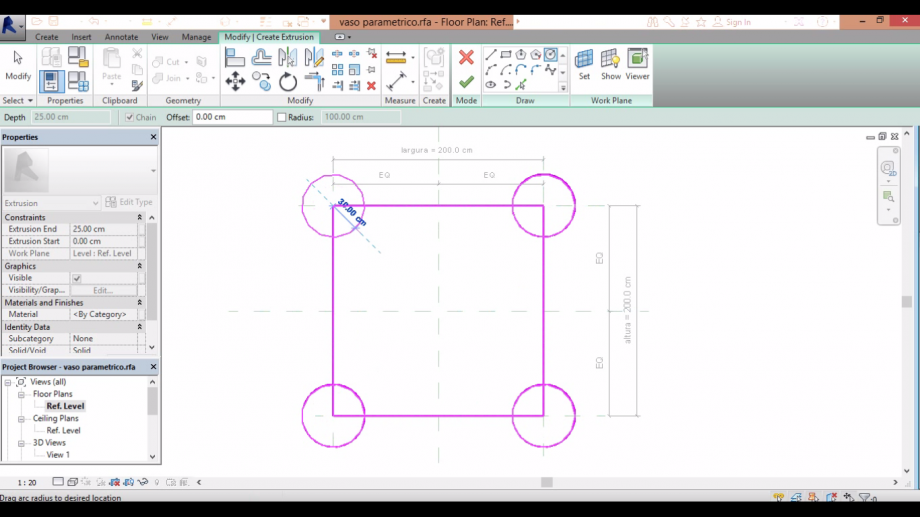 15. copy that circle to the other corners
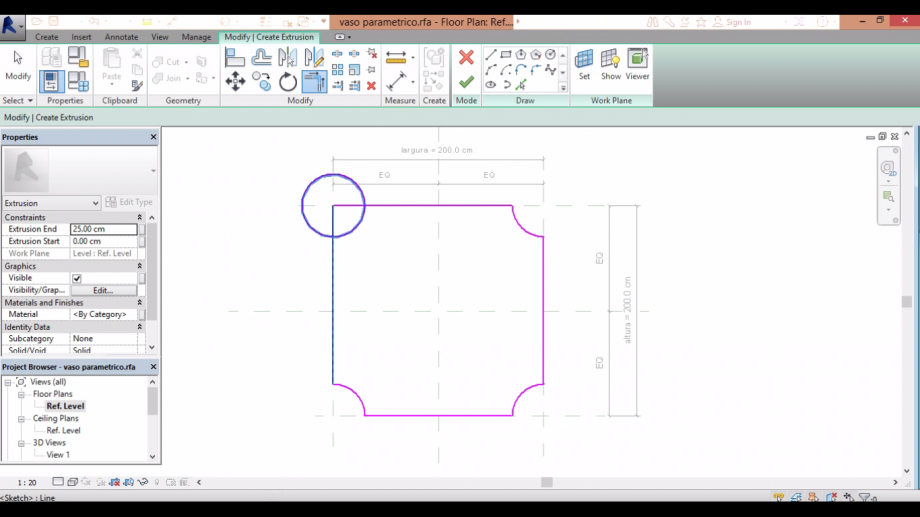 16. comand trim, cut the parts of the circles thata are outside the square
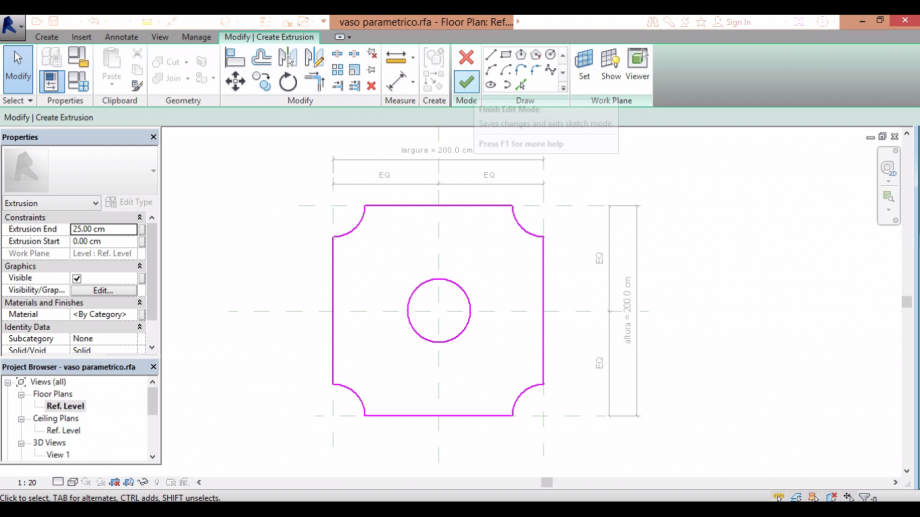 17. then draw a circle in the middle of the square
18. on annotate, make a radial dimension to the circle and a linear one to the "semi-circles" on the corners,
conecting their extrem part to the reference plane
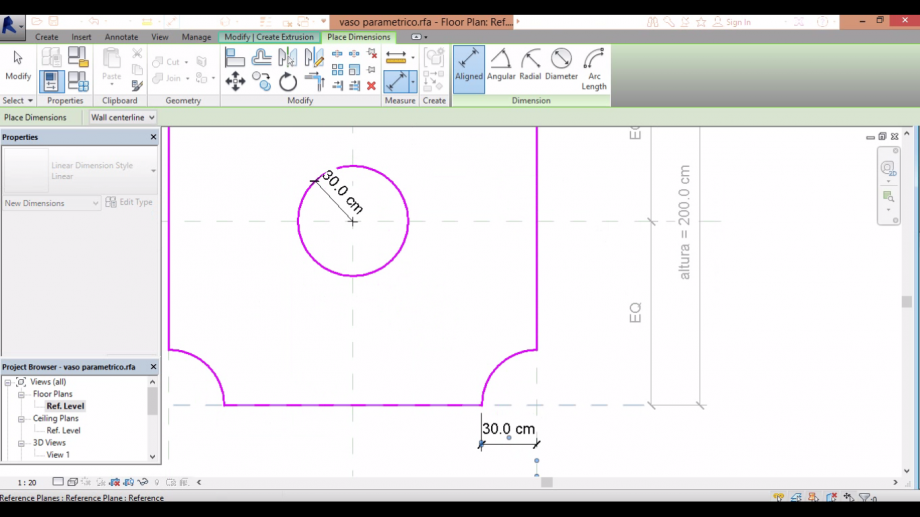
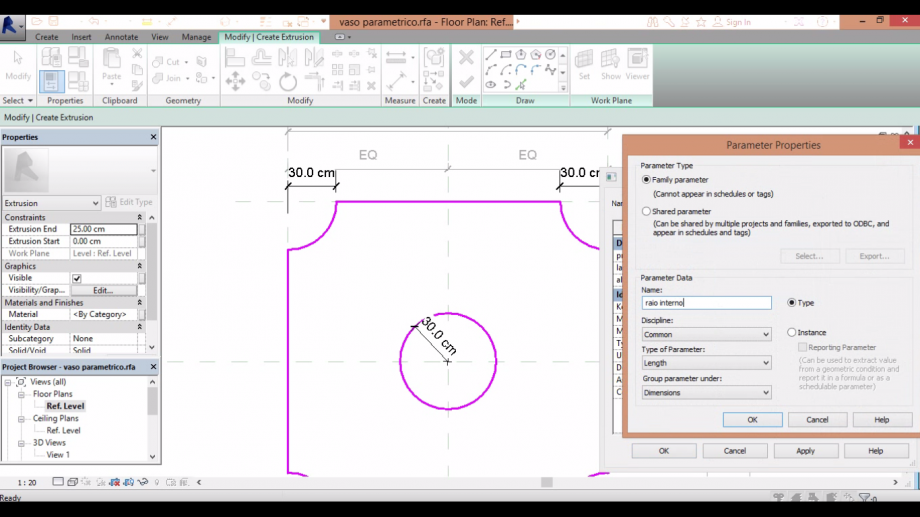 19. add new parameters to the radium and label them
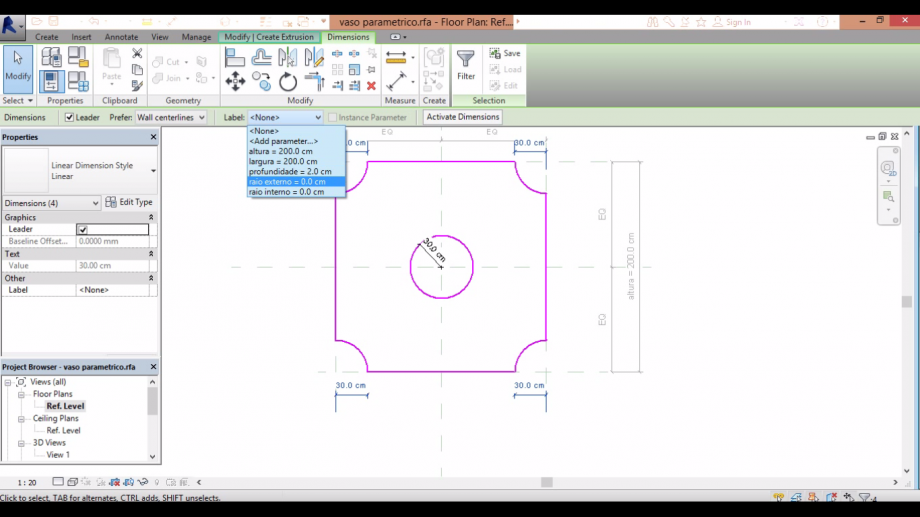
 20. click on the check buton
 21. test if all the parameters really works
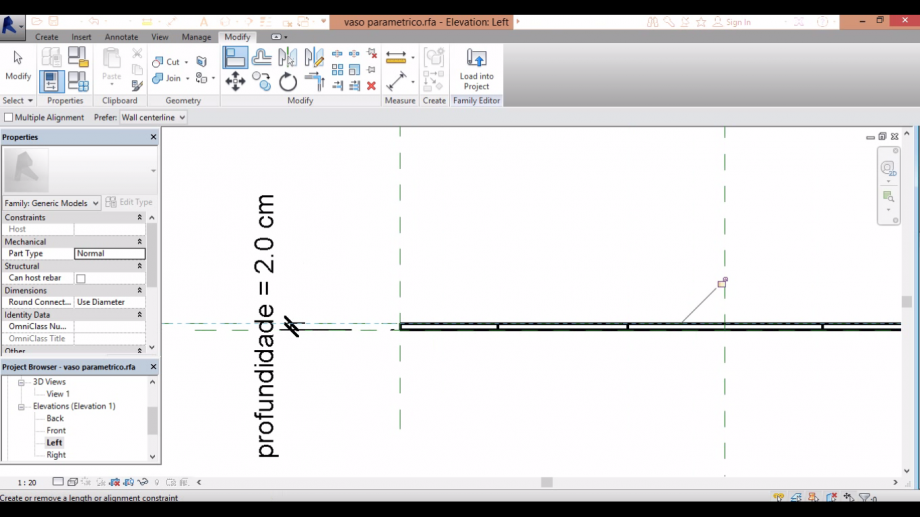 22. on the left side, don't forget to align the reference plane to the object and then click on the locker
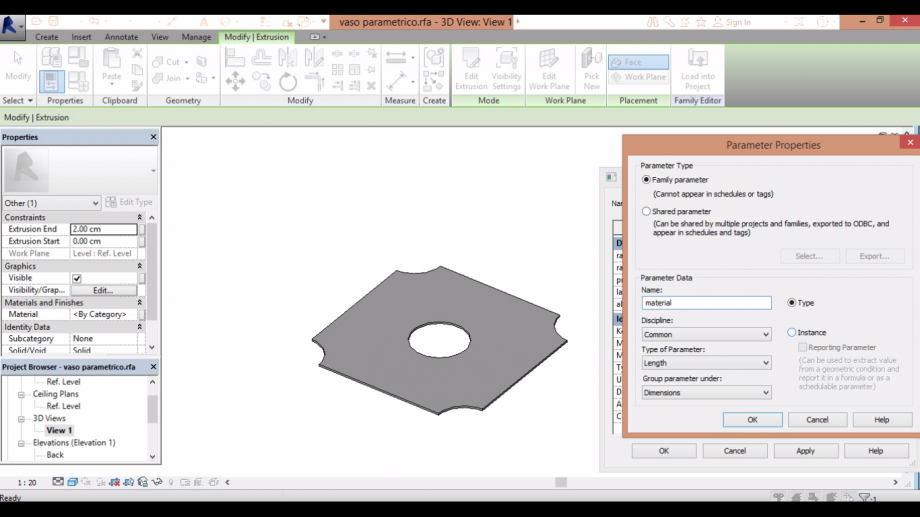 23. create a new "material" parameter, and on the box of type of parameter click on "material"
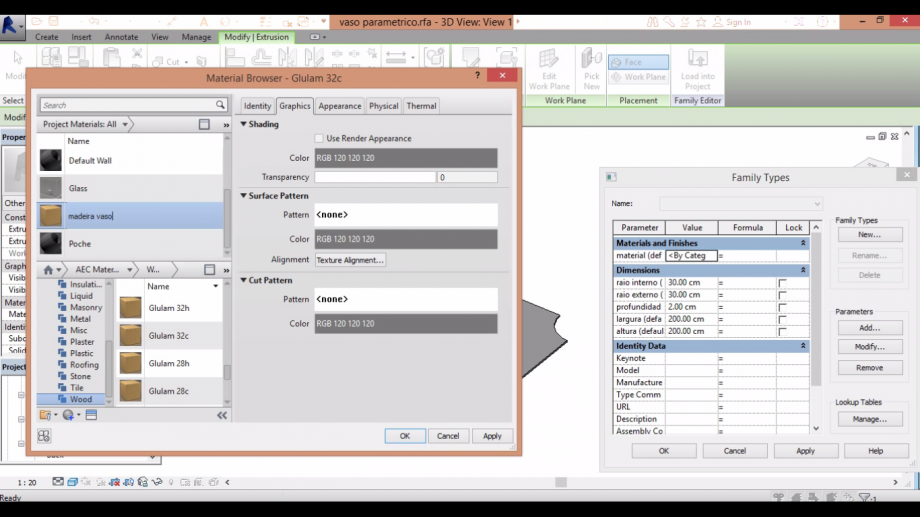 24. on the category, choose the best material that fits your object, upload and rename it
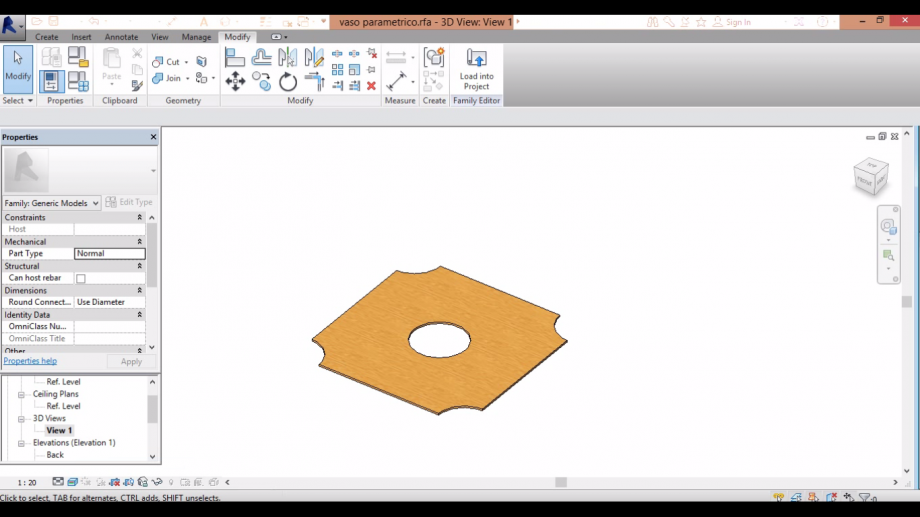 25. click on the realistic vision on the box below to see how your object turned out
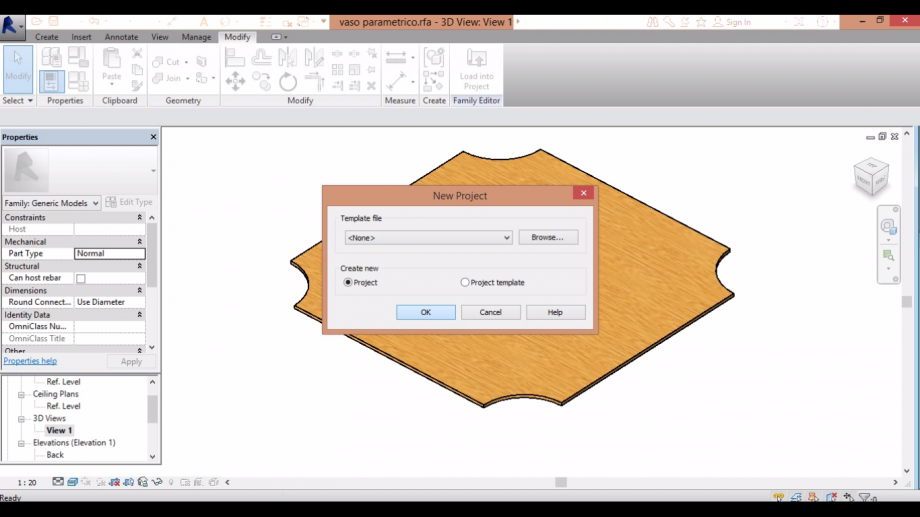 26. create a new project
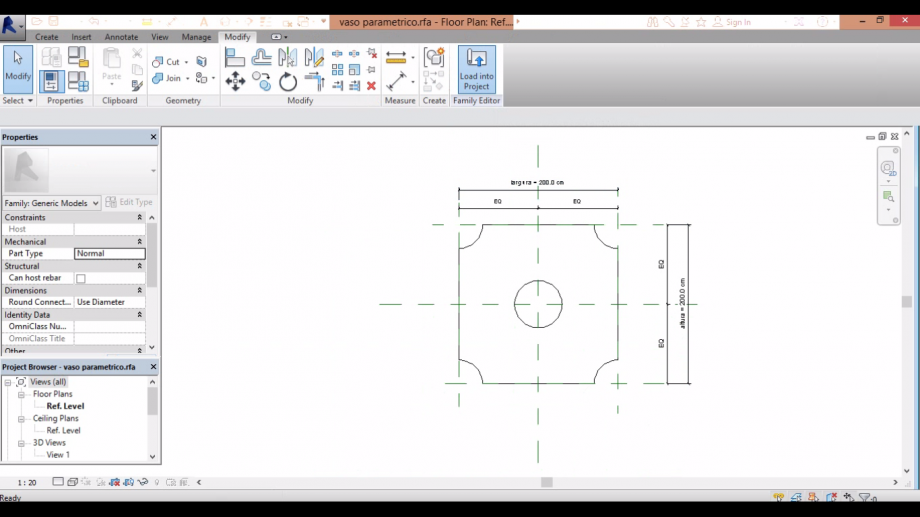 27. load your object into the project
 28. change the dimensions of this first object acording to the base of the vase
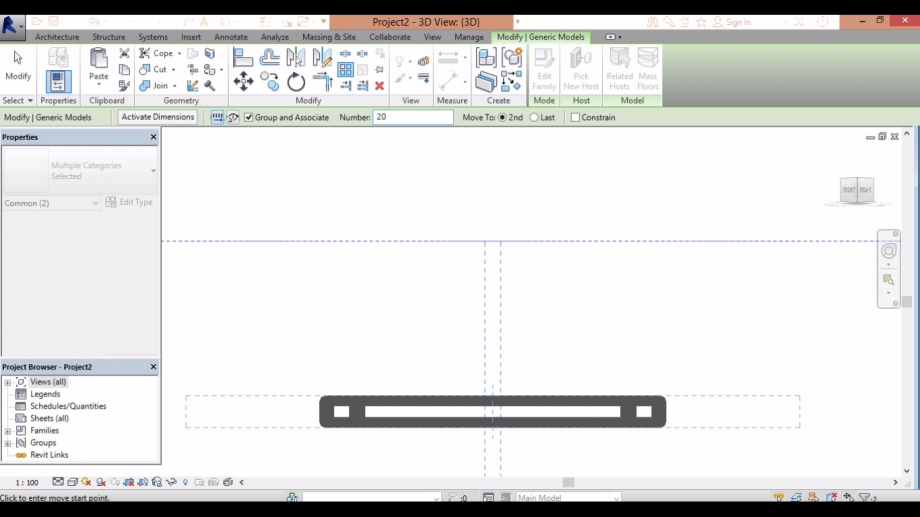
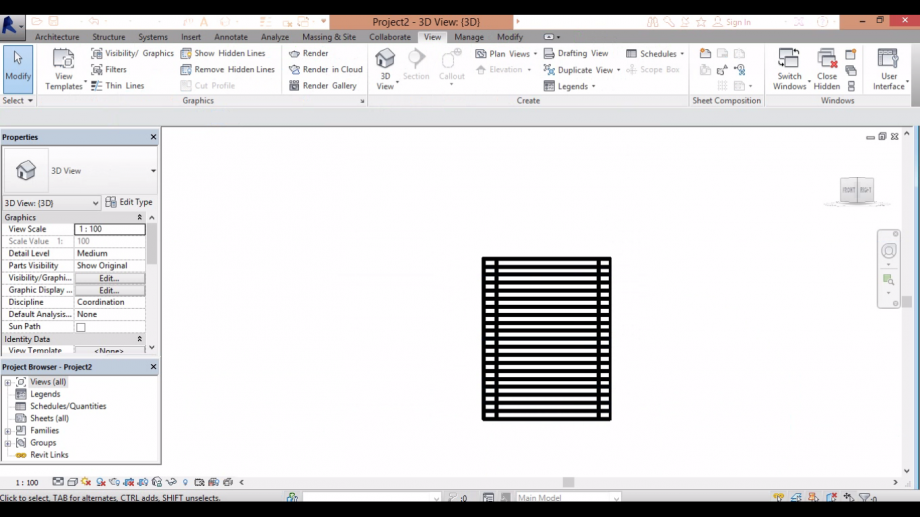
29. on the 3d view, go to the parallel vision and then to the array command. write 20 to the number of
repetitions of the object and uncheck the group and associate box. Then click on on point of the inferior side
then at one on the superior side of the object
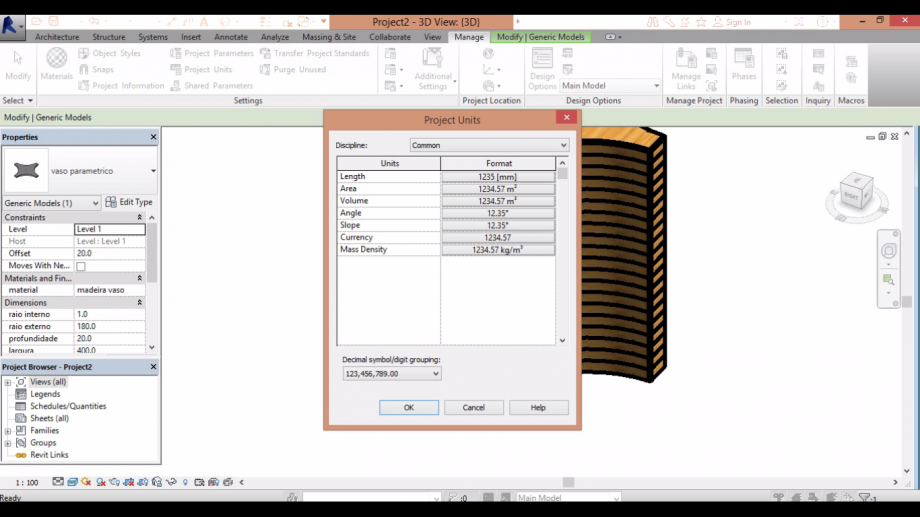 30. at project units, don't forget to change the units to centimeter
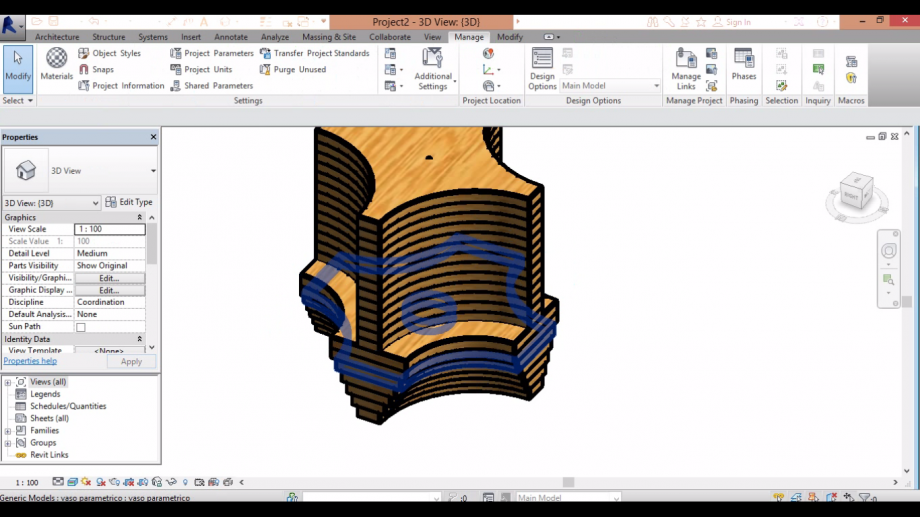
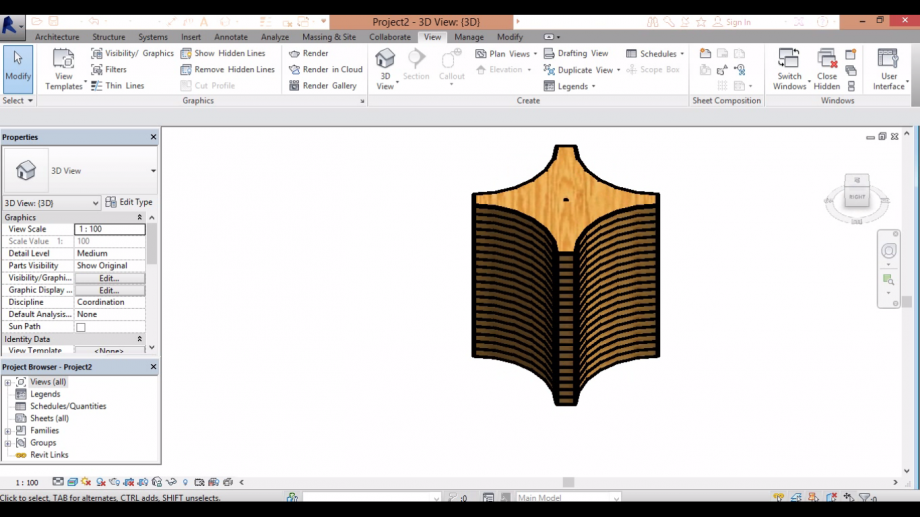
31. start changing the dimension of each one of your objects like these: the extern rays starts at 19cm
decrease at each object until reach 0.1cm at the top, as the inside ray start as 0.1cm and at the top has 19cm.
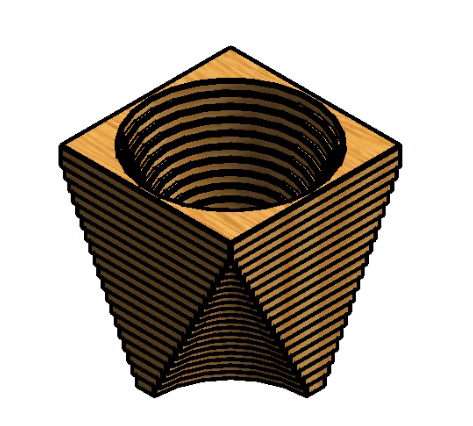
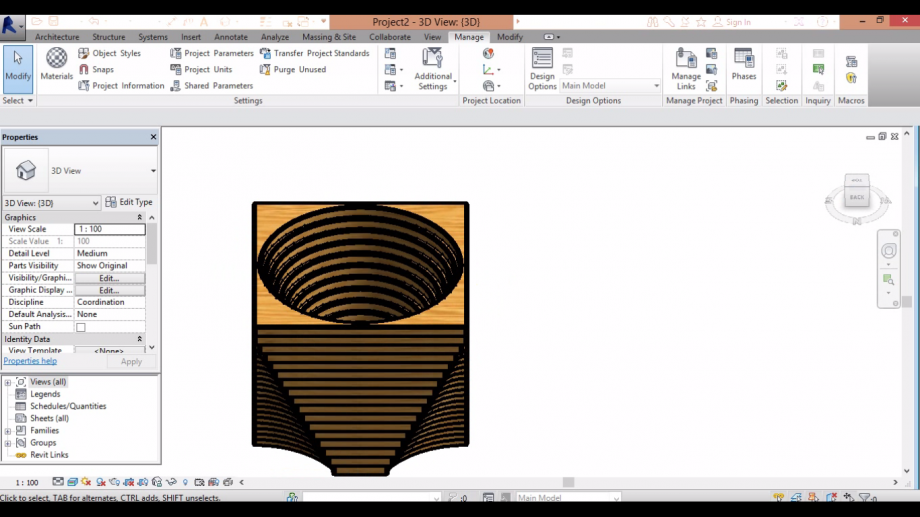 32. the object is ready.

Commenti
StefanoConverso
Mar, 23/12/2014 - 17:52
Collegamento permanente
Nice Design Vinicius
The post is also very clear.
Well, maybe the final image could give more credits to your design:
and I believe it has more potential to express.
Anyway, very nice interpretation, we look forward to see more work from you!