


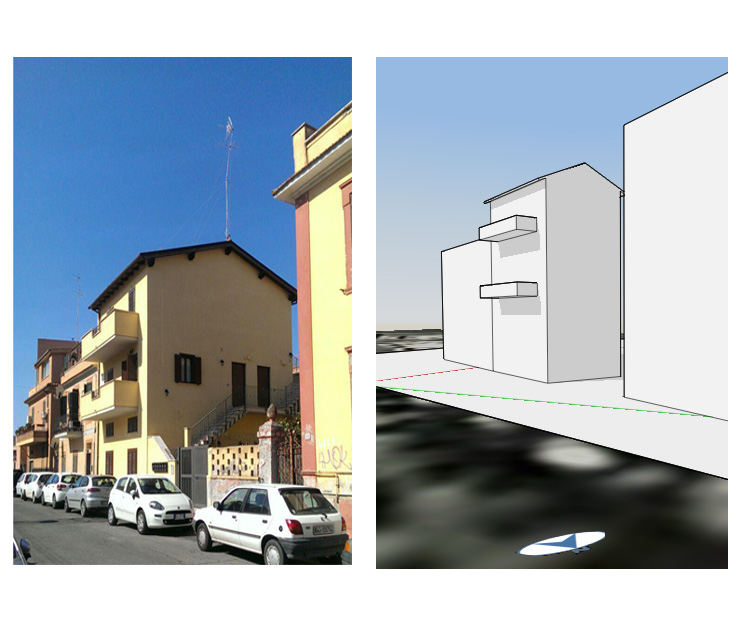
LAB6_Via Etruria Ladispoli (RM)
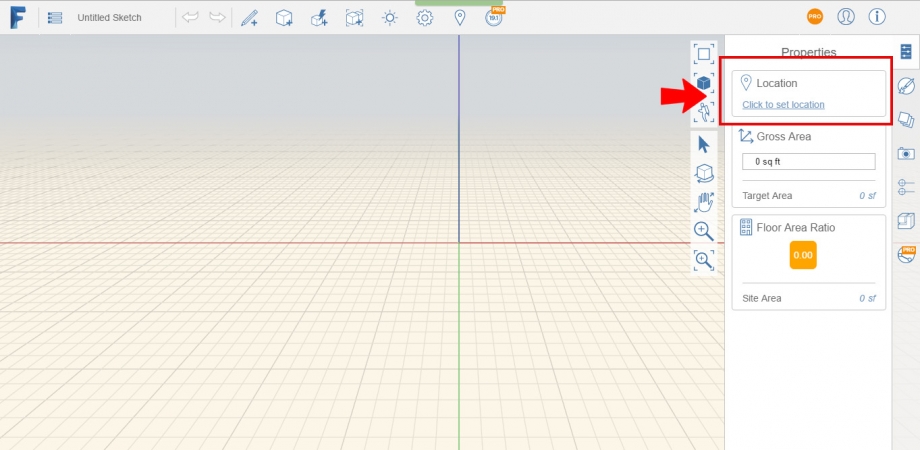
Step 1: Select the location button into properties bar menù to identify the area.
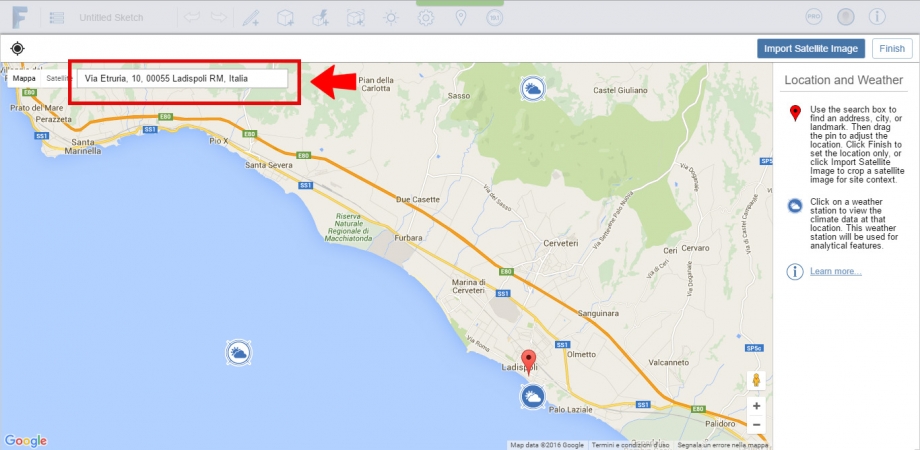 Step 2: Insert the address into the bar.
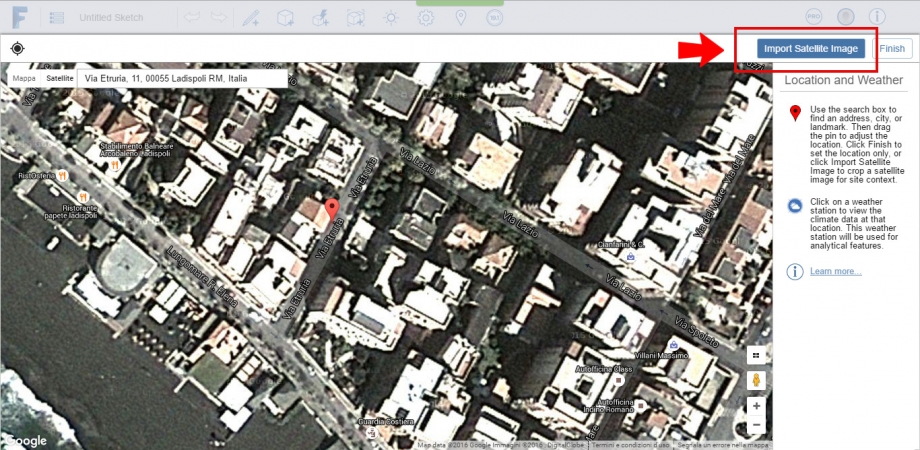 Step 3: once we set the satellite view we can click on import satellite image button.
 Step 4: a square appears in order to select a more accurate area, press on finish importing button to import the image.
 Step 5: The selected area is now imported into Form it; we can see the red selection the footprint of the building we are going to build.
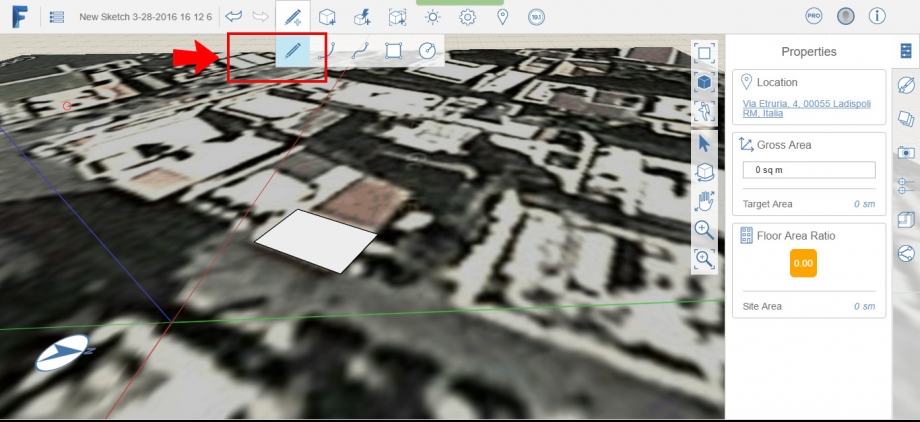 Step 6: we start to built using the command on the bar upon the screen (create sketch).
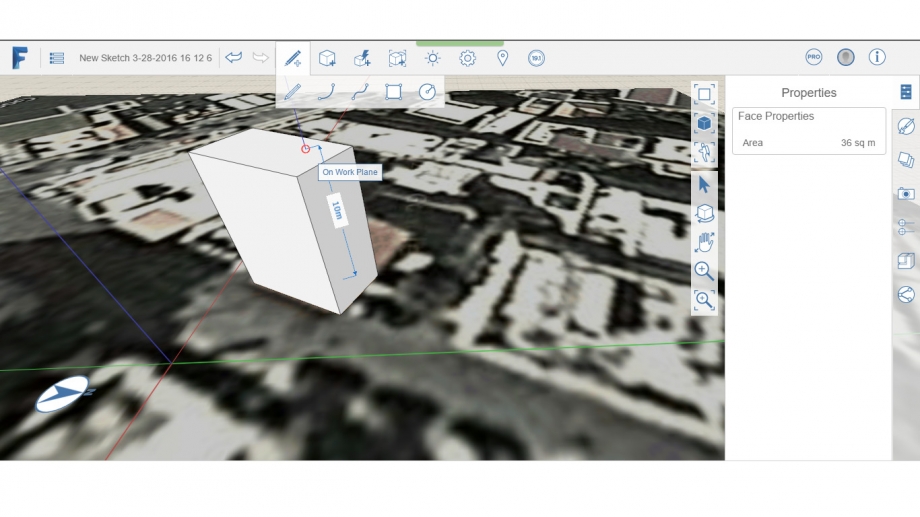 Step 7: once we designed the rectagle we close the command by pressing esc, than we build the 3d model by clicking twice on the surface.
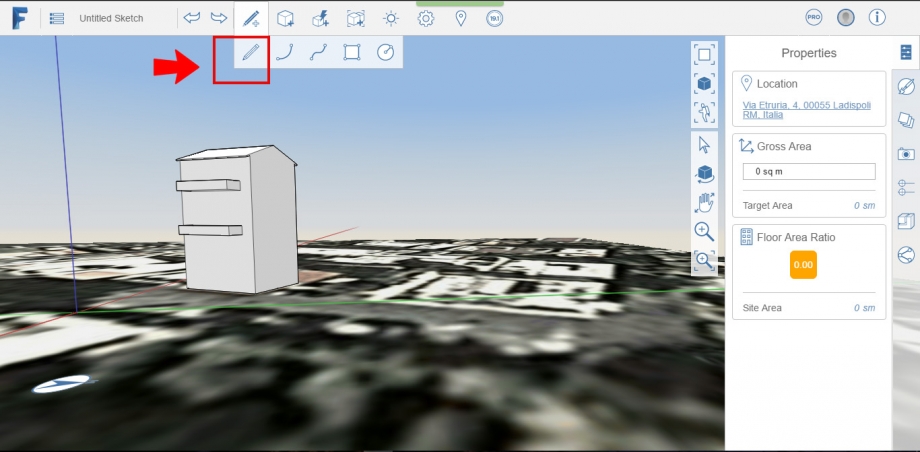 Step 8: using the same command (create sketch) we can complete the building model.
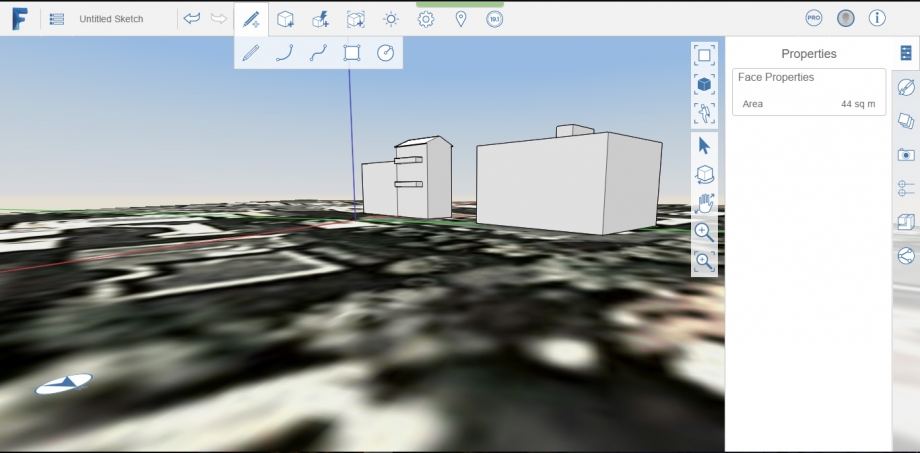 Step 9: after completed the model house, we design the adjacent buildings. We can insert the north by clicking on the setting.
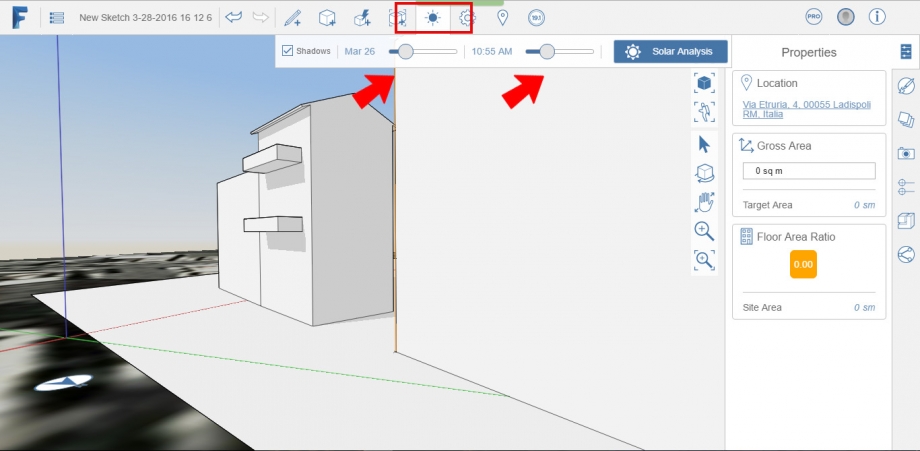 Step 10: clicking on the sun (sun and shadows) logo we can set shadows and we choose the same day and hour on the taken photo.
We can see the shadows in the real situation and in the render view.
Commenti
StefanoConverso
Mar, 29/03/2016 - 00:08
Collegamento permanente
Again, no consideration...
this is just one shot in one time,
there is no reasoning in urban space...
ancora non va ma c'è tempo per migliorare!
grazie intanto per aver rotto il ghiaccio!