


Prima consegna - improved version (16.11.2018) - Polona Grmek
- We open Revit, go to families – new family -generic models
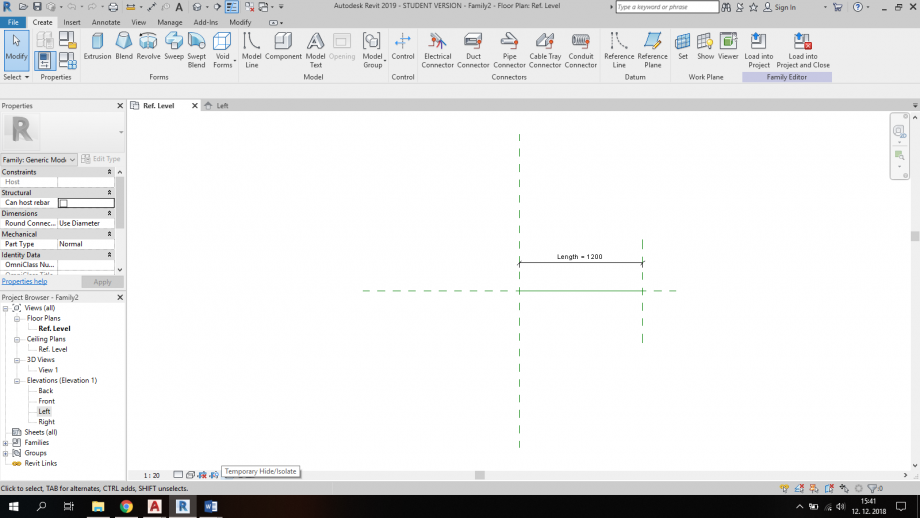
- In new window we see two reference lines. We use »reference plan« to make new reference plans. Two in floorplan and one (or two) in front sight.

- We measure the distance between two pallarel plans – put the quotes (aligned measurments). This provides easiest way to change the distance between two parallel plans.Also we need to lock the quotes (later parameters) in »spessore«, if we want to refere it to altezza da terra. If we want, we can change the units at this point: Manage, project units, millimeters.

- We can create parameters now by clicking on the quotes and than on Label – create parameter. We make parameters for each of them : lunghezza, larghezza, altezza da terra and spessore. It's possible to define each parameter: type or instance (depends on our needs). I choose the larghezza and altezza da terra for inszance. We can also create a shared parameter – in my case there are two of them c_larghezza and c_adt (altezza da terra).
- Now with the create . extrusion we make our object (bigger than our refference plans) and than we align the edges of new object to reference planes (align – click on plane – click on edge – lock)
- Now we can simply change the values of parameters in family types . If we change the values there we also change the object.

- Now we open new project. With WT we can divide the window in two equal parts – one for family and one for project. We should savet he family and savet he project. We load family into project ( Properties – generic models- »our family«). We »click« it into our project window. If we want we can also set the reference plans into project to make a composition in easiest way.

- When we have all the desired objects in our project we go to view – schedule- generic model – c_lungezza and c-altezza. This two parameters we can change differently for each object in the project only by typing new values.

Schedule:

I choose to have elements 4x4xN cm. Lenght of each piece depends on it position. The other thing that varies is the hight, which creates a wave-like structure.


IMPROVED VERSION:
After coments on last lecture i decided to do some changes on my project. I was satisfied with my family so i leave it like that, i also liked the composition from my first atempt. Therefore i decided to start from there and build new patterens from this shape.

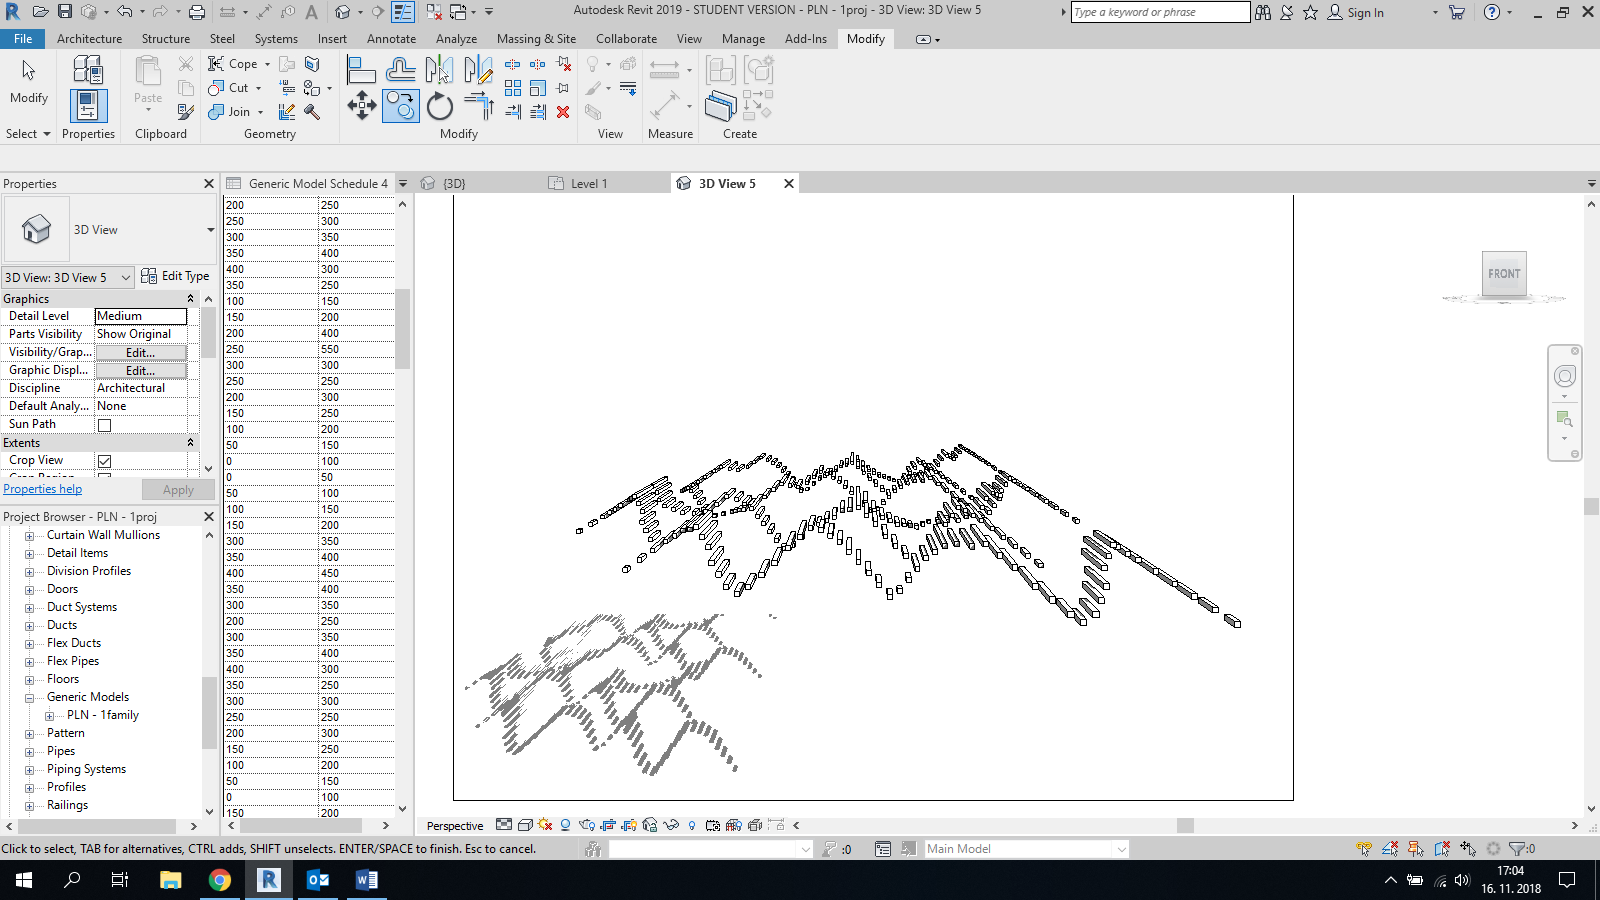
I added new objects in the same was i was adding them in the first project. The base was the same, i only change their lenght, hight from the ground and position in space. In that manner i create a wavy shape.

In order to achieve coherece the "families" often "run" on each other, so i had to change some lenghts in schedule and delete few parts. In that way i get nice smooth joints.

I played with form by adding and taking new parts. I achieved a nice composition which reminds me on waterfall.

Few 3D views of my new composition:

As you can see on this photo i still has some issues when putting the shadow - i don't know why but my shadow is lower than my point 0m.


Commenti
StefanoConverso
Gio, 08/11/2018 - 11:37
Collegamento permanente
Process "too mechanical"
ciao!
the post is quite difficult to read, for somebody "not informed" about what we are doing.
Please try to make it more friendly.
At the same time, the form is clear and also interesting potentially, maybe too linked
to an "image to be reached". But here as well, it would be better to know in more detail
how you put all your parts together, with which criteria.
In this case, some images within the text, might help.
Thanks!
S.C.
StefanoConverso
Mer, 21/11/2018 - 11:09
Collegamento permanente
Good improvement
The new images are much more convincing, good job!
As for the shadows, I am not sure I got your comment.
Normally they are on Level 0.00 by Default, but that setting can be change. I doubt you did it.
So maybe post a front elevation?
It seems a correct behavior