CURTAIN WALLS_LIGINI'S TOWER
In this post I explain how I created personalised curtain walls and architectural walls for my project.
Before starting to show my workflow I want to list which were the elements I introduced to complete the flat.
Curtain walls:
- glazed parapet
- glazed window
- structural wood wall 23 cm
Basic walls:
4. inner wall 13 cm
5. exterior shelf 7 cm
6. interior shelf 3 cm
7. plaster 1.5 cm
So the base to obtain the curtain walls of the first group was the basic curtain wall, in the second group I created the different types of wall starting from a basic wall and then I personalised the layers.
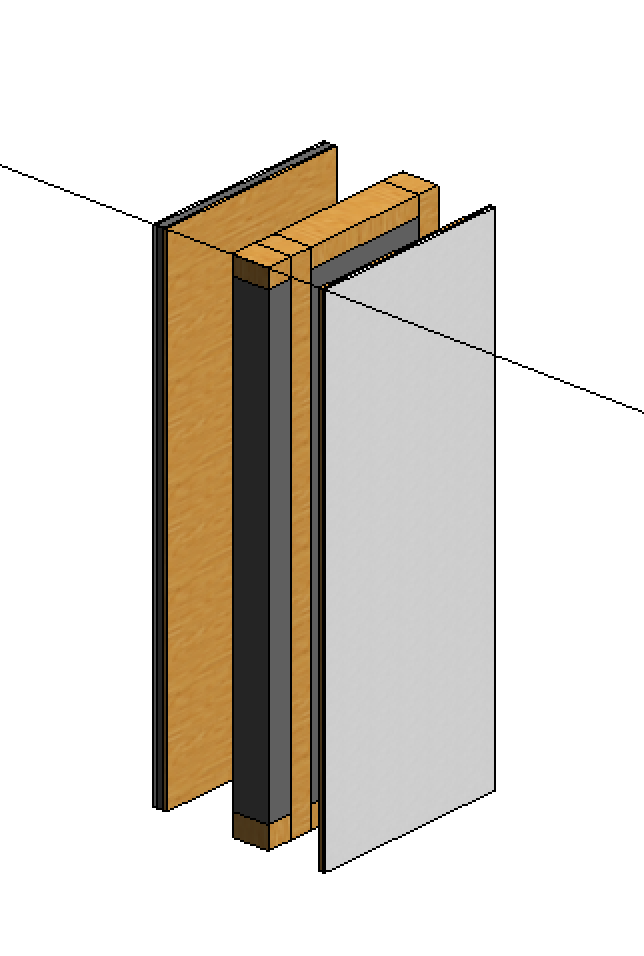
STRUCTURAL WOOD WALL 23 CM
In the project browser go to Curtain walls mullion > rectangular mullion > duplicate > rename. In this way I created a personal wood mullion in order to use it as mullion for the structural wood wall. I assigned to this mullion the material I wanted (GLULAM 28C).

Then I duplicated and renamed a basic curtain wall. Architecture tab > wall > architecture wall > curtain wall. In the curtain panel menu I assigned the insulation panel previously created and I assigned my personal wood mullion for the grid.


With a similar workflow I created the glazed curtain walls for windows and parapet.


INNER WALL 13 CM
I started from a basic wall. Architecture tab > wall > architecture wall > basic wall > duplicate and rename. Then I change the structure layers in order to obtain what I needed.

(This symbol visible in plan view is useful to swap the exterior with the interior side of the wall)


In the same way I shaped the exterior and the interior shelf to complete the structural wood wall.

And at last the plaster useful with the concrete existing structure.
P.S. I don’t know how to attach the curtain wall. Are they already visible in my project loaded on glue?