 Salis_Tipaldi
Lun, 27/04/2015 - 23:09
Salis_Tipaldi
Lun, 27/04/2015 - 23:09
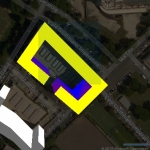
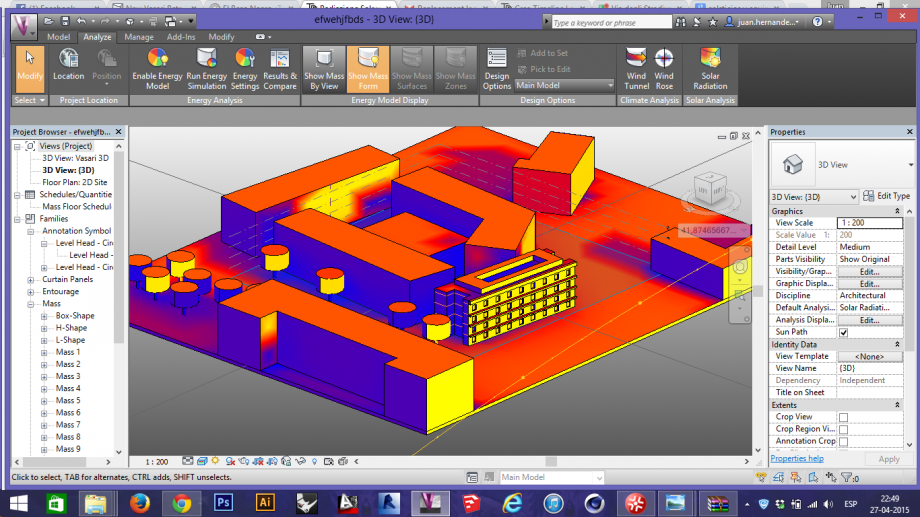
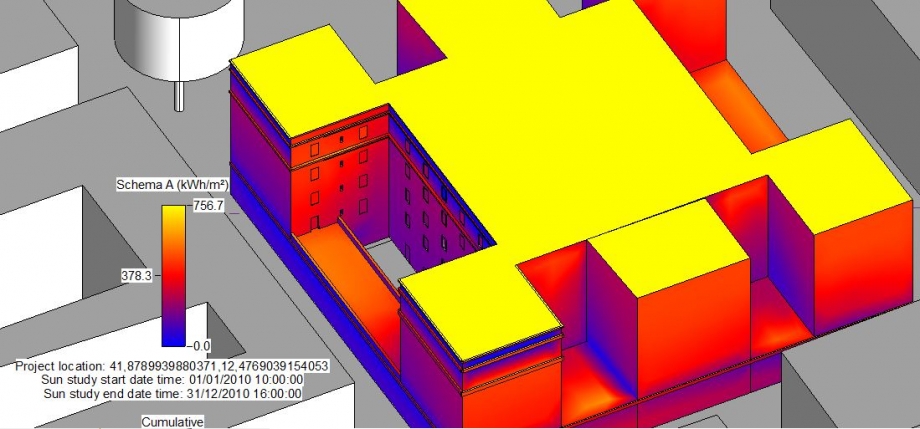
1_Analysis of solar radiation.
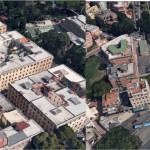
Via Pier Luigi Nervi 280, Latina
1. First, we have to shape the building creating the openings of windows and balconies, so click on Create Void Form. (If there were any projections, we should click on Create Solid Form.)
2. Then we have to analyze solar radiation, so click on Solar Radiation, top right, and specify, in the window that opens, period and other decisions regarding the analysis.
3. On the menu we selected the voice Multi-day and we chose different times of the year.
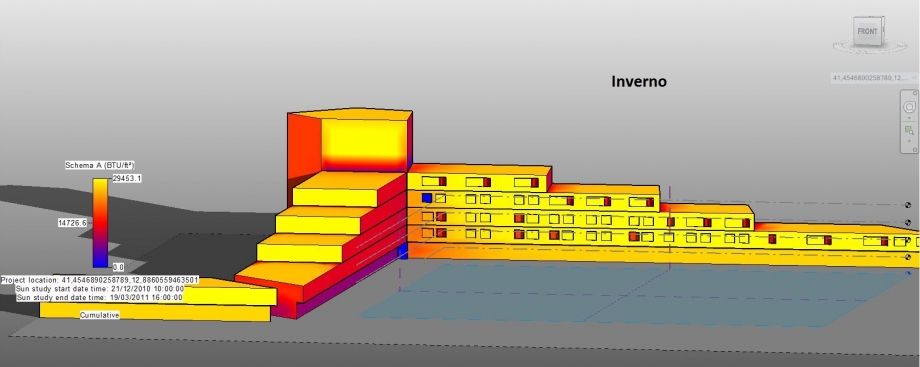
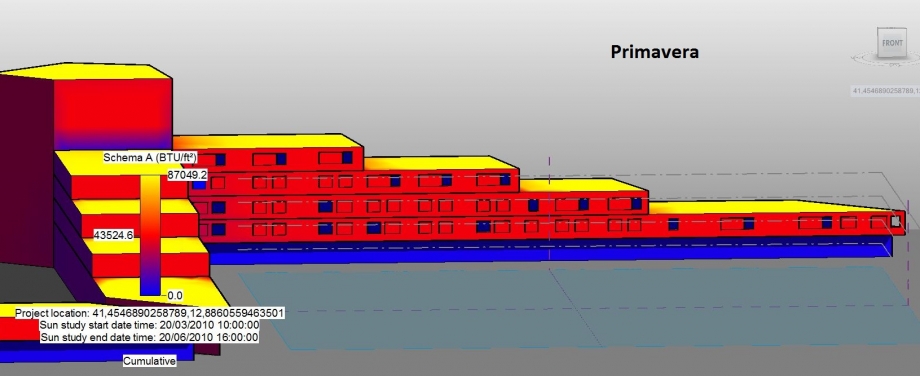
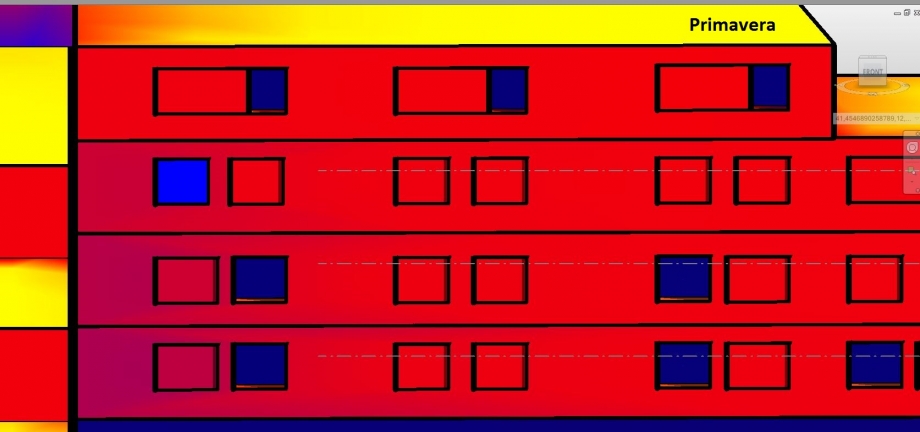


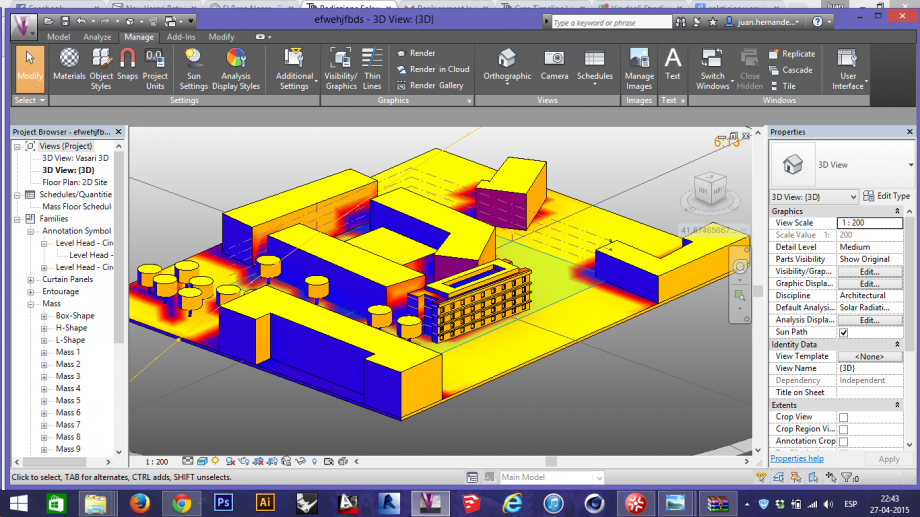
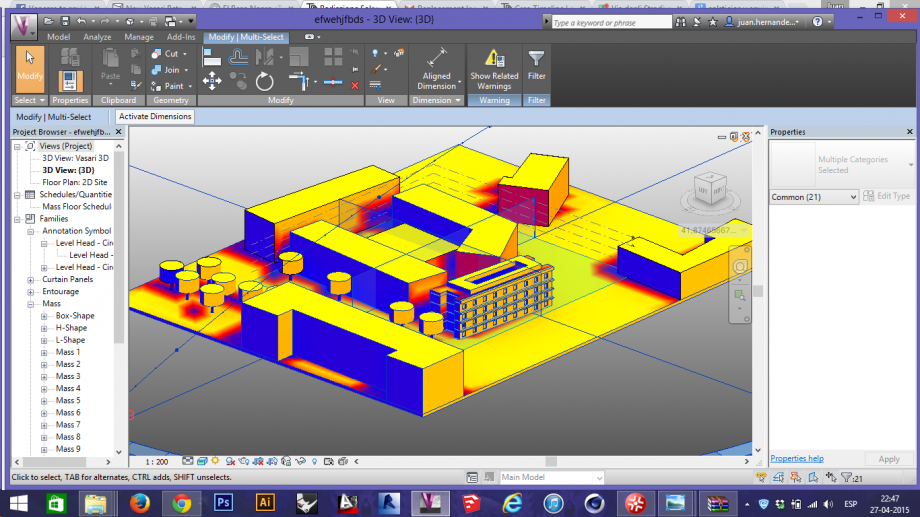
As we can see in the summer and spring the south facade is red and the roofs, where there are the terraces of the apartments on the top floors, is the hottest area (in yellow) because obviously that affected more by solar radiation. In winter, the south face is colored in yellow instead.
Having only a few trees present in the court, we believed that isn't necessary to include them in the study because they haven't got some influence on the building, they were too far from it.
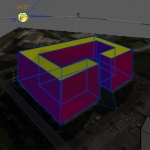
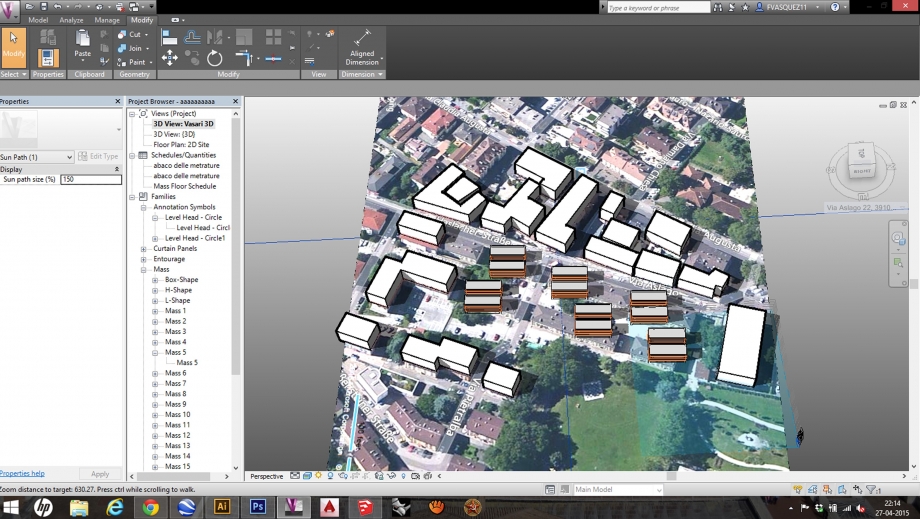
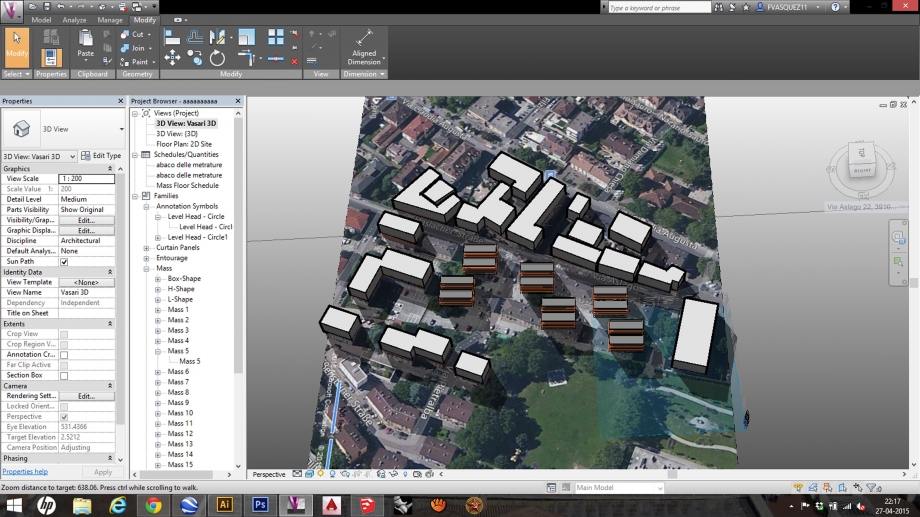
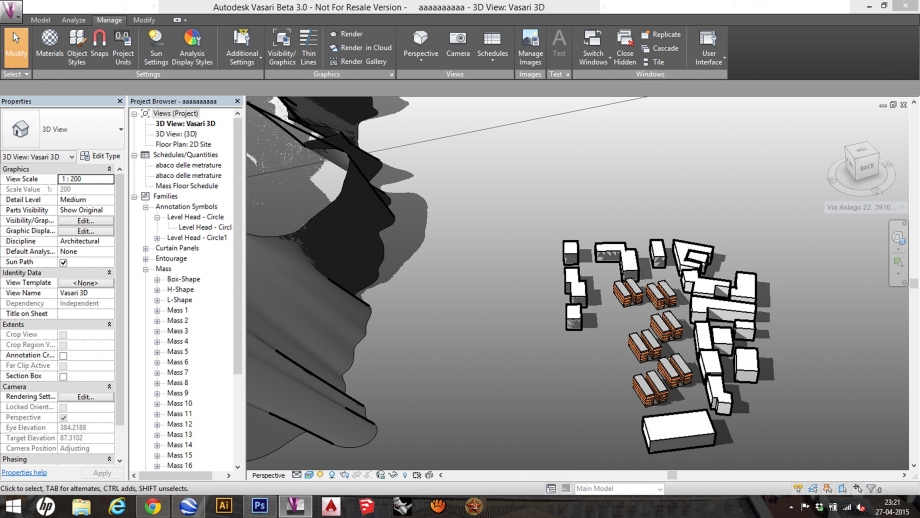
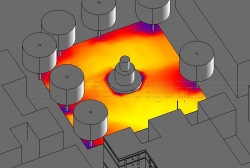
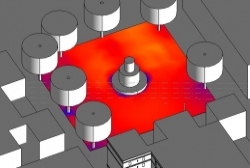
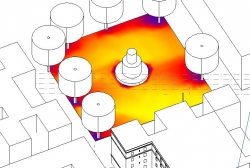
2_Bolzano_Project
The site of the project is in Via Aslago. The area is located near a mountain, and it causes the lqarge presence of the shadows. Our project consists of 4 buildings, those visible in the image (characterized by levels). The buildings are positioned so as to form three short-squares for families and meeting places for young people.
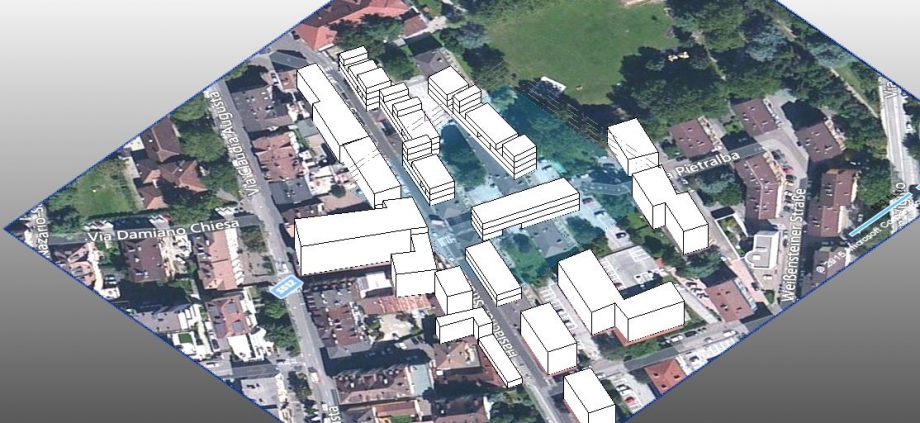
We studied how to act in the shadows on certain days of the year.


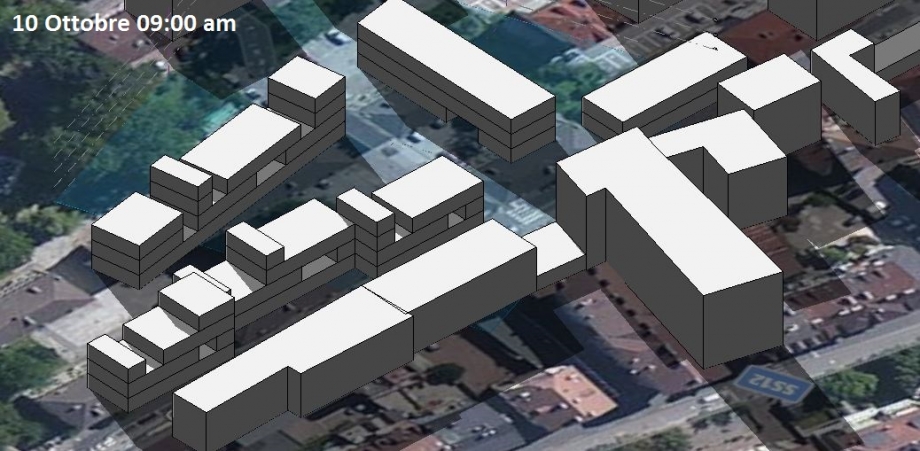
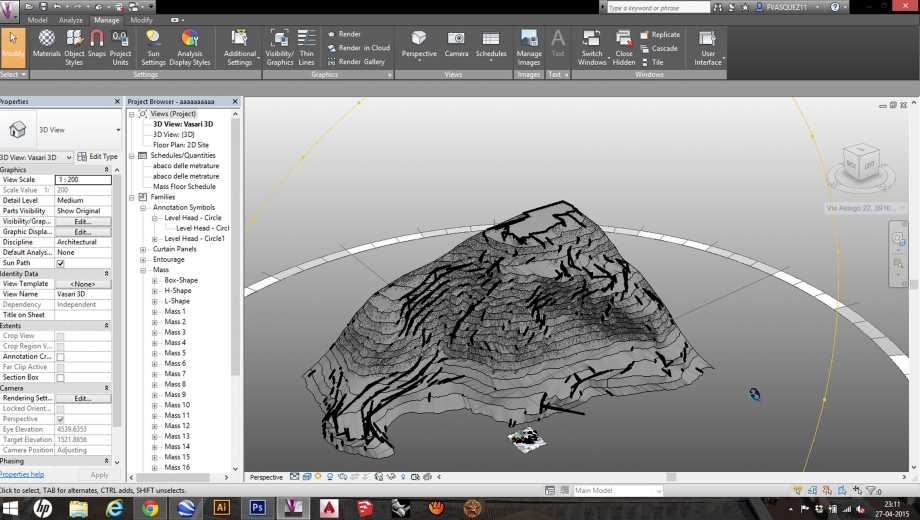
Note: Unfortunately, I failed to paste the mountain on the file because it said that there was an error and, immediately after, the program stopped. Consequently, the study of the shadows will be approximate.
Lun, 27/04/2015 - 23:18 Hernandez_Vasquez
Lun, 27/04/2015 - 21:33
Hernandez_Vasquez
Lun, 27/04/2015 - 21:33
Introdicción
En esta ejercitación, hemos cambiado nuestro proyecto a Via degli Stradivari, 10, por considerarlo mas interesante que el anterior, que por lo demás se encontraba incompleto. El contexto de la ejercitacion fue encontrar el contexto solar en el que el edificio se encontraba, para eso modelamos los ventanales y ante techos de los edificios
 Primera etapa de la modelación, ubicación de los pisos y los ante techos, posteriormente creamos las ventanas.
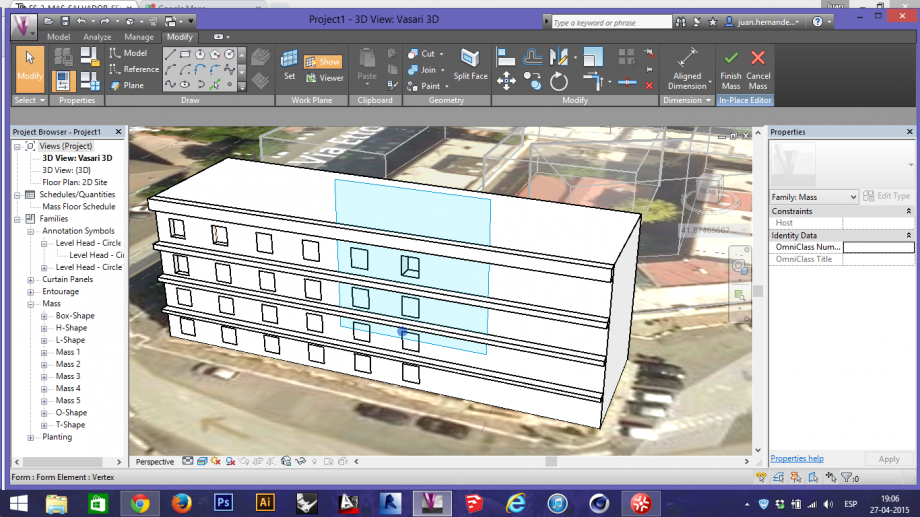
Finalmente el contexto del edificio quedó de la siguiente forma: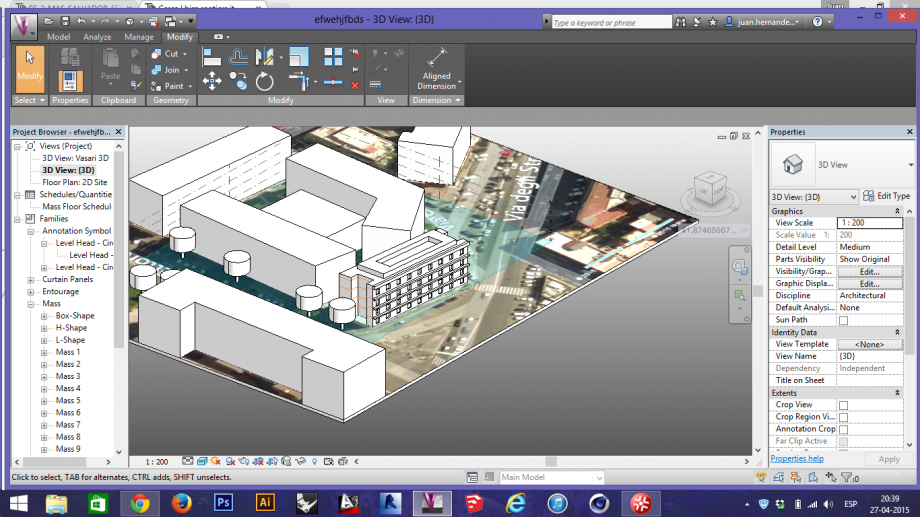
Radiación Solar
Luego de lo anterior, hemos comensado nuestro analisis solar en tres fases. La primera es el analisis solar de los equinoxios y solsticios del edificio y su contexto
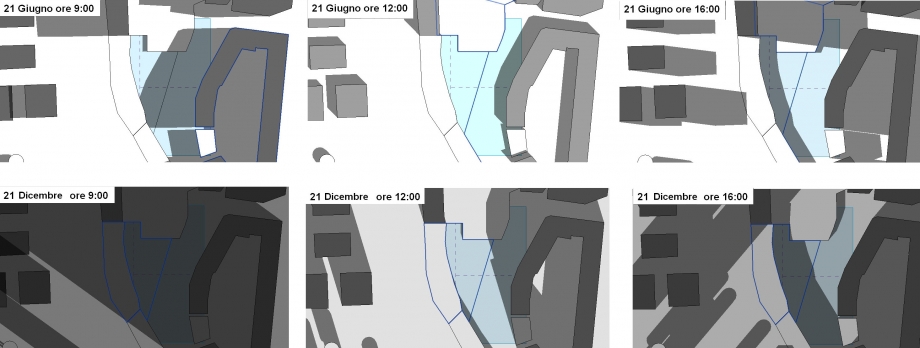
 21 de Marzo
 21 de junio
 21 de Septiembre
 21 de Diciembre
Concluimos que la fachada que da hacia la calle recive una cantidad exesiva de sol, lo que no se tradice en los resultados de los lados posteriores, donde claramente la falta de sol genera humedad exesiva
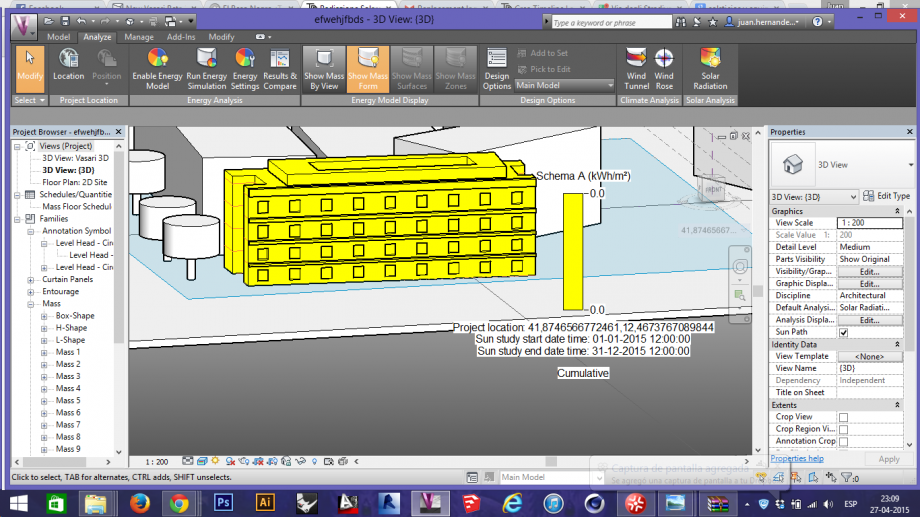
El estudio "One Year Of solar Radiation" nos deja a la conclusion que el edificio tiene llegada al sol durante todo el año, ni un solo rincon del endificio se encuentra bajo los efectos de la humedad.
Analisis Numerico
El analisis numerico nos lleva a la conclusión de que durante todo el año, y en momentos concretos como son los equinoxios y los solsticios, la fachada recibe luz solar constanta, no variando los valores, solo en minimas cifras.
 Equinoxio de marzo

Solsticio de Diciembre
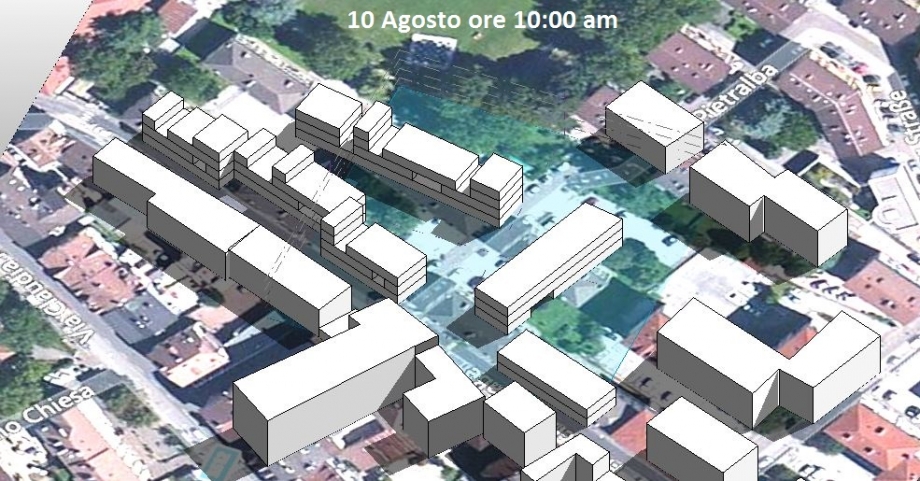
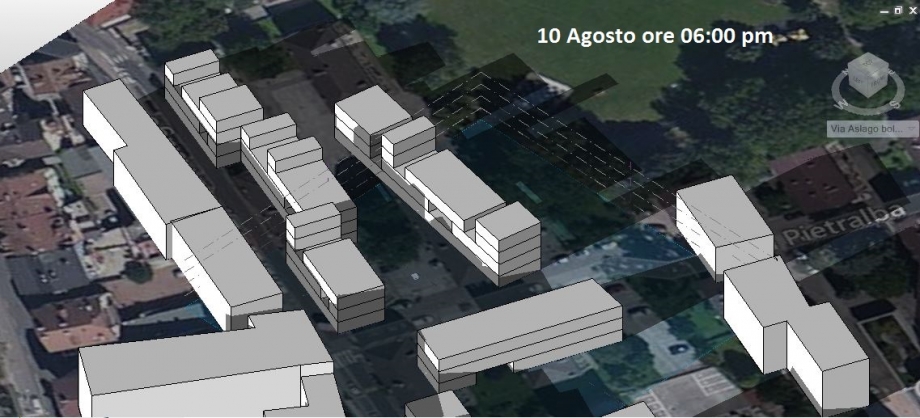
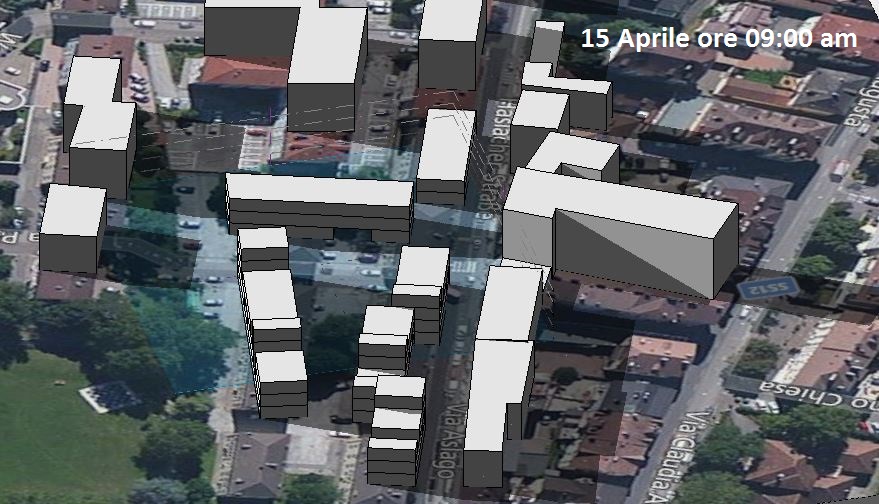
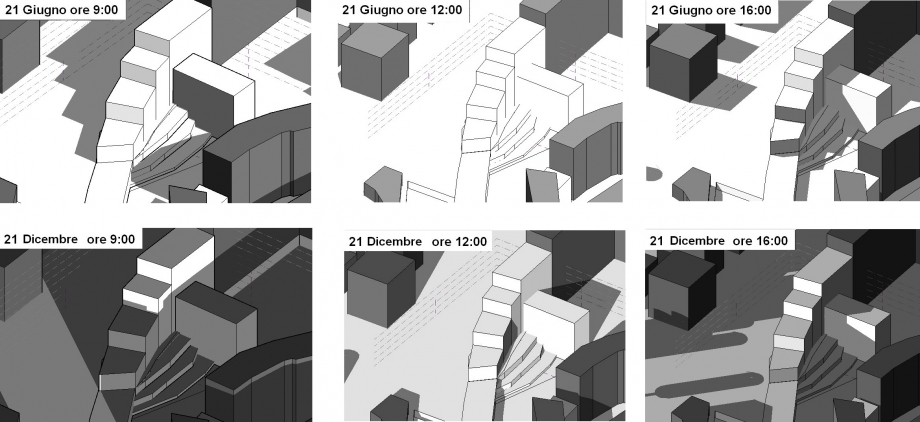
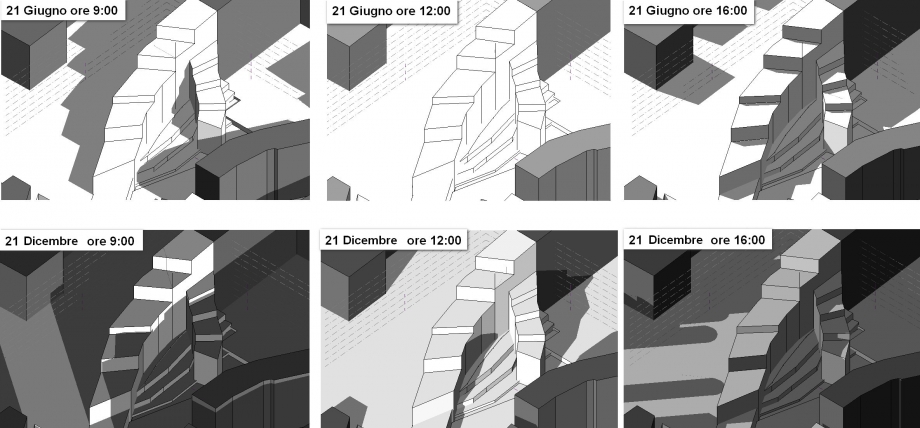
2- Analicis del desarrollo del proyecto de Via Aslago 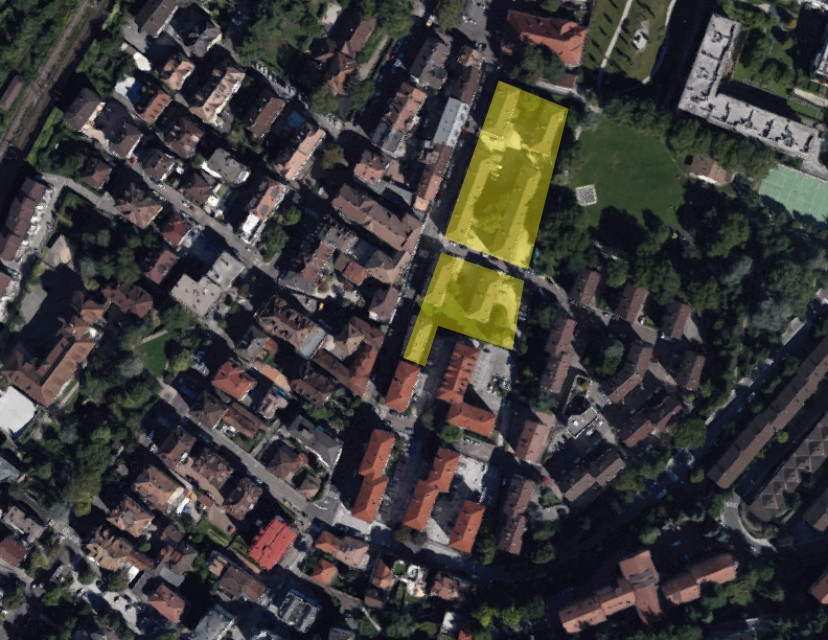
Se muestra el lugar exacto de la intervencion en la ciudad de Bolzano, en el cual se dispone a salucionar el preoblema de la orientacion del sol y de los espacios abiertos y cerrados entre los edificios.
2.1- Asoleamiento en epoca invernal, sin la montaña como factor influyente en el terreno ( 21 de marzo 2015 / 9.00 am) 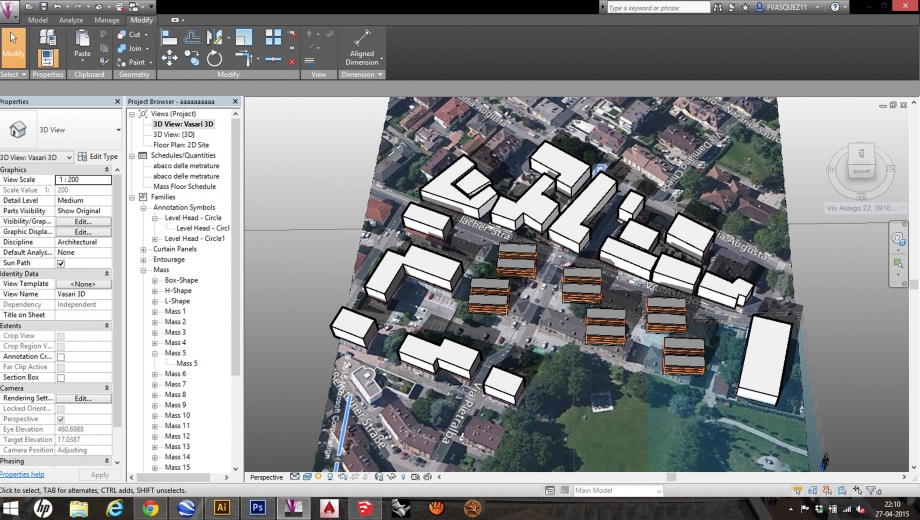
2.2- ( 21 de marzo 2015 / 12.00 pm )
 2.3- ( 21 de marzo 2015 / 16.00 pm )
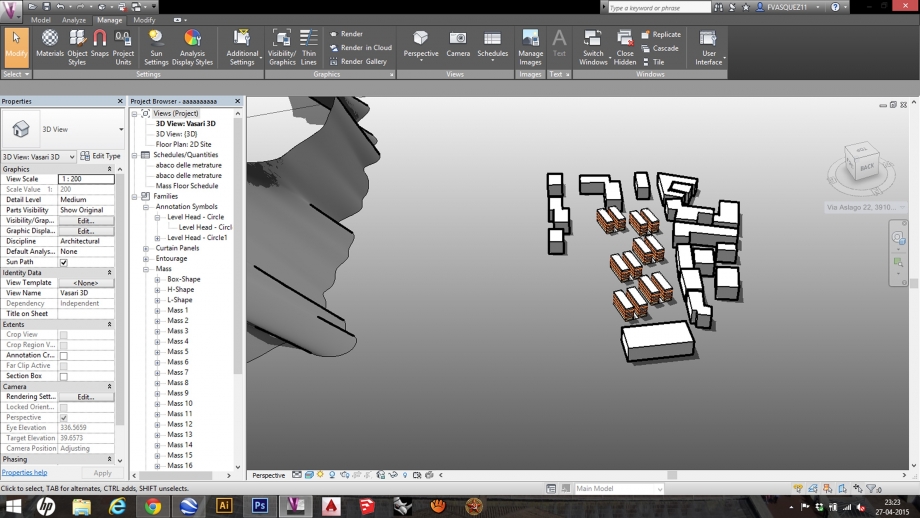
 2.4 - Emplazamiento incluyendo la montaña
2.5- Asoleamiento incluyendo el factor montaña (invierno 21 de abril 2015 / 9.00 am )
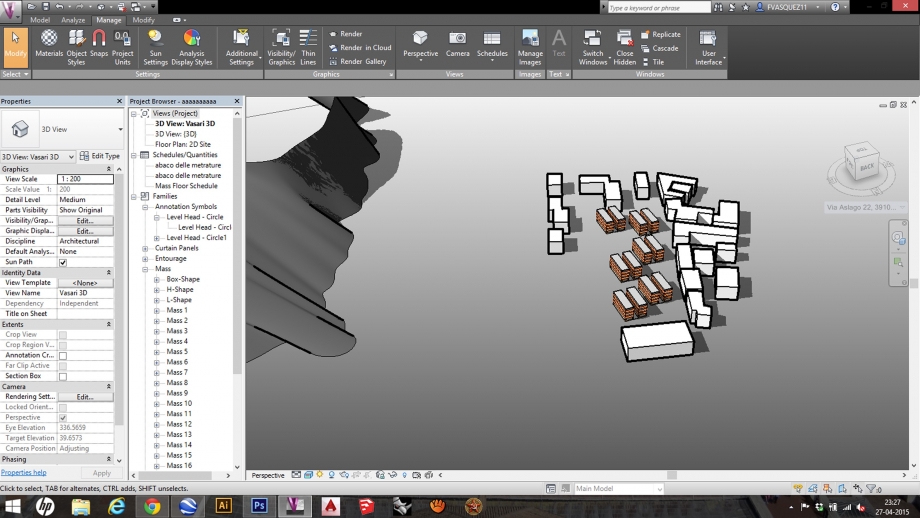
2.6- Asoleamiento incluyendo el factor montaña (invierno 21 de abril 2015 / 12.00 pm )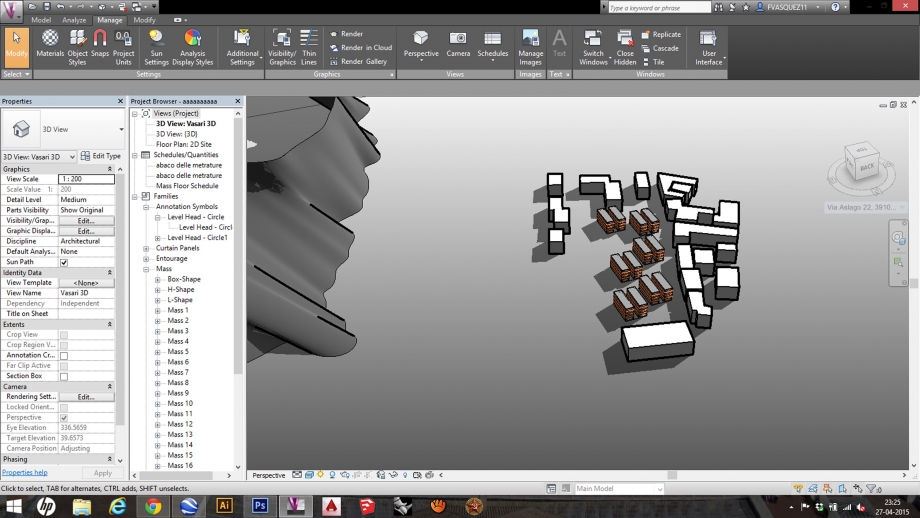
2.7- Asoleamiento incluyendo el factor montaña (invierno 21 de abril 2015 / 16.00 pm )
2.8- Asoleamiento incluyendo el factor montaña (verano 21 de julio 2015 / 9.00 am )
2.9- Asoleamiento incluyendo el factor montaña (verano 21 de julio 2015 / 12.00 pm )

 Adamczyk_DeFlorio
Lun, 27/04/2015 - 21:38
Adamczyk_DeFlorio
Lun, 27/04/2015 - 21:38
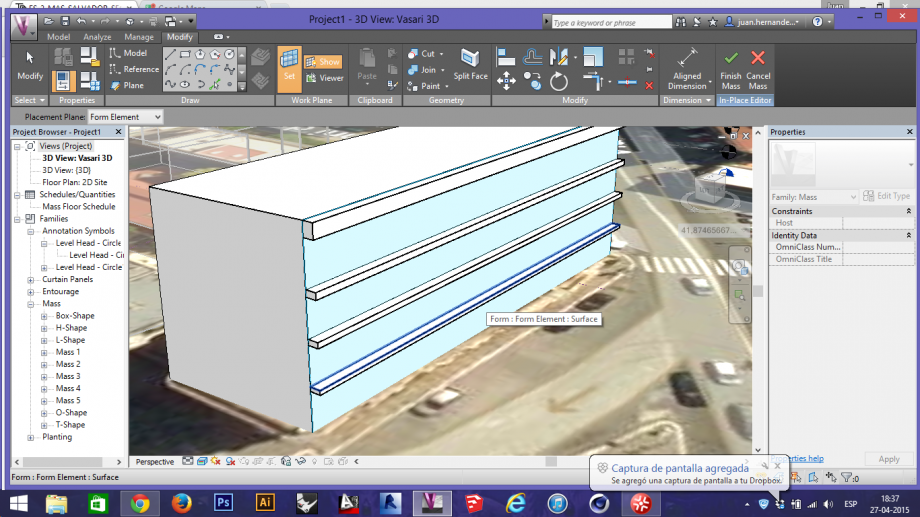
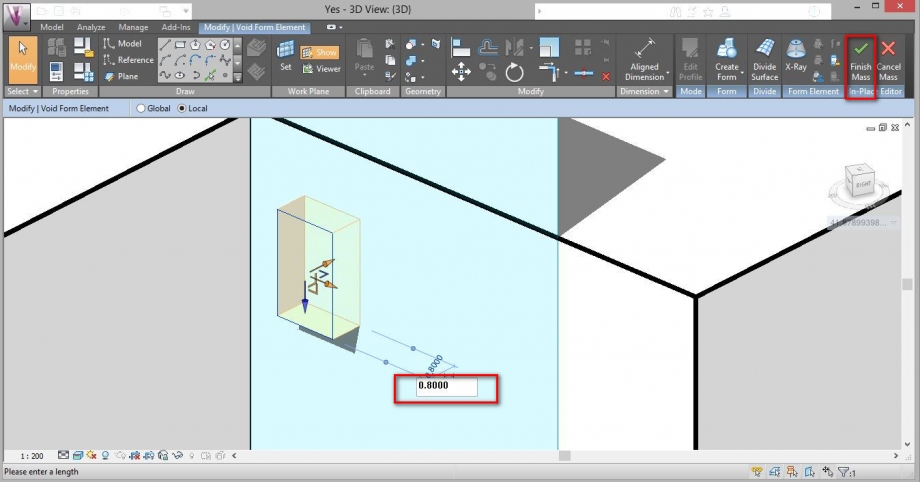
On second step of our delivery, we have to analize the relation between the area mentioned in the first delivery and the solar radiation. For more precision of results, before the true analysis we have to model some details of our building, as windows, balconies, cornices and every mass that can create shadow.
For this, we have to click on a face in which we need to model the elements. Once you selected the face, click on Edit In-Place (on your right) and choose the form or the key that you like more. For example, to draw a window you can select “rectangle” in Draw.
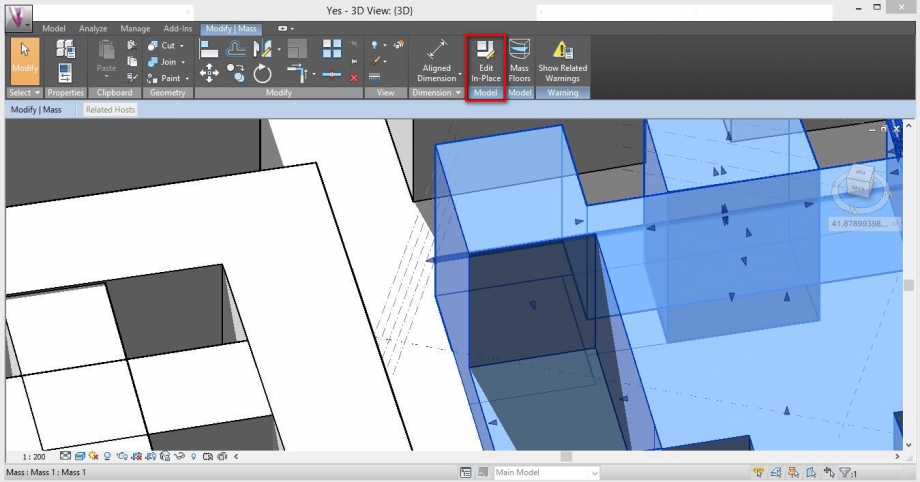

After this, draw the window on the selected face. You can control the lengths in two ways. You can draw you windows with such precision or you can draw the element as you prefer and, after this, change the lengths by clicking on the number next to the windows.
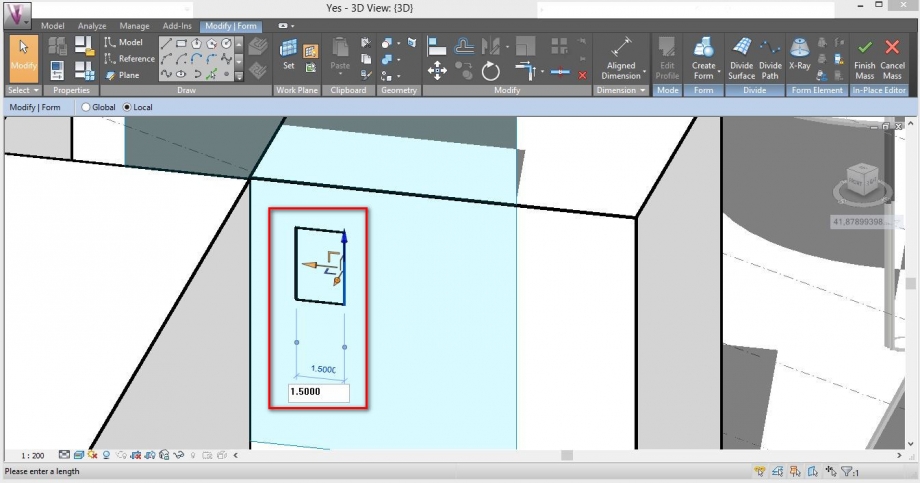
When you finished this, click on the face of the window and then click on Create Form > Void Form.
Again, you have to specify how your windows goes inside the building by clicking on the measures next the lengths. Then click on Finish Mass.
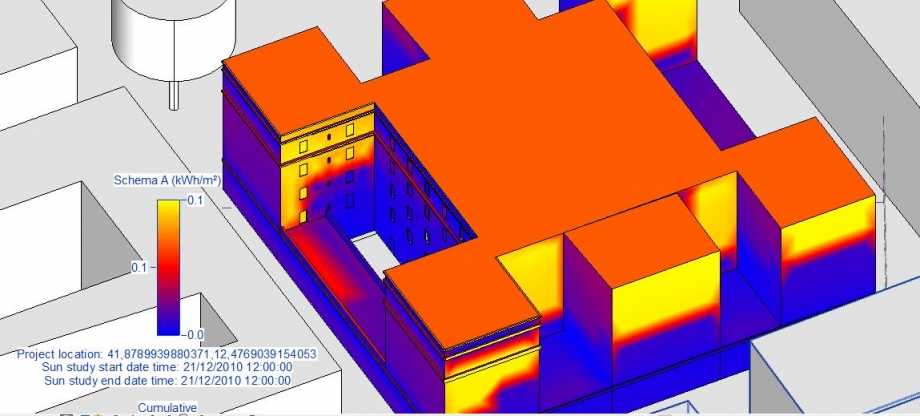
Now we can do the analysis. To start we have to activate the key Solar Radiation. Once you done, click on Analize > Solar Radiation.

It will appear a little windows in which we have to change some settings.
1_Clicking on the arrow we can select some mass faces to analyze.
2_Clicking on the dots, it will appear another window called “Sun Settings”. We want to study the behavior of the building during summer and winter. For this we have to select “Multi-Day” and then “Summer Solar Study”. On the right, we can choose the day and the hour that we want to analyze. We can choose all the daylight by clicking on ‘’Sunrise to sunset”. If you prefer, you can change the “Time Interval” for more or less precision. Check that the ground plane is at Level one!
3_The last thing, you have to change the Unit from BTU/ft² to kWh/m².
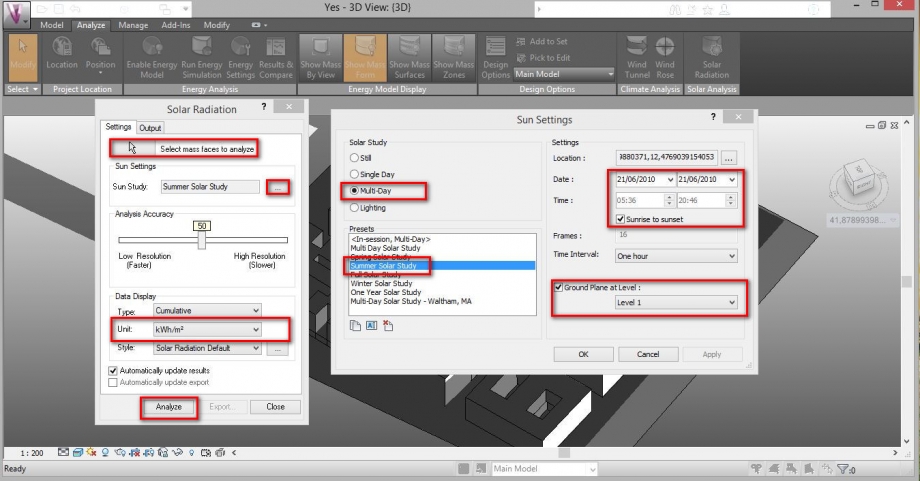
Now click on Analyze. It can happen that appear a window like the follower, if you forgot to select some faces. Don’t worry, choose you preferences.

Now you can see the results of your analysis.
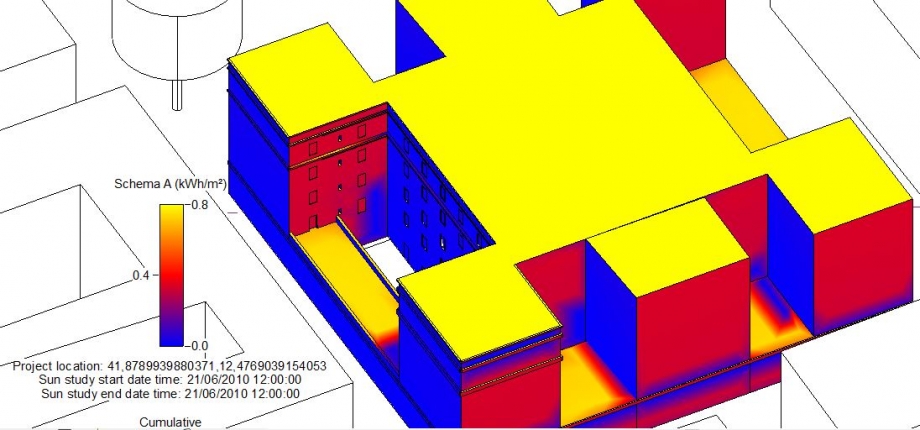
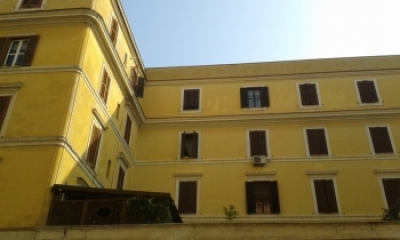
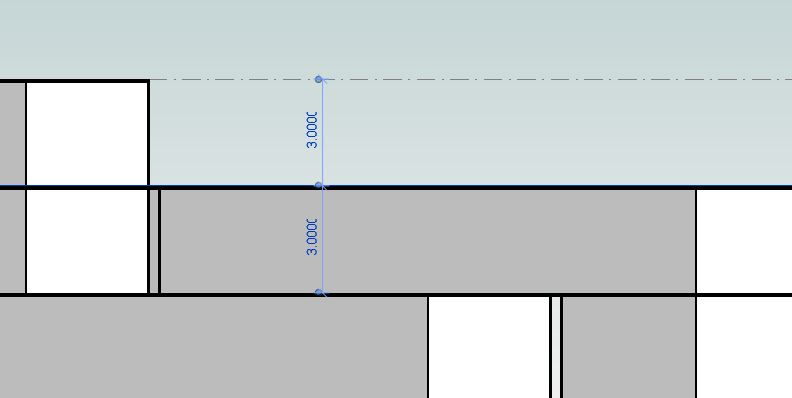
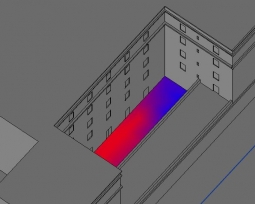
Summer Solstice Analysis: As you can see, the selected face is very irradiated by the strong sun of Rome. This aspect generated a sort of brightening of the wall. In fact, we can note that in reality the color of the face is clearer than other faces. During our search we have talked with some tenants which told us that the apartments are very hot during summer, in particular the top floor is very hot because of the coverage. The lower terrace is not in the shade, in fact the owner of this terrace has built a sort of coverage (“I paid it 3000 euros!” he said us) to make the terrace more comfortable. In the end, we can see how important is the presence of cornices which generate a strong and significant shadows on the south face.
Winter Solstice Analysis: During the winter, the face is half irradiated. This factor generated two important aspect. The first is that in the lower space (a sort of courtyard) we can see some mold and grass or, in general, some dark spots, generated by a moist situation. The second aspect is a different quality of life inside the building. The tenants of the lower floor said us that in general, during winter, the space is not cold (because of a massive wall) but the suffer the lack of light. On other hand, the tenants of the top floor said us that in winter they has a good quality of the space (light and temperature).
One Year Solar Study: In general, during the year we have a uniform irradiation on the whole south face. The different color of pattern or the presence of mold and spots in different points of the face, is caused by the different intensity of the sun during the year.
Behind our building, on north face there is an important square called “Piazza Testaccio”. Despite of the square is near some buildings, there is not very important shadows on it. In fact during the whole year the square is very irradiated. In winter this aspect creates a good situation because the square is irradiated in its whole extension. On other hand, during the summer the square is very irradiated too, but the strong sun of Rome doesn’t make very nice the life on this square. There are a series of tree along the perimeter of the square but they are not sufficient to have a comfortable situation.
Here there is three images about the square in summer, winter and about the whole year:
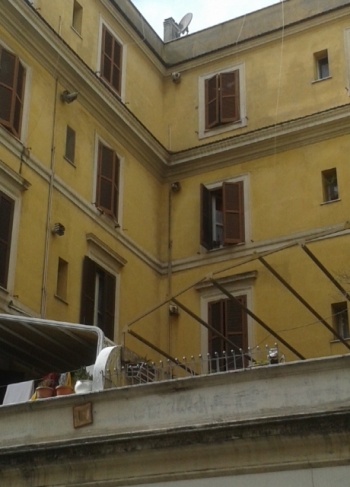
Before the main entrance, there is a little courtyard that present two different and interesting situation during the year. In winter, this space is dark and cold. In fact in the lower corner we can observe some mold and stain. During the summer the situation became better just for half area. In fact in the south corner there is a strong shadows caused by the buildings. On other hand, in the north corner the sun can irradiated the wall and the floor. In this part of courtyard in fact there isn’t some mold or stain. In general, the situation of this courtyard is not a problem for the tenants, because this is just a space in which the people going through.
Here you can find three images about this courtyard in summer winter and about the whole year:

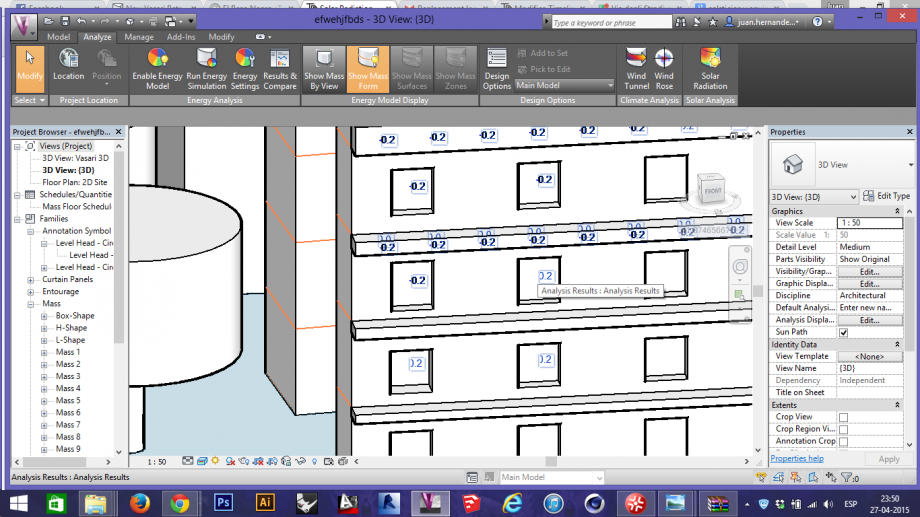
For more accurated analysis, we have to change the method of the analysis itself. In fact, the previous system is not suitable for some elements like windows on in general every glazed element. For this reason, we can analyze the surface with a second method.
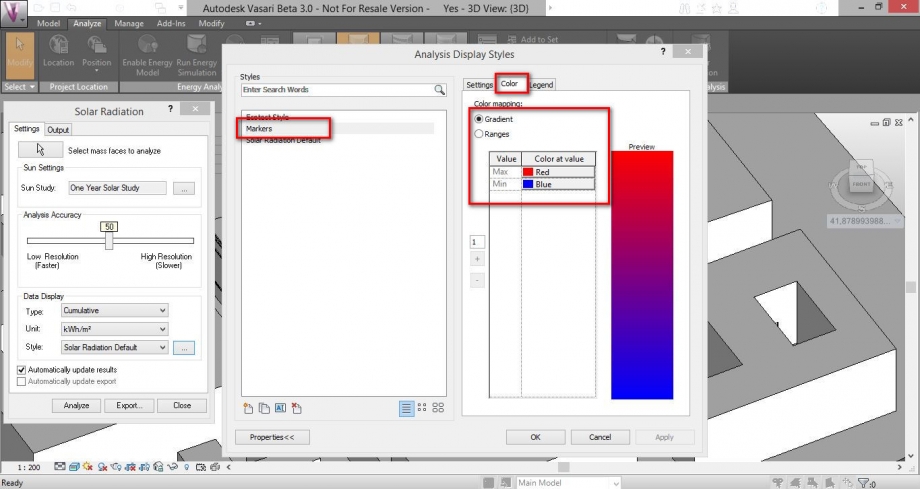
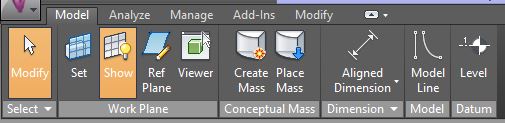
To start, click again on Solar Radation. In the window that will appear you have to change the style “Solar Radiaton Default” with another new style. To create a new style, click on the next dots. It will appear a new window (like in the follower image). Click on the key “New Style” (low on the left) and then click on “Markers with text”. Then, enter a new name as you prefer.
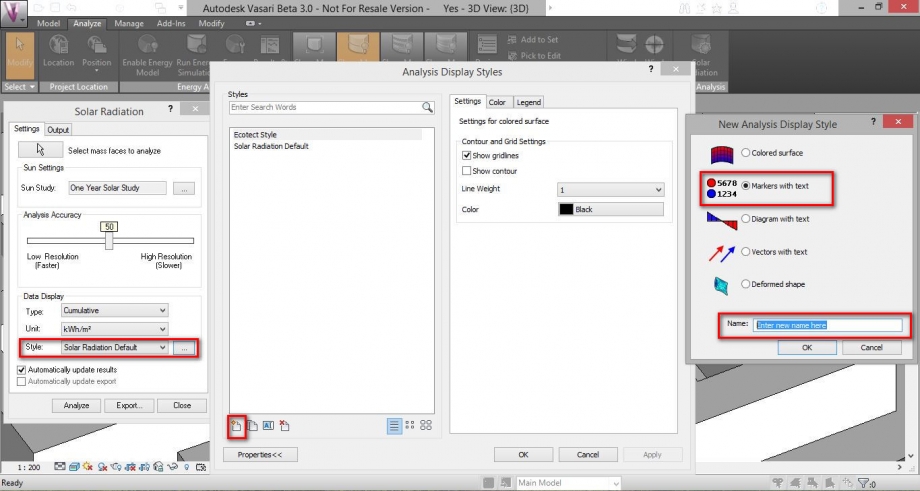
IMPORTANT: When you created a new style, you can see on your right some new settings. Click on “Color” and then you have to reverse the color of default. Choose Red for Max and Blue for Min. After that, we can start our new analysis.
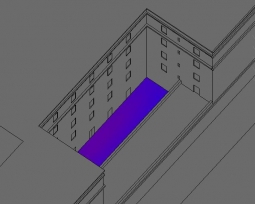
Second Method Results:

From the last analysis we can understand how important is the lack of protection. In fact, we have some high values. How we can see, the values become higher until the coverage. This fact is caused by a stronger irradiation next to coverage. Despite of this fact there isn’t some protection. To solve this situation, the tenants can close the shutters, losing diffused light too. To avoid this problem, when we are designing something, it is possible to draw back the windows, inside the building. In this way we have a shadows that protect our window. In the previous picture, we can see an analysis about the whole year.
Project
We made the same analysis about the area of project. This sace is located in Rome, in Municipio Roma XII, not very far from the center of the city. The area is next Viale Trastevere.
For this delivery, we added the geographic position of the area dell'area and then, we designed the contest.
At first we studied this space in winter solstice and in summer solstice., It is possible to note how the buildings next to te area are not important to study the shadows, except for the early hours of the day..
We want to creat an urban space and a residential space, so we thought to create a little square between two building positioned in the right way to obtain a good energetic level.
First idea:
In the first idea, the building looks like the letter “T”. In fact it is composed by two buildings: the main is along north-south and the secondi s along east-west. We made a first analysis (in summer and winter solstice), and we noted how the coverage of the main building is very irradiated, with the space of the “square” too. On coverage, we thought to put some public services, often organized according to Raumplaum. There are some solutions to limit the irradiaton:for example we can put on the square some tree which during winter lose their leaves. The square itself is protected by the main building already at 16:00. This aspect, can make a nice space in our square. During the winter, at 12:00 the east face of the main building ovestis irradiated. For this we can have a little energy advantage.
Second idea:
In the second idea, we thought to turn the vertical face on the coverage, to understand what changes we can obtain. In addition, we played with the orientation of the two building, to understand how we can use their shadows. For more details, we used the solar radiation.
First Hypothesis:
Second Hypothesis:
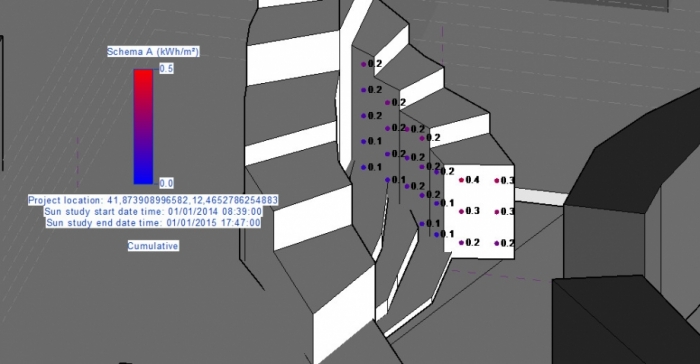
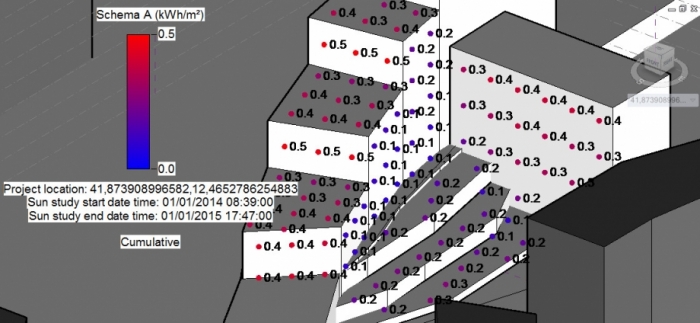
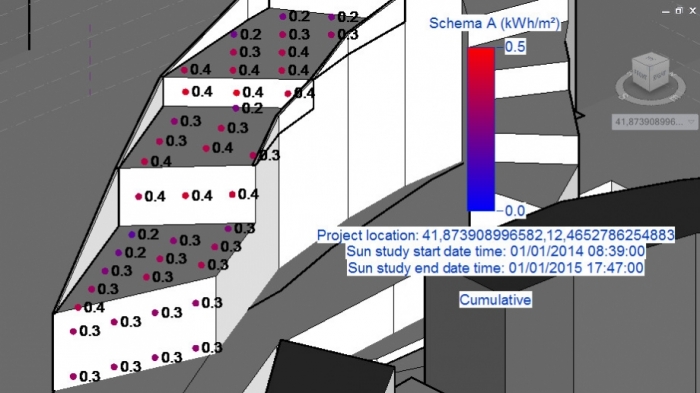
The amount of solar radiation on east face of the main building is costant in the second hypothesis too. However, the behaviour of the south face of the second building is different. In fact at first we have sie values like 0,2kWh/m2-0,4kWh/m2, and then some values like 0,1kWh/m2 e 0,2kWh/m2.
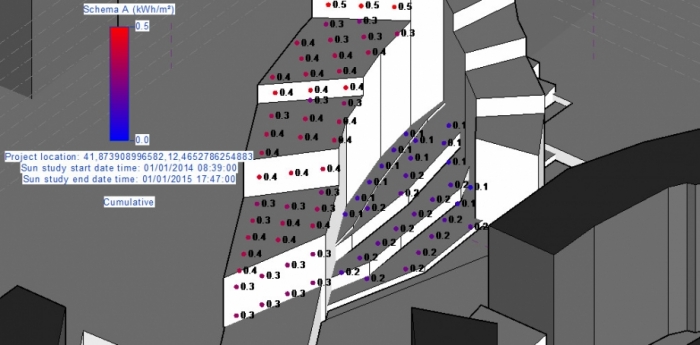
We can note and in the both hypothesis we have the same values about the space next to the square. On other hand, the values about vertical face of main building, get off from 0.4kWh/m2 or 0.5kWh/m2 to 0,4kWh/m2, almost on every surface.
For the second hypothesis, we are thinking about a brise-soleil on the whole west face. We made the concept of this barriesrs but the work are still in progress.
It is possible to note how this barriers protect the surface during the summer, but can’t stop the radiation on vertical face. For this, we are thinking about a particular kind of brise soleil.
Analysis of the building
The follower steps show you how we analyzed the values about the extension of every floor that compose our building:
1_Click on Model, and (on the right) click on Level to add some levels.
1a_To rename the new level, click on the level itself and than on its automatic name.

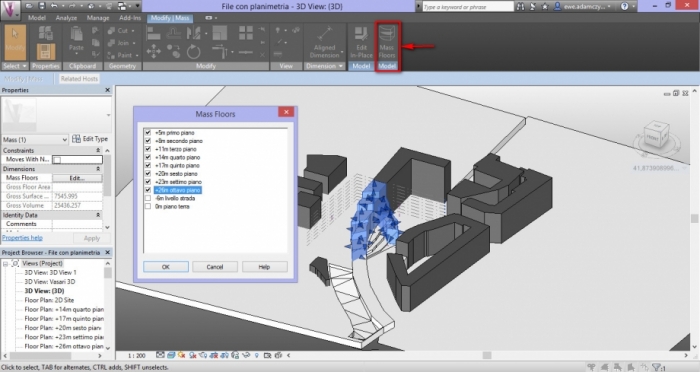
2_Select the building and then click on Mass floors. After this, click on the key about levels, to make visible the levels that meet the considered building.
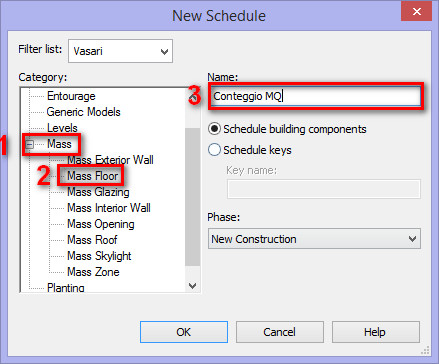
3_Click on Manage> Schedules>Schedules/Quantities, to create a new card.

3a_Click on Mass and then on Mass Floor, after you added the new of the new card
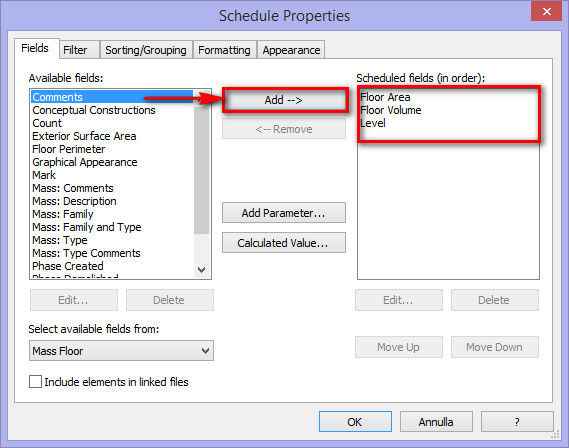
3b_From the menu on the left, you have to choose the keys “Level”, “Floor Volume” e “Floor Area” by clicking on Add.
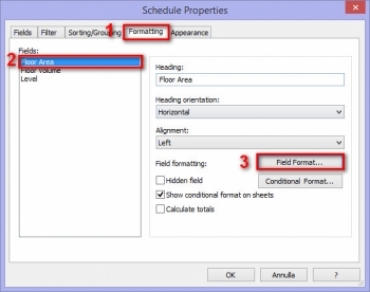
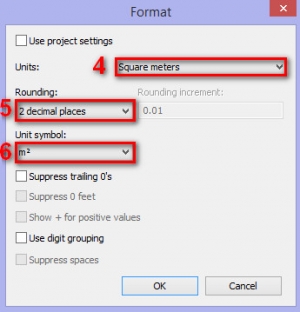
3c_Click on Formatting, to modify the settings about the keys that you choosen. In Fields, you can select the key which you want to modify and then click on Field format. In the new indow, you have to change the unit of measure to m2. You have to follow the same steps for every key in Fields.
4_Now, you can see the card with every aspect about the your levels. In particolar, it is possible to understand floor area and floor volume.
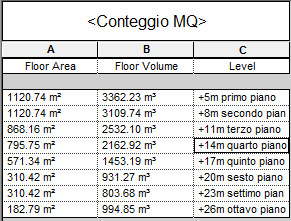
In our case, we have 5274 mq, that is the same of the value of the project.
Lun, 27/04/2015 - 23:18