


 Lollobrigida_Lugni
Lun, 11/05/2015 - 15:40
Lollobrigida_Lugni
Lun, 11/05/2015 - 15:40
Premise
3D tree modelling is a quite important skill for every architect. Indeed the ability of creating quality in space and handling it consciously is the main task for the professionals. Managing in making it run correctly is what actually defines a good exterior (and why not interior) designer. Trees are just like any other archtiectural element, such as walls, floor planes, projections and so on. Since they especially represent a beauty delivering object by themselves, we must not consider them as mere final instruments for the designing process but as primary elements. If not so, the quality of the space we are forming surely fades away. Trees cast fine shadows, the adjust temperature and humidity, they define space, capture visual forces in they foliage, get the attention for their details.
Choise and Description
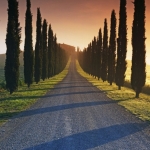
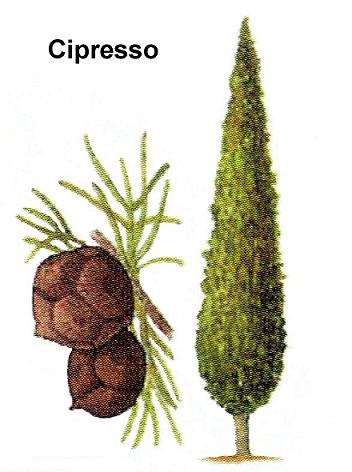
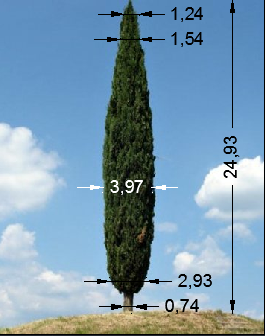
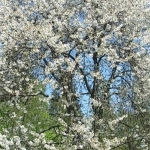
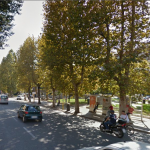
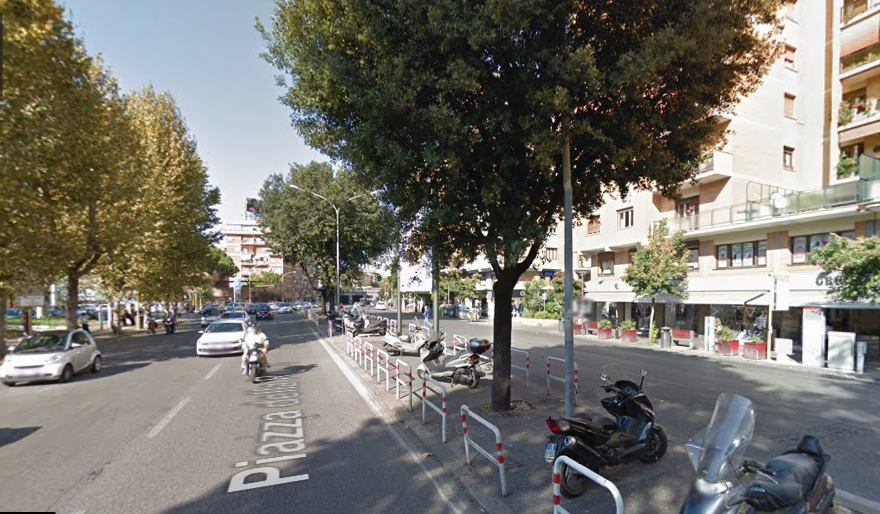
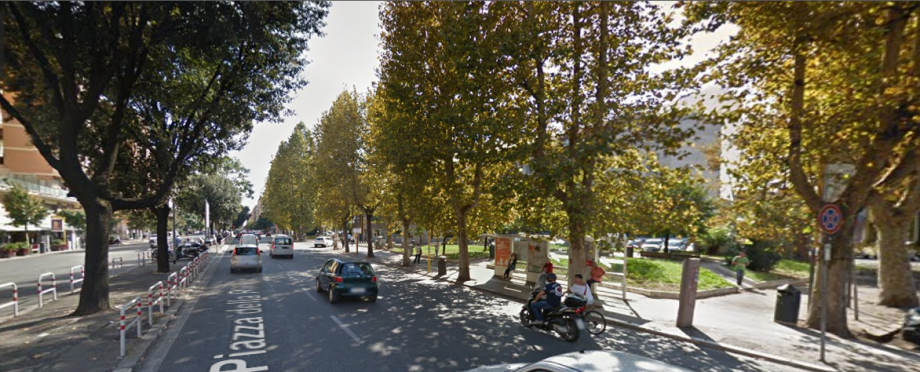
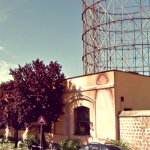
Now, let us choose our repesentative tree. As shown above it is clearly the cypress, aka cupressus sempervirens. The name itself reflects its strenghth. It is also called Mediterranean cypress (or Italian cypress, Tuscan cypress, graveyard cypress or pencil pine). Native of the Mediterranean region, it is a medium-sized coniferous evergreen tree, 25 to 35 m tall, with a conic crown and level brenches. The oldest trees can grow up to 45 m. Very long-lived, some trees have been reported to be over 1,000 years old. Its foliage grows in dense sprays and dark green in color. Such foliage is very peculiar and in time various species have been selected and breed for ornamental purposes so to enhance its prerogative. Now different species exist, some have conic crowns, some have piramidal crowns, although often it depends on the way it is trimmed. It is also used in bare and bleak lands as windbreak.
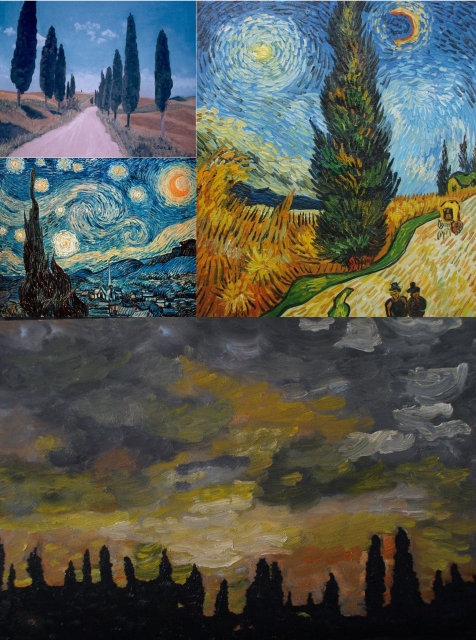
In the international community, cypresses are frequently associated with the italian landscape, particularly Tuscany (in the Italian community as well). They refer to peacefulness, tranquillity and, as obvious, rest. In fact its roots grow down vertically so they do not damage the graves. Over time it has actually been depicted abundantly in drawings that recall such sensations, Van Gogh and many other artists for instance.
Vasari's Tree Modeling Procedure
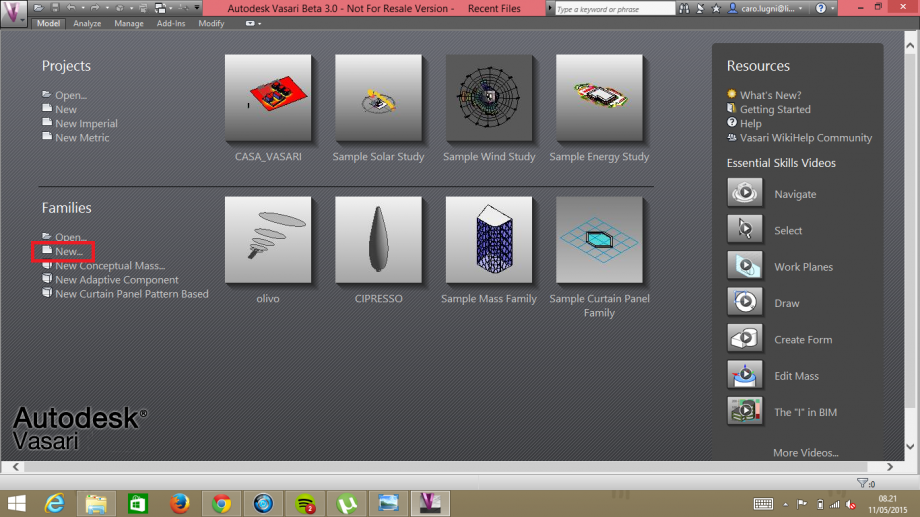
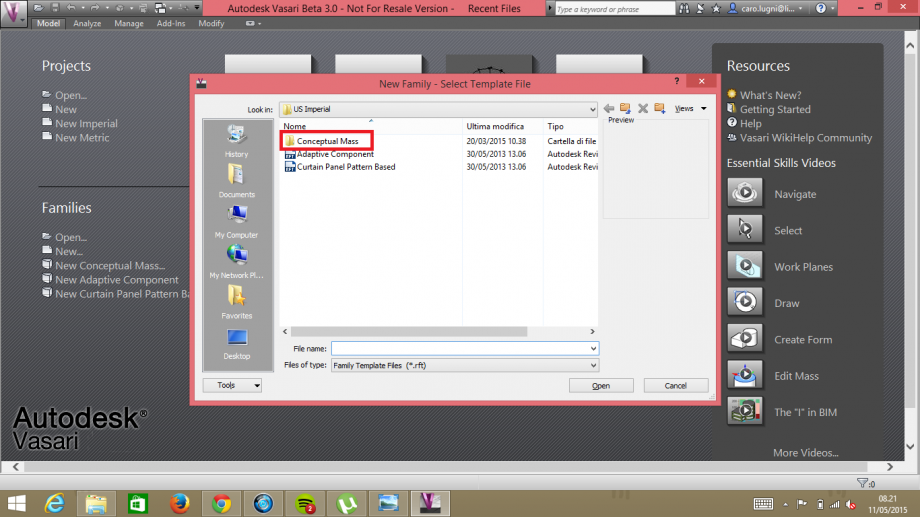
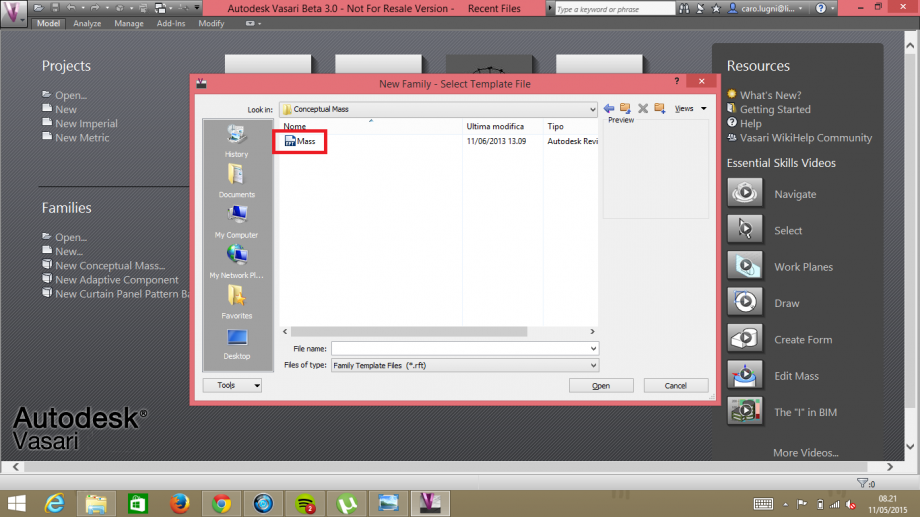
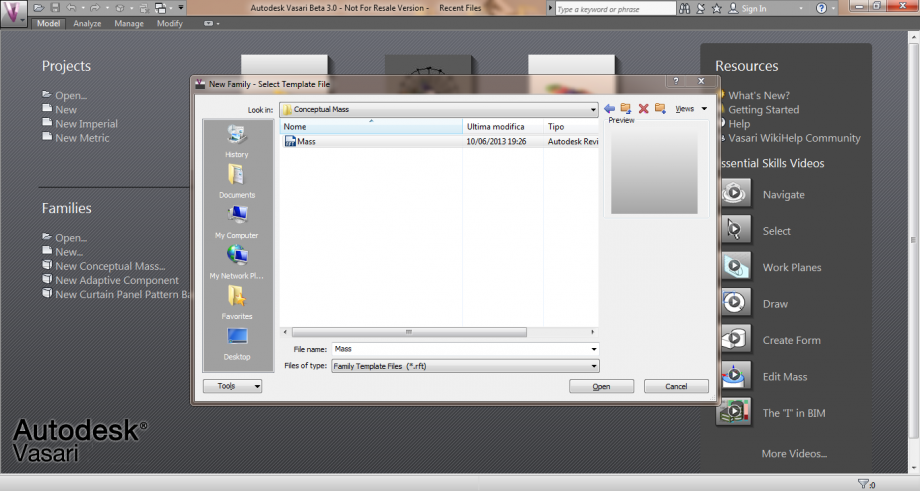
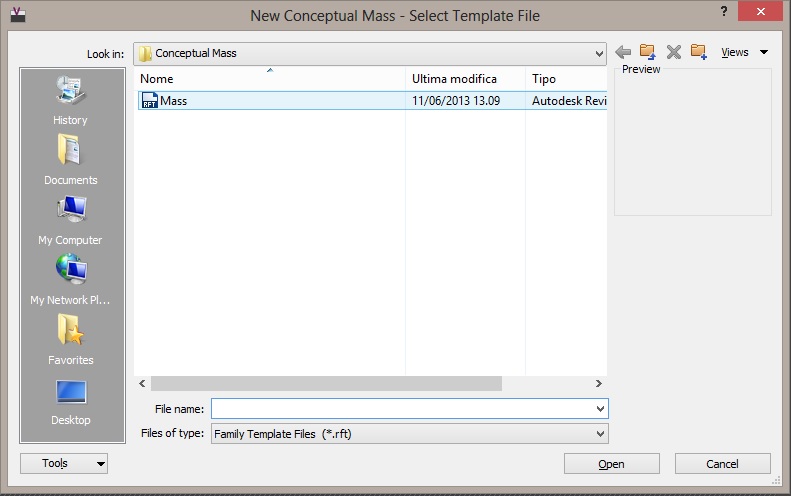
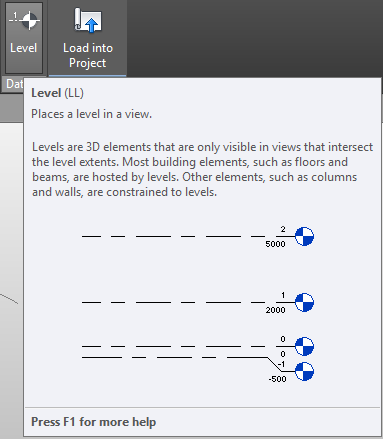
The first step consists of opening a new file. Mind that it has not to be a simple template file but a family template file. Do so by clicking on New > Conceptual Mass > Mass.
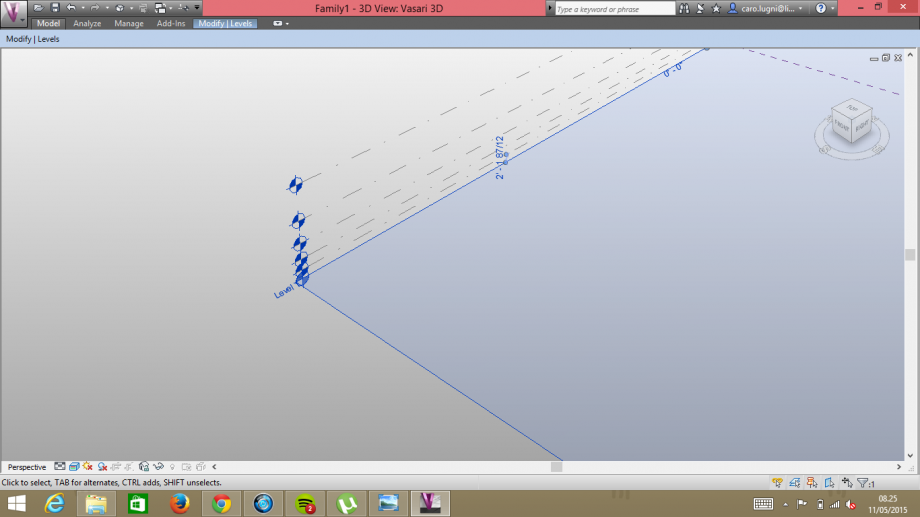
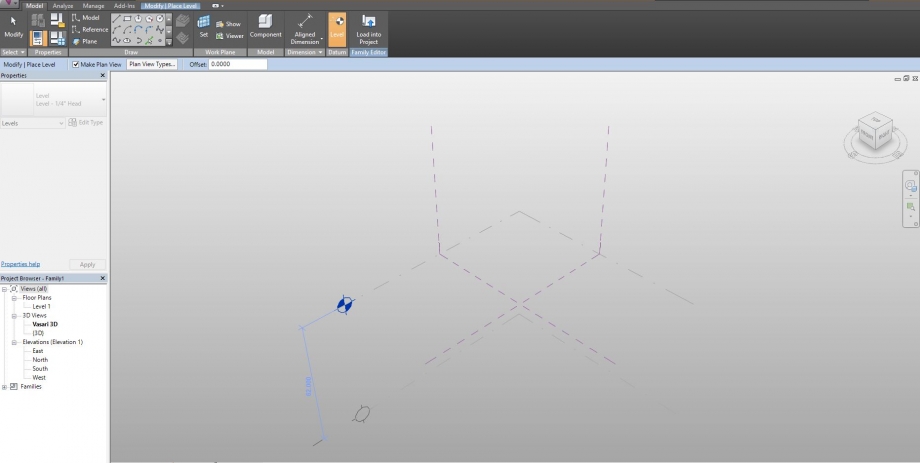
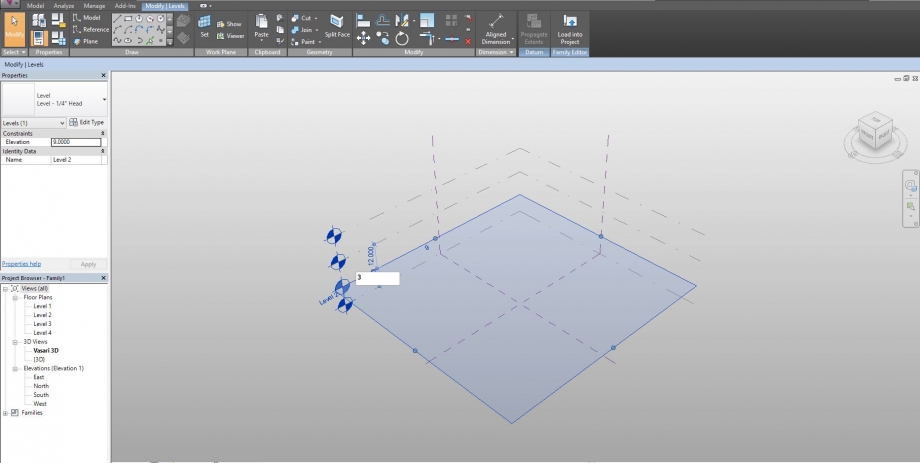
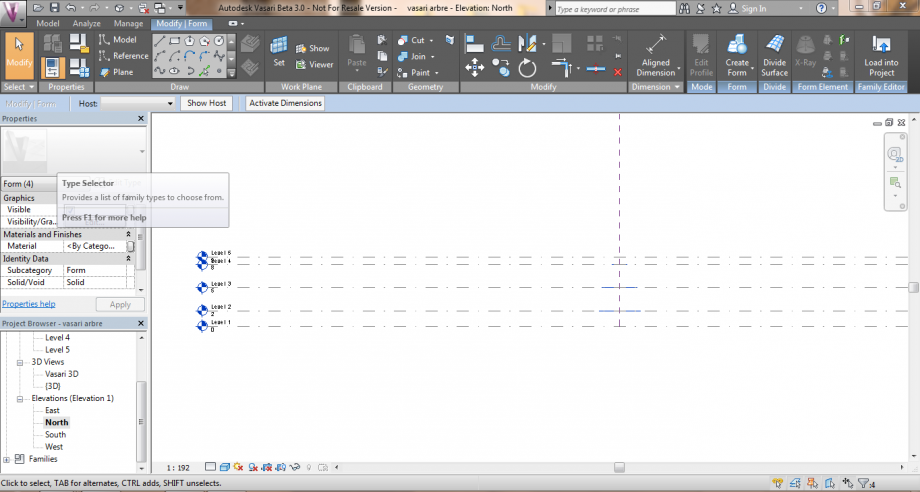
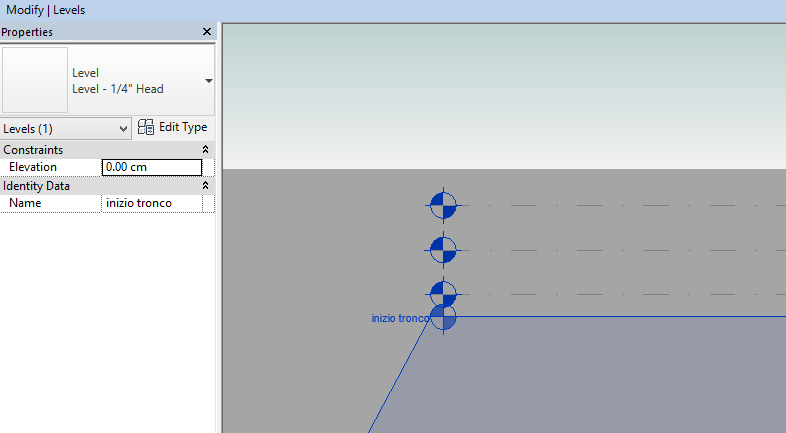
Create the levels. Place them in the right height according to the shape of your tree. Use a picture of your tree as reference, possibly with a axonometric view. Rename the levels in order to make the following steps easier for you. Click on Modify > Levels
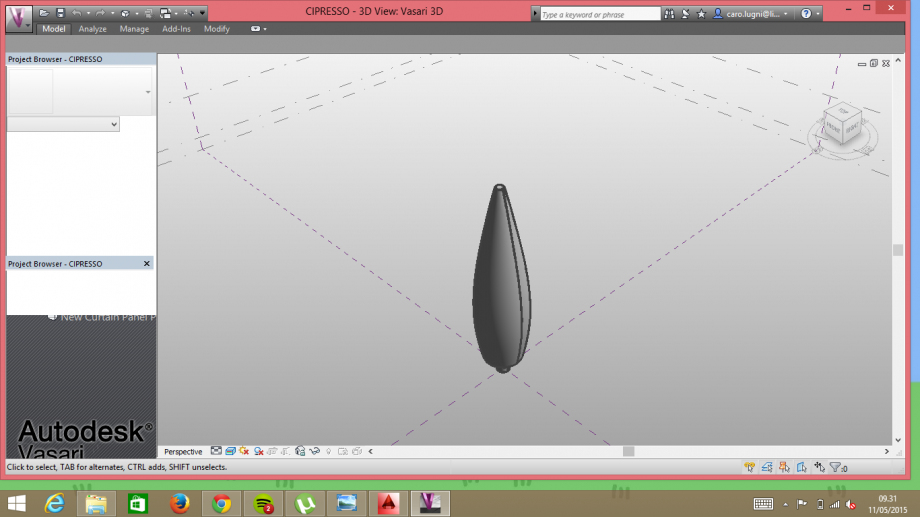
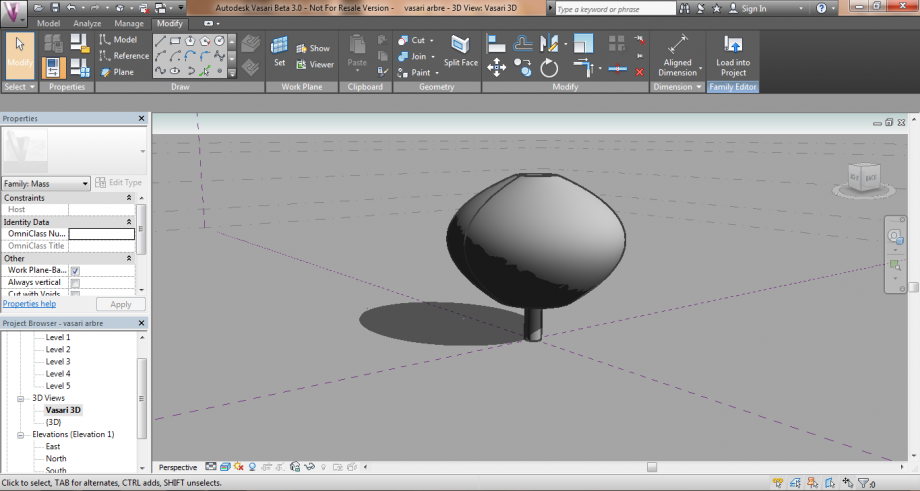
Let's model our tree. Start from bottom to top. Set the right level and draw the section to extrude. In our case we are setting the base of the trunk. Do so by clicking on Modify > Create Form > Solid Form
Once you extrude the form, you can block the last level of the trunk so that if you need to adjust the height of the foliage base you will not end up with a trunk crossing the leaves. If done properly the whole foliage will go up along with the trunk.
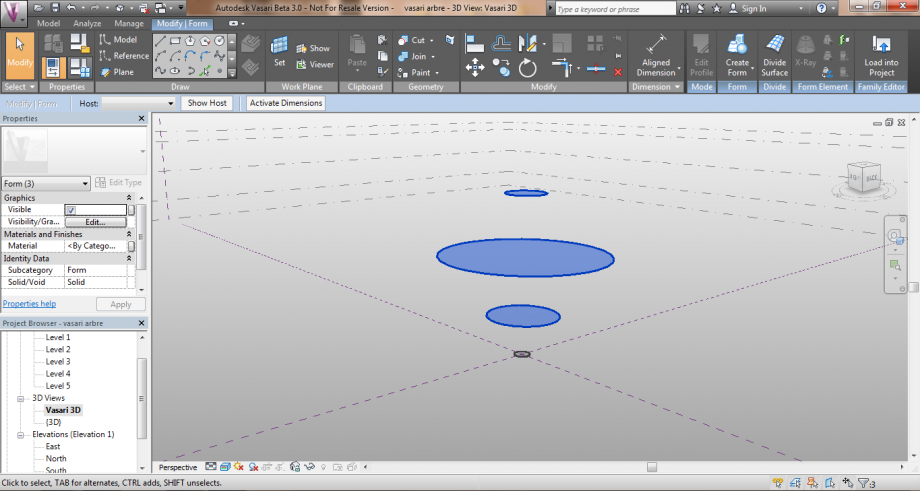
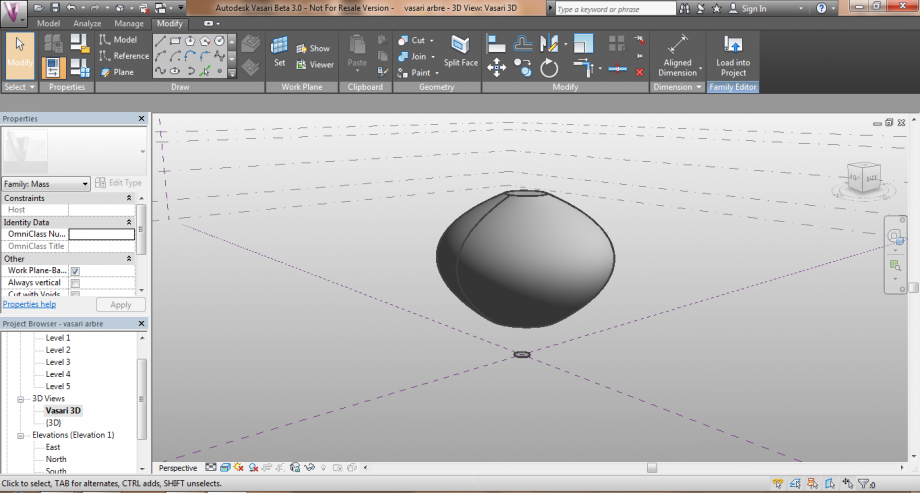
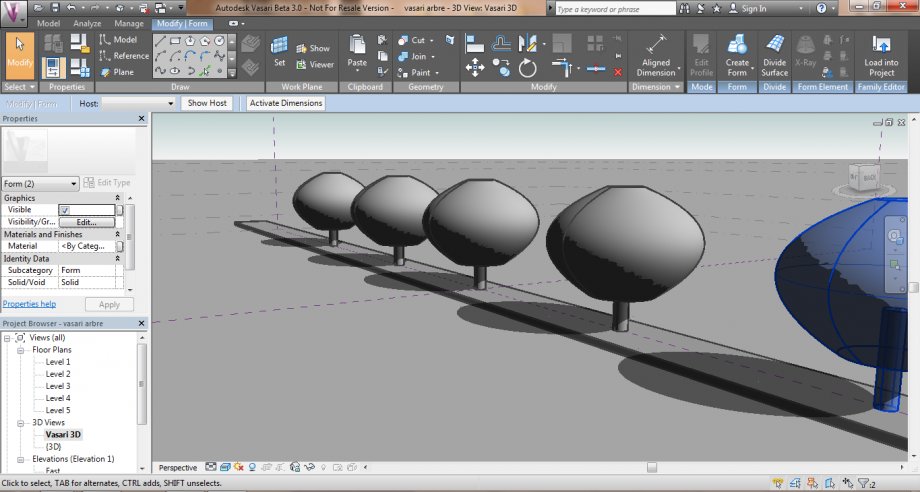
Set the planes of the crown on the right levels. Then you can automatically create the volume of the foliage by clicking on Create Form > Solid Form
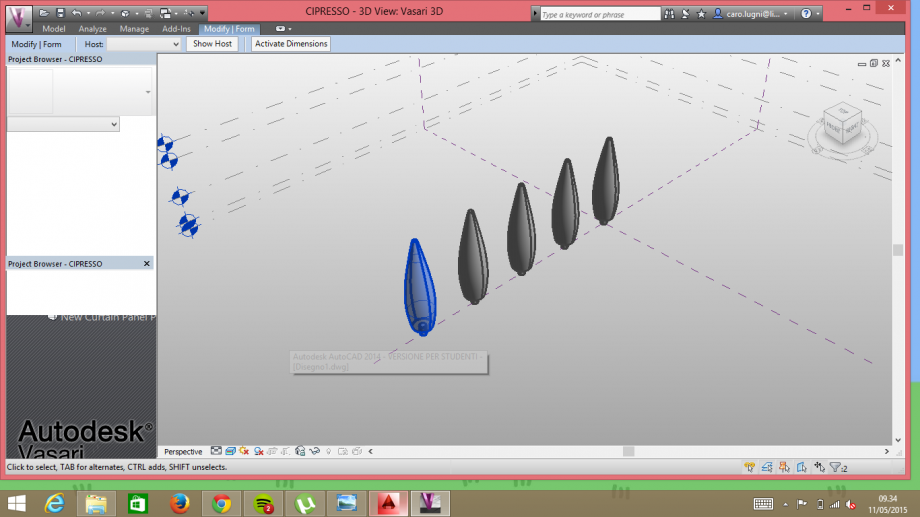
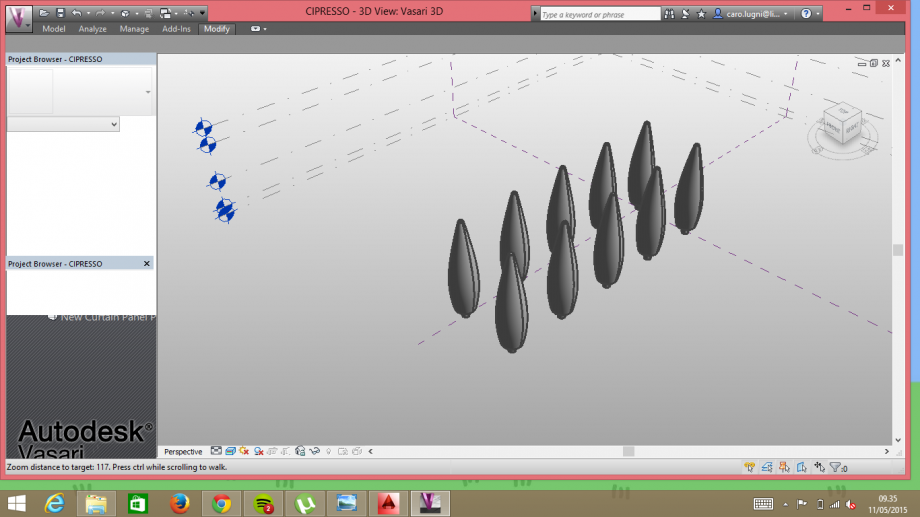
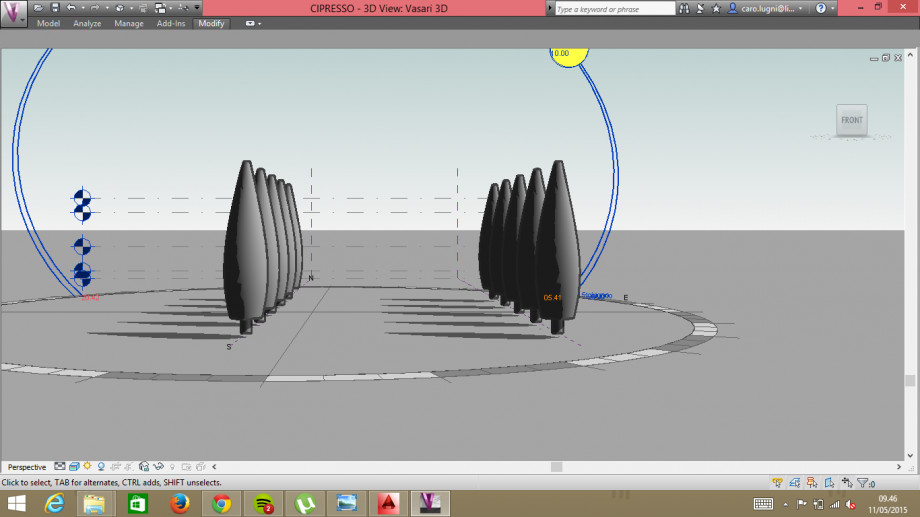
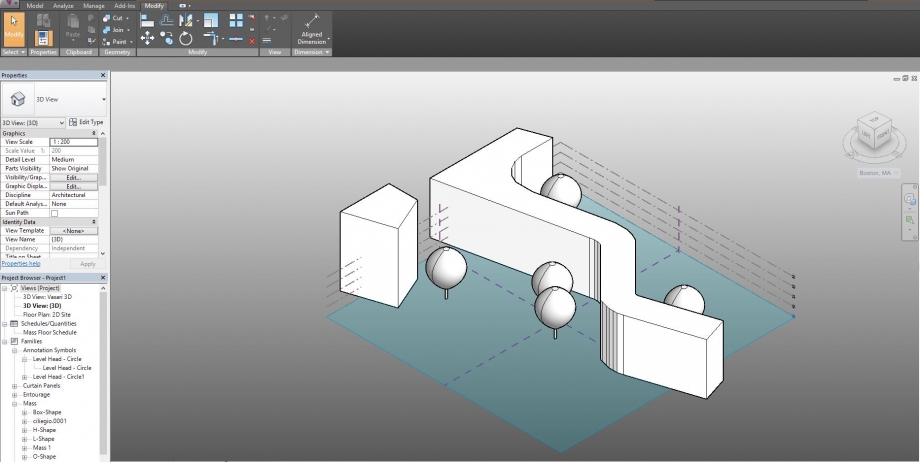
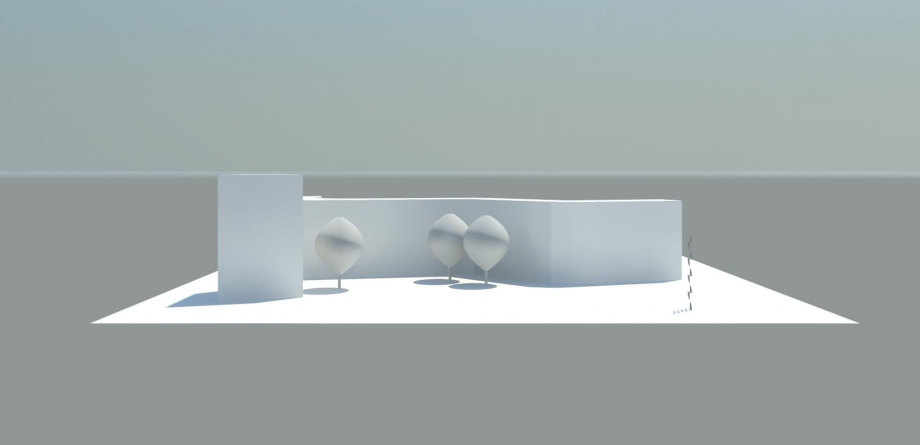
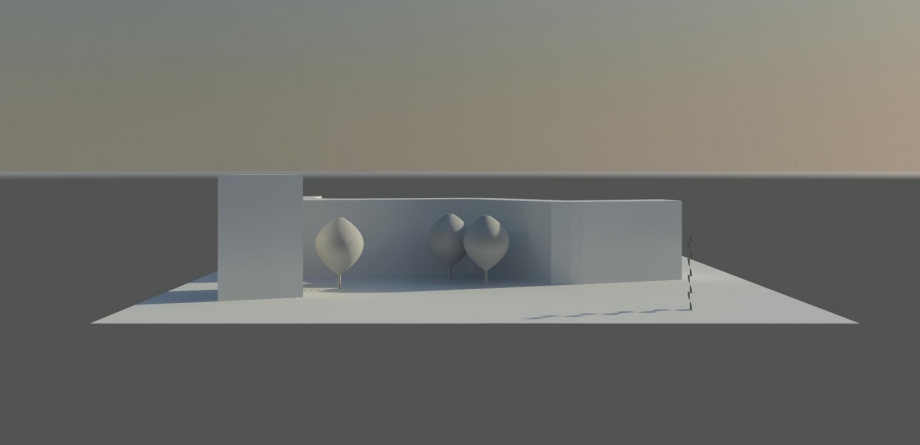
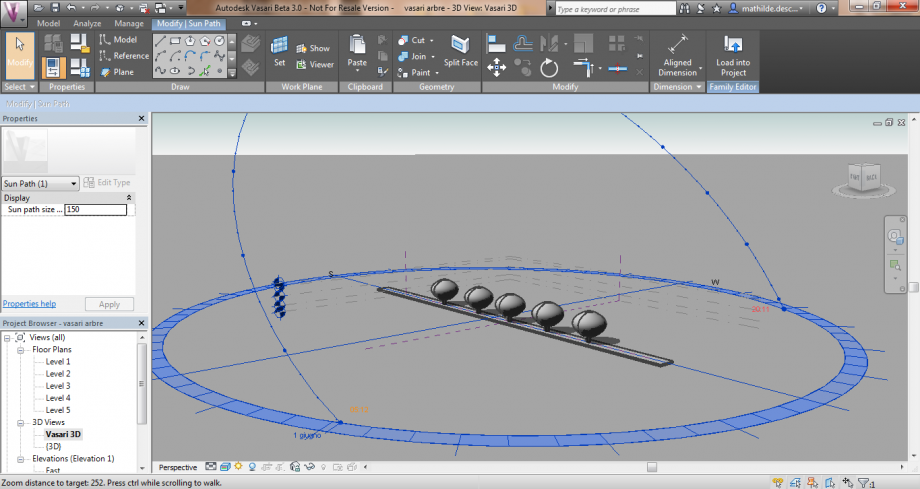
We now wanted to analyze the shadow setting created by a traditional tree arrangment which is the row of cypresses typically seen in the countriside. We did it by copying the tree we previously made along a line, then by copying multiple trees on another line parallel to the first. This is the result.
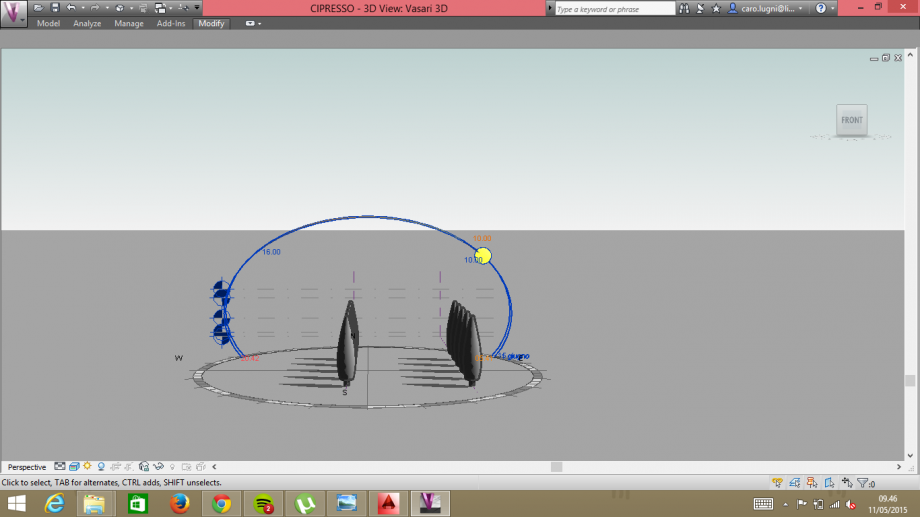
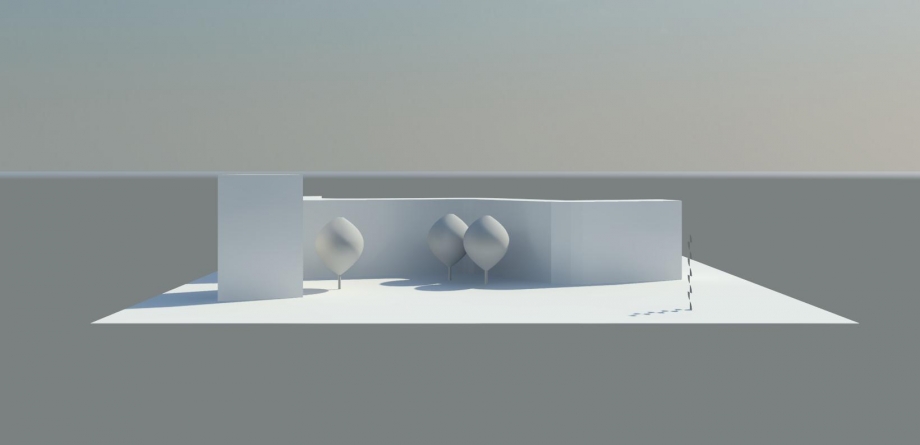
Set the shadows on and the set date and time. The final result is impressive and very similar to the reality. We set 10 a.m. and summertime.
Cypresses are streamlined trees, they define space by creating a precise corridor between them both in terms of space, planes and volume. This makes them ideal for defining walkways and portals. For most of the trees, the shadows on the ground are joined together because their foliages are actually connected one to another once the trees grow older, so that there is no modular definition on the floor (while there is one through space thanks to their trunks). Moreover common trees have very wide crowns, like umbrellas, so during the summer they can protect people from direct sunlight, but on the other hand their shadows have very high impact in wintertime. As for cypresses, they do not represent a valid source of freshness nor sun protection since their trunks are relatively short and the foliage is narrow and low. However they cast wonderful shadows on the ground, and their relationship with the trees creates an interesting game of verticalism and orizontalism and an especially architectural succession of lightness and darkness.
Lun, 11/05/2015 - 16:03
 Bianchi_Cinotti
Lun, 11/05/2015 - 14:20
Bianchi_Cinotti
Lun, 11/05/2015 - 14:20
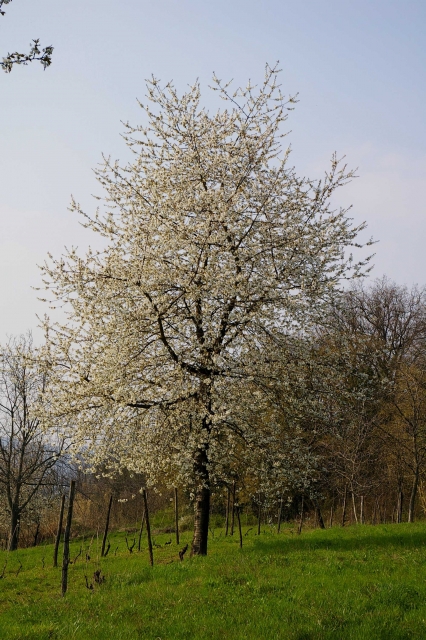
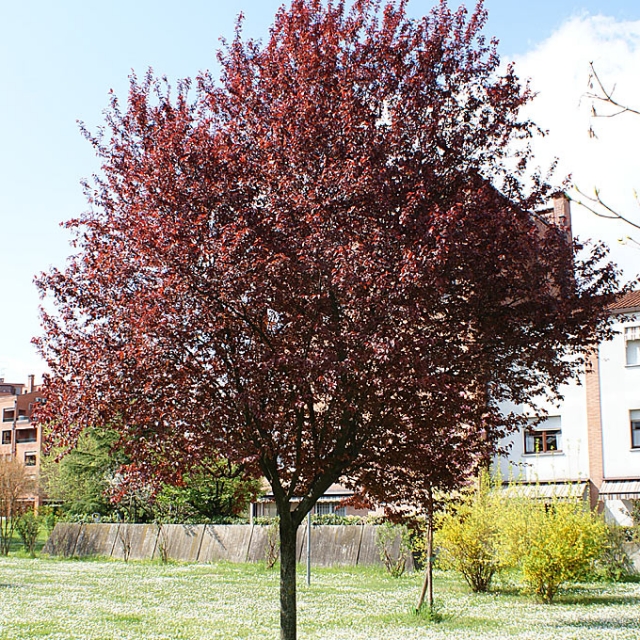
Procediamo in questa esercitazione con la modellazione di un albero 3D. L'analisi è stata effettuata su un albero di ciliegio, molto apprezzato per le sue colorazioni primaverili e per le sue caratteristiche di adattabilità e resistenza al freddo.
Le dimensioni medie di un Prunus Avium variano tra i 15 e i 30 m di altezza e tra gli 8 e i 12 m di diametro della chioma. Il ciliegio è un albero deciduo, perde cioè tutte le sue foglie durante le stagioni invernali. Vive circa 100 anni ed è molto esigente di luce, caratteristica che lo rende perfetto per essere posto in aree molto soleggiate e che necessitano di essere ombreggiate, come nel nostro caso in cui la conformazione dell'impianto progettuale genera un grande spazio aperto esposto a Sud-Ovest.
Modellazione dell'albero su VASARI
1_Avviare il programma e scegliere New Conceptual Mass nella sezione Families. Si aprirà una finestra che ci permette di scegliere un file template denominato "Mass", clicchiamo su Open.

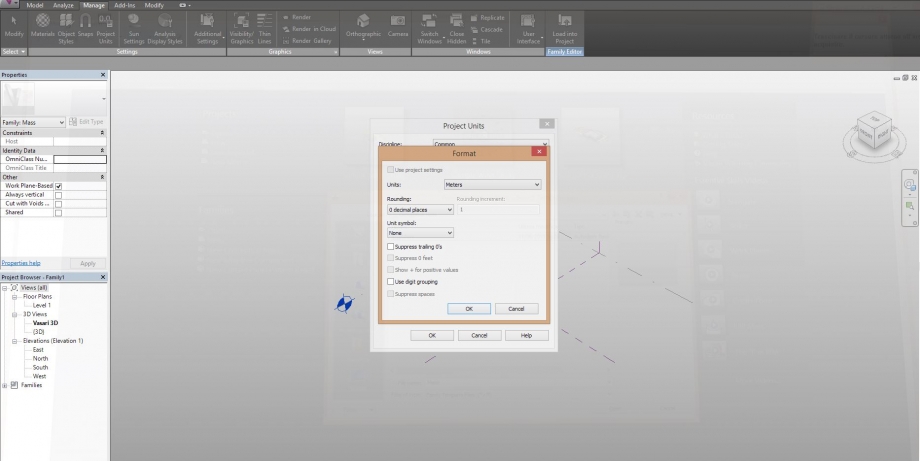
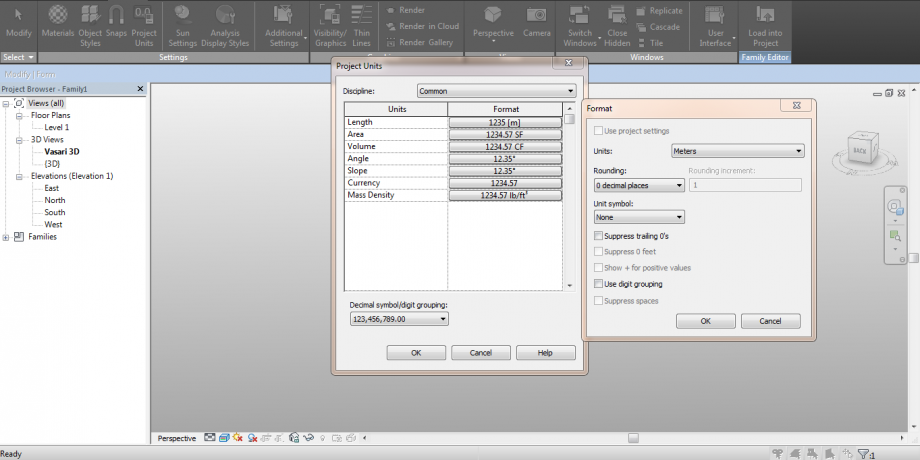
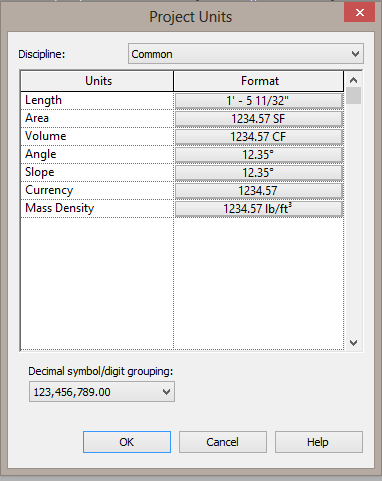
2_Come di consueto dobbiamo modificare l'unità di misura del nostro spazio di lavoro, quindi clicchiamo su Manage -> Project Units e cambiamo il Format da pollici a metri.
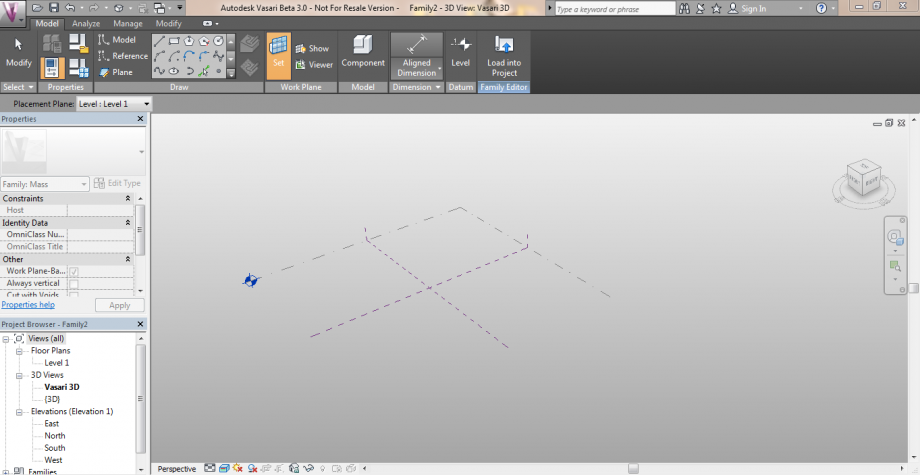
3_Adesso dobbiamo procedere con la creazione dei livelli sui quali andranno posizionate le superfici che serviranno a modellare il tronco e la chioma dell'albero. Clicchiamo su Model -> Level e disegniamo i livelli che ci occorrono.
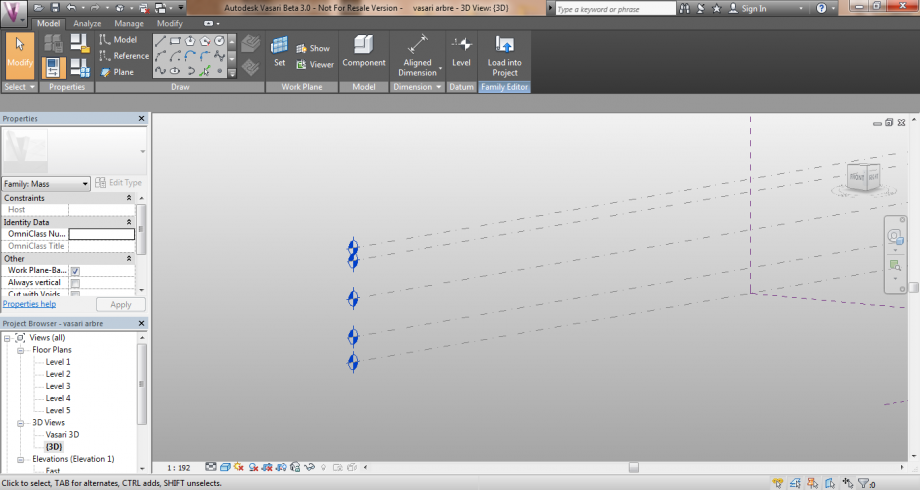
4_Adesso possiamo modificare le quote alle quali vogliamo che ogni livello sia posizionato, semplicemente cliccando sul livello e modificando il testo della quota.
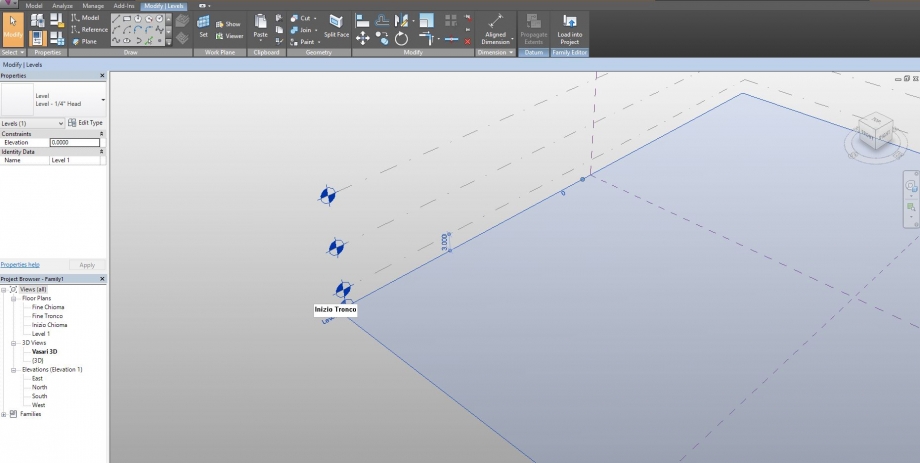
5_Possiamo anche rinominare ogni Livello;
I nostri livelli sono 4:
-Inizio Tronco, corrisponde alla quota 0.0 m
-Fine Tronco, corrisponde alla quota 3.0
-Inizio Chioma, corrisponde alla quota 10.0 m e conterrà la circonferenza più grande della chioma, ovvero la sua estensione massima.
-Fine Chioma, corrisponde alla quota 15.0 m e sarà la sommità dell'albero.
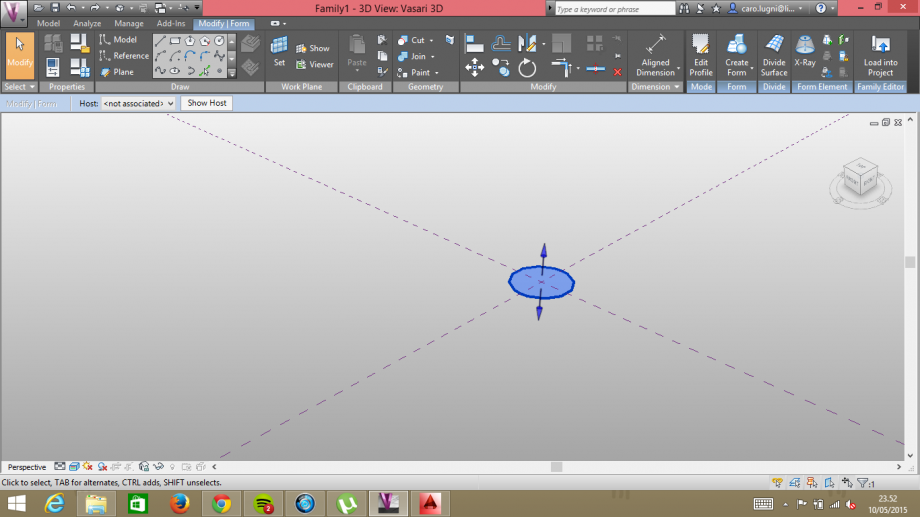
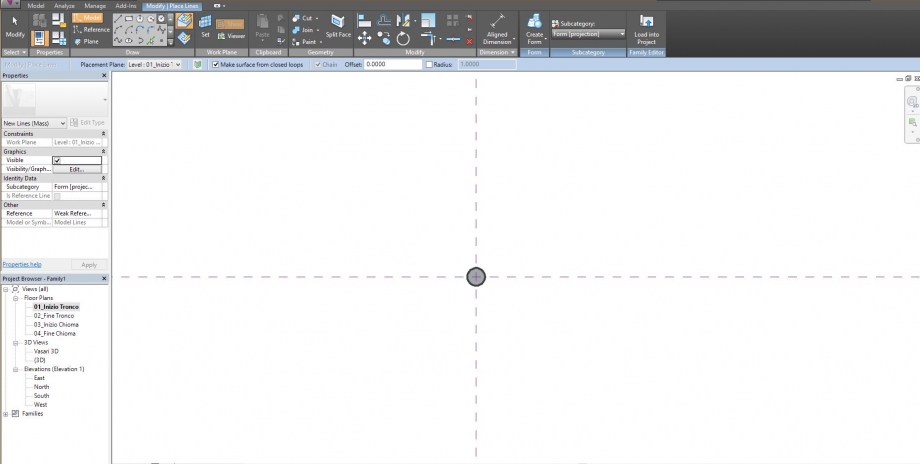
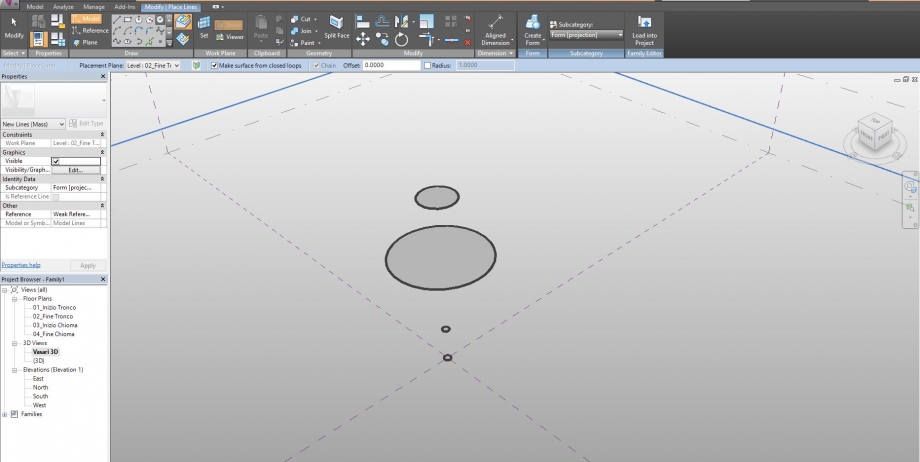
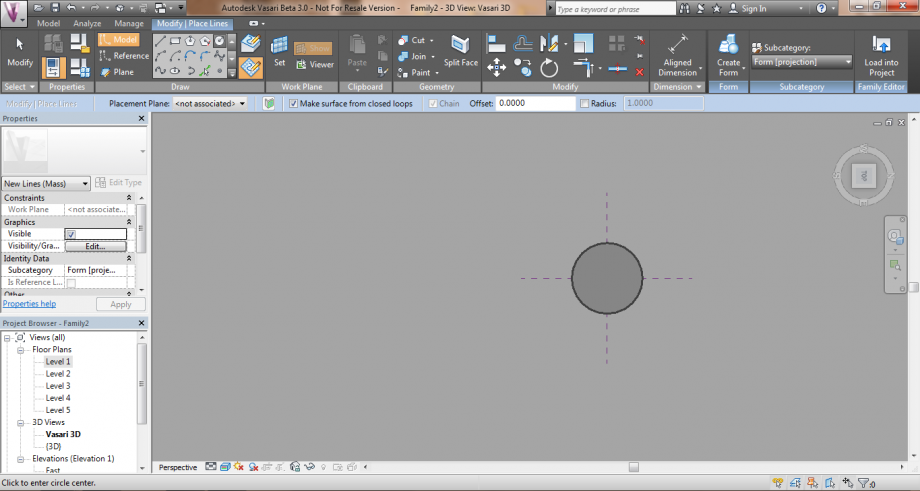
6_Cliccando due volte sul Livello desiderato attraverso la finestra laterale sinistra Project Browser possiamo decidere di disegnare sul piano la nostra circonferenza. Ripetiamo l'operazione per ogni Livello.
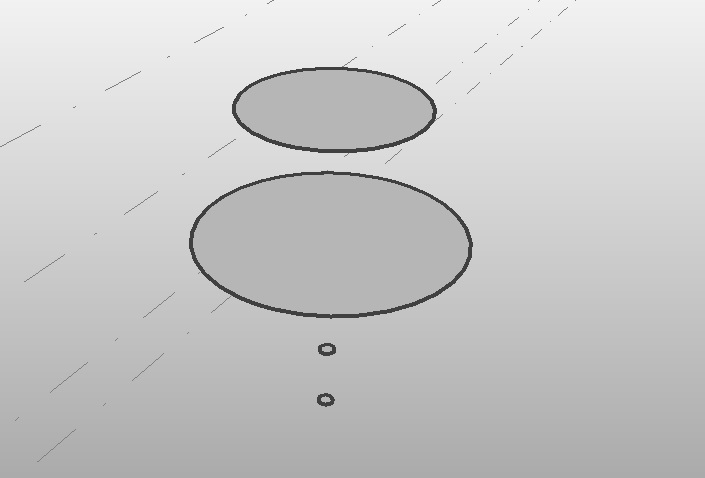
7_Cliccando su 3D views -> Vasari 3D vediamo come le nostre circonferenze siano contenute nei rispettivi piani.
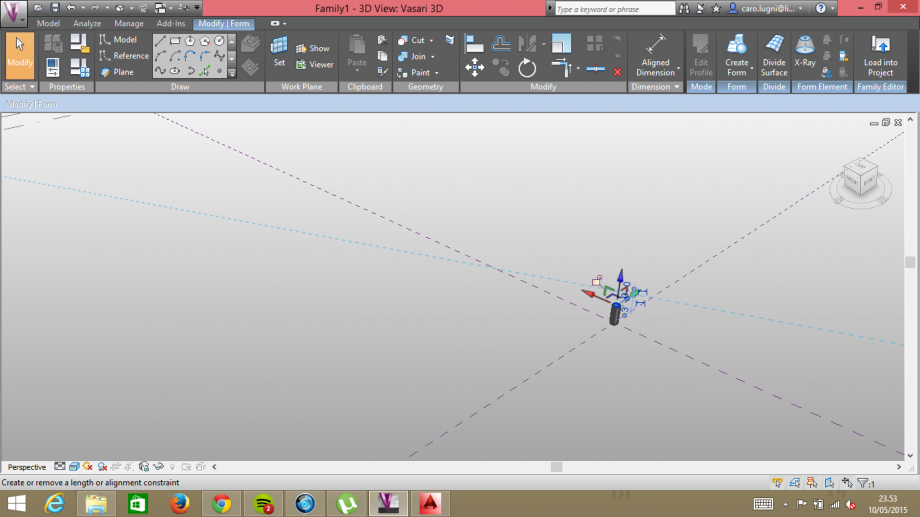
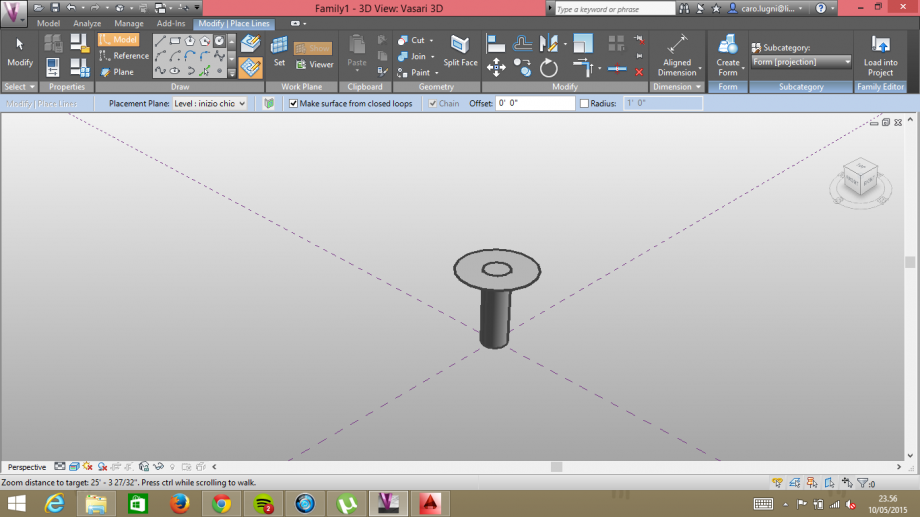
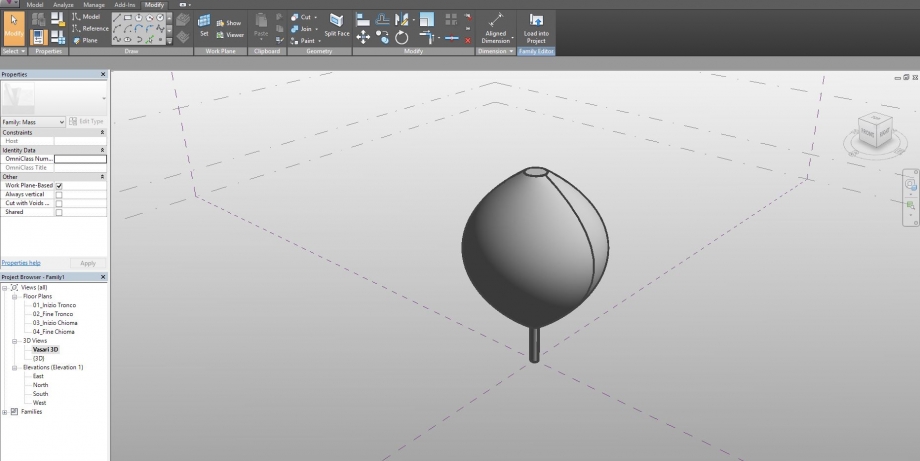
8_Ora le nostre superfici andranno unite usando il comando Create Form dopo averle selezionate. Effettuiamo l'operazione in due passaggi:
-La prima in cui selezioniamo la circonferenza di base e quella della sommità del tronco, creando una sorta di cilindro.
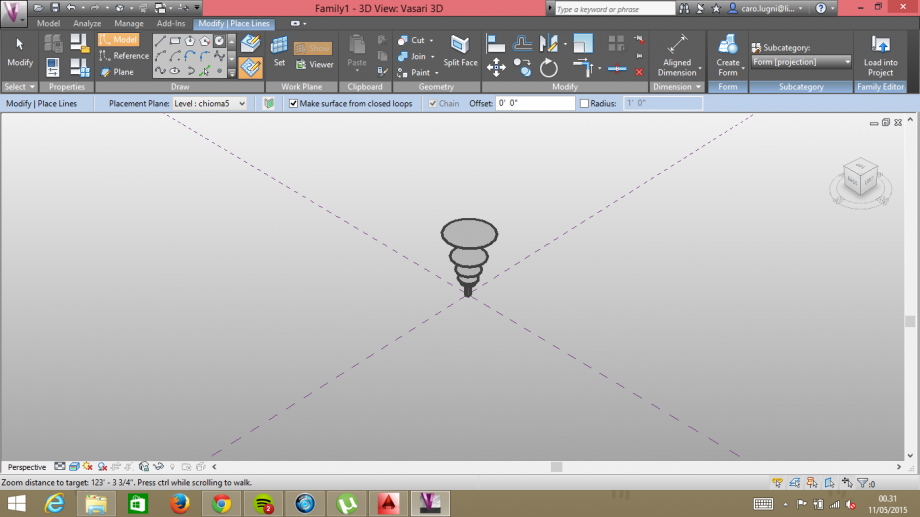
-La seconda in cui selezioniamo la circonferenza di sommità del tronco e le restanti circonferenze che daranno forma alla chioma.
9_Come abbiamo già detto il ciliegio è un albero deciduo, dobbiamo quindi considerare che la sua forma non resterà invariata nel corso delle stagioni.
Per farlo basta settare la visibilità della chioma cliccando sulla sua massa, e modificando il parametro cliccando su Visible -> Associate Family Parameter -> Add parameter -> e modificando i Data Parameter come il nome, e selezionando l'opzione Instance.

10_Adesso dobbiamo inserire la family "ciliegio" che abbiamo appena creato nel nostro progetto. Per farlo basta Cliccare su Load into Project, e selezionare "Place on Work Plane".
Infine studiamo l'ombreggiamento ai solstizi e agli equinozi.
Equinozi:
Solstizio Estivo:
Solstizio Invernale:
 Thomas LACOUR-V...
Lun, 11/05/2015 - 11:35
Thomas LACOUR-V...
Lun, 11/05/2015 - 11:35
Run the programm, click on New in the section Families, and then select the fil Mass.rft in Conceptual Mass.
First you have to change the projects units in meters.
In this case, you can change only the lenght.
We have to create all the levels of our tree. To do this, click on Model, and Levels.
You can start by creating the stem of 2 metres, and then create the foliage with differents levels.
Select each levels to create all section of the tree by drawing circles.
To do the foliage, you have to select all the sections of it. You can do it by selecting the North view.
And then Click to Create Form, to realize the foliage.
To create the stem, do the same things: click on the stem, then on Create Form, and for this case you choose the higher of it.
To understand the impact of the tree, we can put the shadows.
Then create the context.
At the bottom of the page, click on Sun Path On, and then on Sun Settings, to see all the shadows and to modificate the date and the hours.
 Cabibbo_DelPriore
Lun, 11/05/2015 - 12:17
Cabibbo_DelPriore
Lun, 11/05/2015 - 12:17
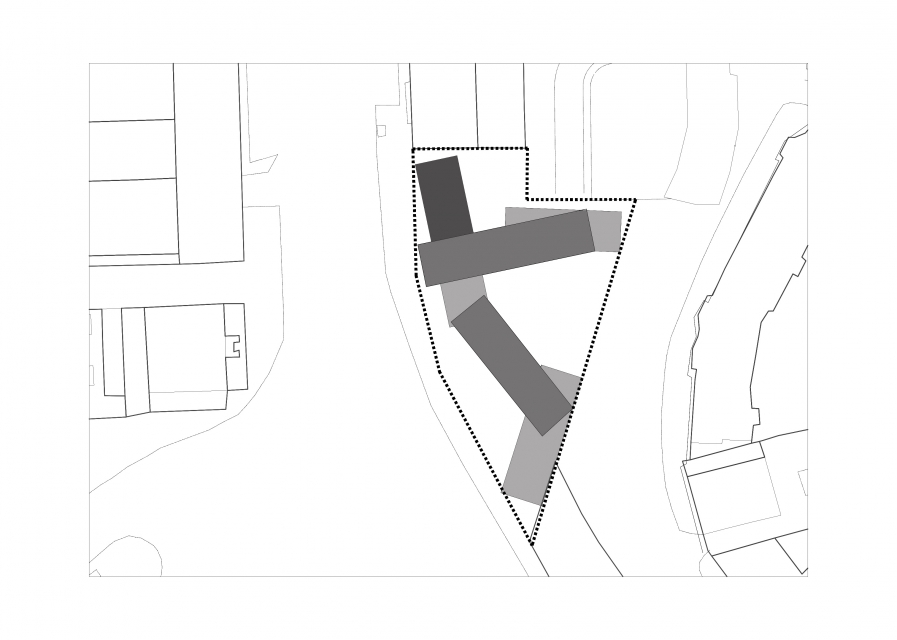
MODIFICHE PROGETTUALI
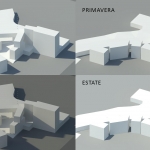
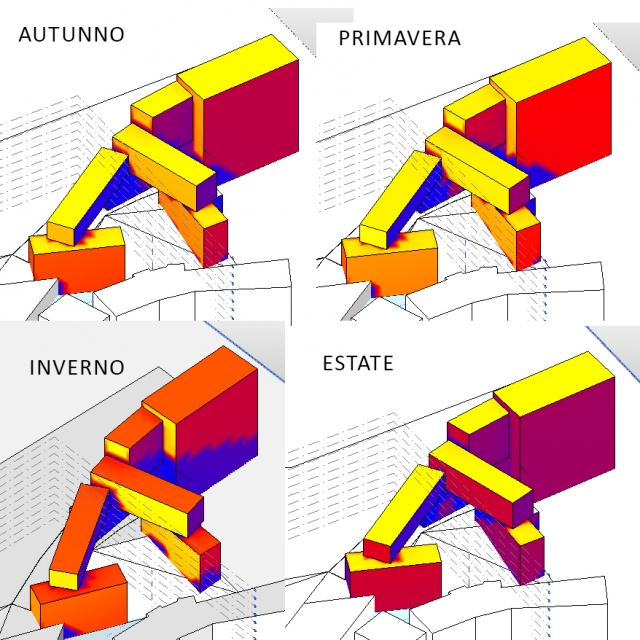
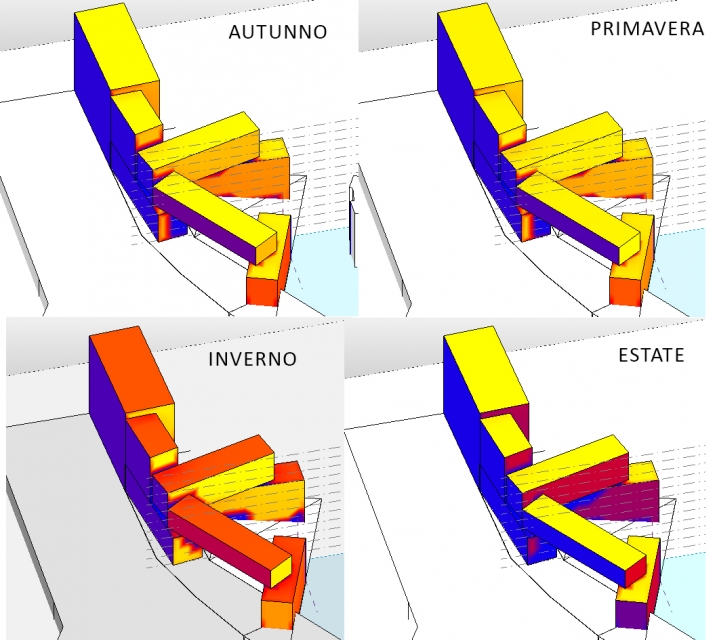
Dall’ultima consegna abbiamo modificato la volumetria dell’edificio, cercando di renderlo più snello e di permettere a più superfici di godere della luce solare sia in estate che in inverno per garantire un miglior comfort all’interno delle abitazioni.
Abbiamo anche cercato di migliorare l’esposizione della piazza che si viene a creare tra i nostri edifici.
Per raggiungere il nostro scopo abbiamo specchiato la posizione dei volumi che in questo modo godono maggiormente di luce diretta e abbiamo diminuito le ombre portate.
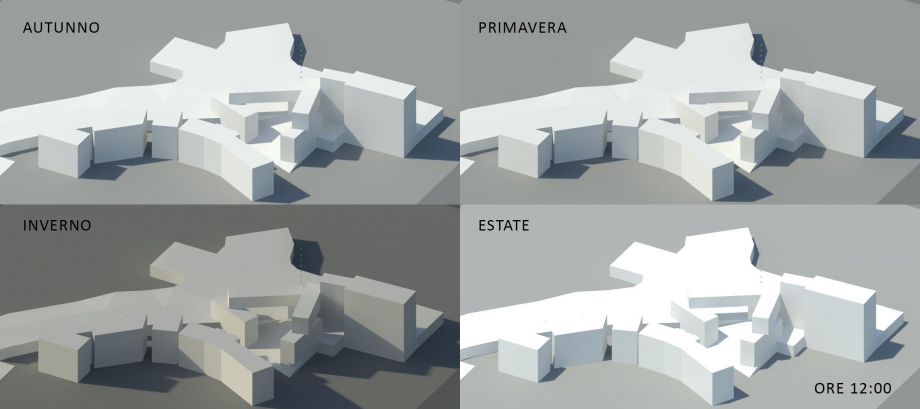
Da queste immagini notiamo come all'interno della piazza sia sempre presente, in tutte le stagioni, un'ombra portata; rispetto alla dispozione precedente degli edifici siamo comunque riuscite a ridurre la sua grandezza, in modo tale da garantire più luce solare diretta durante il periodoo invernale. anche le facciate ddegli edifici godono di maggiore illuminazione rispetto alla configurazione precedente.
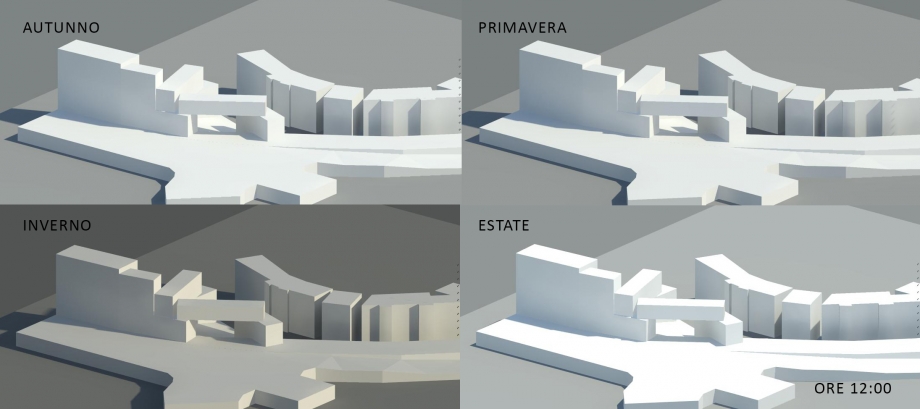
Come si può notare le facciate rivolte sul fronte strada risultano essere per la maggior parte sempre in ombra e saranno caratterizzate da temperature più basse, situazione confermata anche dallo studio delle radiazioni solari; all'opposto le facciate rivolte all'interno della piazza godono di temperature più favorevoli.
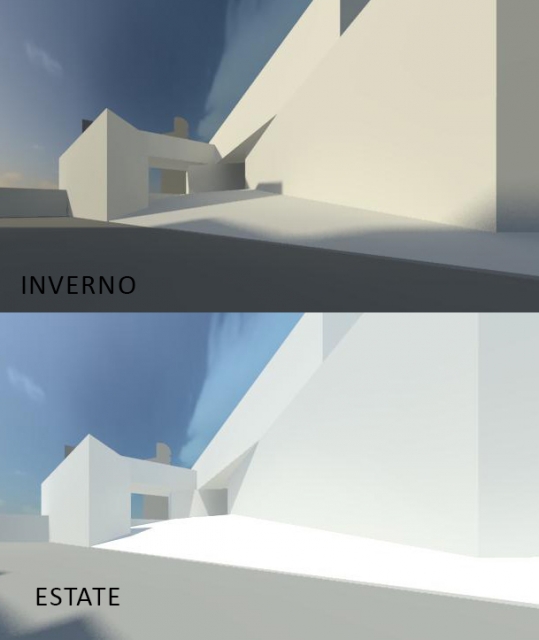
CONFRONTO
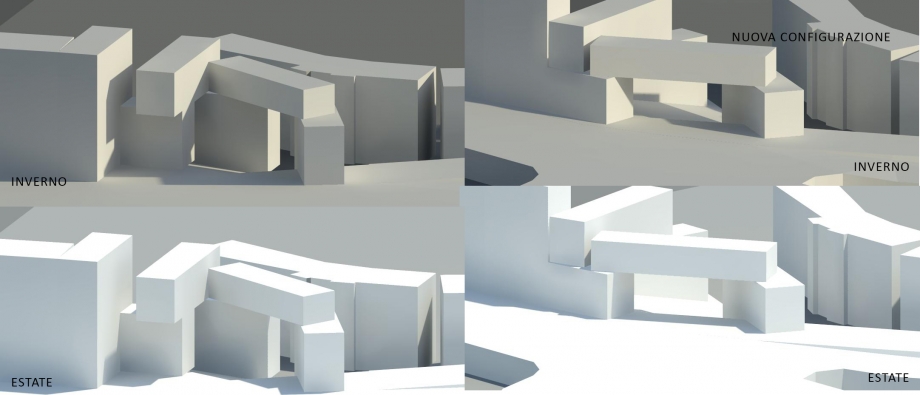 Come si può riscontrare dall'immagine, uno dei nostri principali problemi sono le ombre portate dagli edifici, in particolare da quelli più alti in quanto si è dovuto avere numerosi piani per edificio data la ridotta dimensione del lotto. Nella nuova configurazione quindi, ottenuta specchiando la disposizione degli edifici notiamo come il problema delle ombre portate, che corrispondono a temperatura inferiori per quanto riguarda la radiazione, si sia ridotto almeno in parte. Anche la piazza che prima risultava completamente schermata dagli edifici più a nord ora risulta godere di una maggiore esposizione e illuminazione.
 Melia_Minozzi
Lun, 11/05/2015 - 11:00
Melia_Minozzi
Lun, 11/05/2015 - 11:00
Prunus Cerasifera Nigra in Rome
To fully understand how shadows and lights could affect the project area it’s important to consider the surrounding vegetation, and therefore the most common types of trees in the affected area. In our project area, a very common shrub is the Prunus Cerasifera, better known as Cherry Plum. This tree is spread across Rome, and is therefore a symbol of this city.
Cherry Plum is native to Europe and Asia. It reaches 6 to 15 metres tall and its deciduous leaves are 4-6 cm long. Its flowering occurs quite early, around mid-February. The flowers are white, and the fruit is a yellow or dark red drupe similar to plums, which is edible and reaches maturity between July and September.
Tree Model Features:
Total Height : 7,5 m
Trunk Height : 1,5 m Trunk Diameter: 0,20 m
Foliage Height: 6 m Maximum Foliage Diameter: 6 m
Shaping Prunus Cerasifera Nigra on Vasari Software
1- Start Vasari software, and create a new file selecting ''New Conceptual Mass'' on the list ''Families'', then ''Mass'' and finally ''Open''.
2- It's possible to change the units of measure selecting ''Project Units''.
3- Before you start shaping forms, it's recommended to create levels where you can draw the tree sections at specific heights.
4- Select all the plane figures, and click on create form-solid form to shape the tree.
