


 Ciccarelli_DeSantis
Lun, 25/05/2015 - 18:19
Ciccarelli_DeSantis
Lun, 25/05/2015 - 18:19
PREMESSA
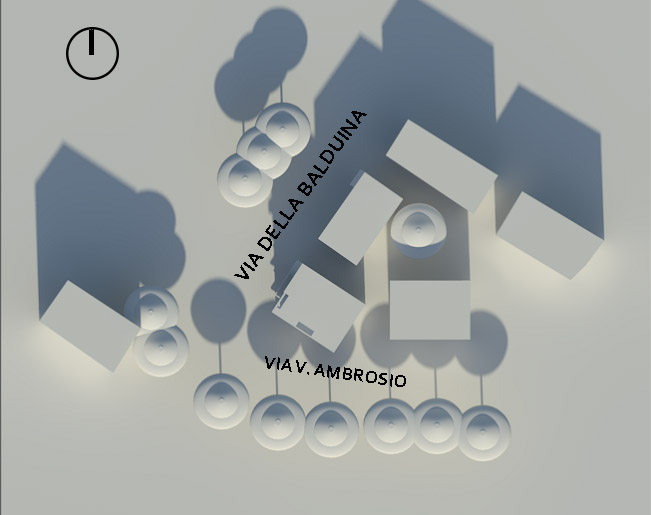
Lungo il viale principale (Via della Balduina) posto di fronte all’edificio analizzato durante le precedenti esercitazioni si trovano degli alberi di dimensioni ridotte della famiglia degli ibiscus, che però, date le dimensioni, non condizionano in maniera incisiva lo spazio circostante e la stessa Via della Balduina; al contrario la vegetazione influenza particolarmente via Vincenzo Ambrosio, via secondaria posta a ridosso del nostro edificio, e il nostro edificio stesso. Si tratta di un aggregato di Pinus Pinea, comunemente chiamati Pini domestici, che caratterizzano l’intero territorio romano. Iniziamo con una breve descrizione delle origini e delle caratteristiche principali di questa specie arborea.
CENNI STORICI
Il Pino domestico è una conifera, appartenente alla famiglia delle Pinacee, molto diffuso lungo i paesi che affacciano sul Mar Mediterraneo ; di origine spagnola e portoghese si diffonde a Roma, o meglio in tutta Italia, in seguito al 1861. Diventa simbolo di riconoscimento della città di Roma, e dell’Italia più in generale, in quanto è parte integrante del primo grande progetto paesaggistico italiano che mirava ad unificare anche culturalmente il paese e a creare un simbolo della nuova identità nazionale. Molti viali di Roma sono dunque caratterizzati dalla presenza di questo tipo di alberi in quanto sono alberi che forniscono molta ombra grazie alla tipica chioma “a ombrello” e poiché si adattano facilmente alla siccità e all’inquinamento. Via Appia ad esempio è caratterizzata dalla presenza di esemplari di filari di Pinus Pinea che si susseguono lungo i margini della strada.

PRINCIPALI CARATTERISTICHE E DIMENSIONI
Nome specie: Pinus Pinea
Famiglia: Pinacee
Altezza : 20-25m (può arrivare fino a 30 m)
Corteccia: spessa, colore grigio/marrone
Foglie: costituite da aghi flessibili a coppie di 2, colore verde glauco lunghe 10 -12 cm circa

Abbiamo riportato la dimensione del pino domestico in modo da effettuare, in seguito, la modellazione :
MODELLAZIONE SU VASARI
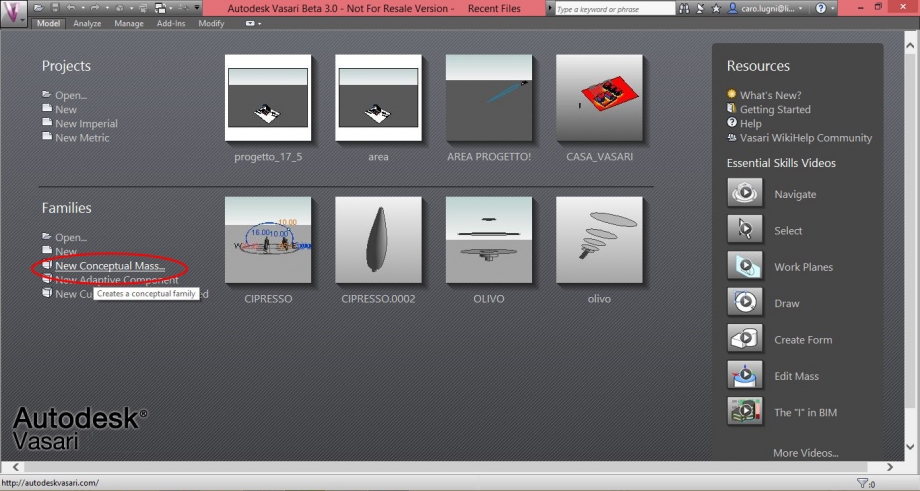
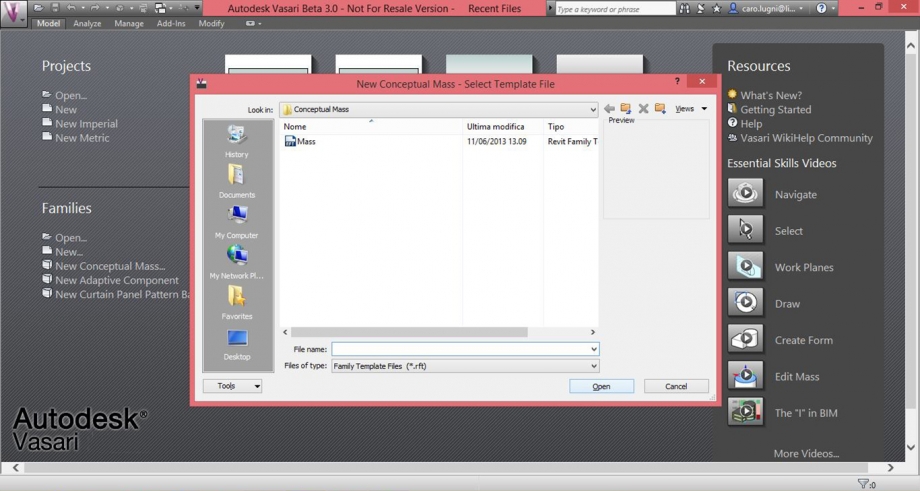
Per prima cosa abbiamo creato una nuova “Families” e andiamo su “New Conceptual Mass” e selezioniamo il file “Mass”, aprendolo così su Vasari.
FAMILIES -> NEW -> MASS

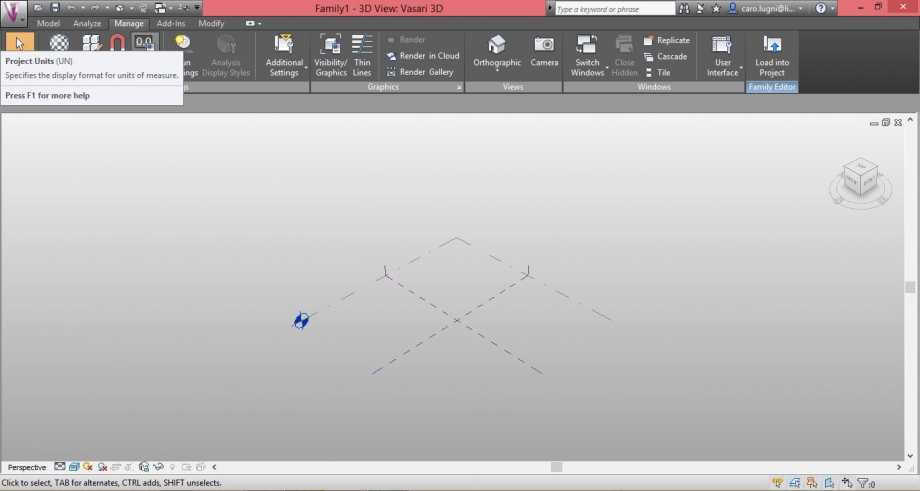
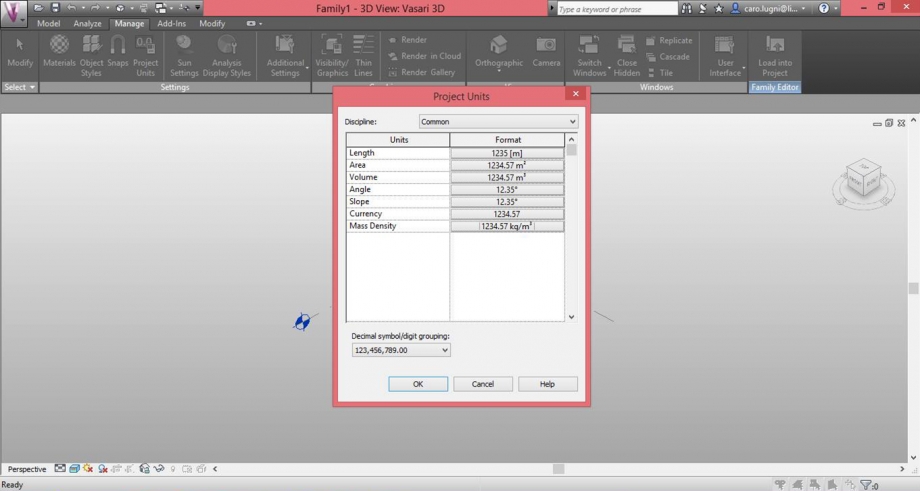
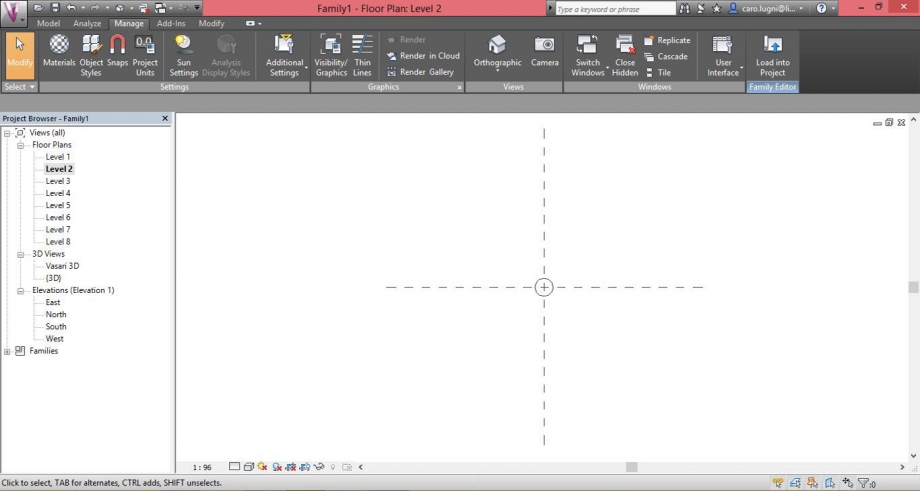
Come prima cosa impostiamo l’unità di misura in metri.
MANAGE -> PROJECT UNITS -> LENGHT -> METERS

Andiamo sulla finestra Project Browser in basso a sinistra e quindi su Elevation e impostiamo la vista su North. Successivamente andiamo su “Levels” così da creare nuovi livelli che riportano le misure da noi precedentemente esaminate. Rinominiamo i livelli facendo doppio click sopra in modo chiaro con nomi specifici (Linea di terra,Inizio chioma, Prima biforcazione ecc…) tutti livelli che corrispondono alle sezioni del nostro albero così da ottenere le quote precise.


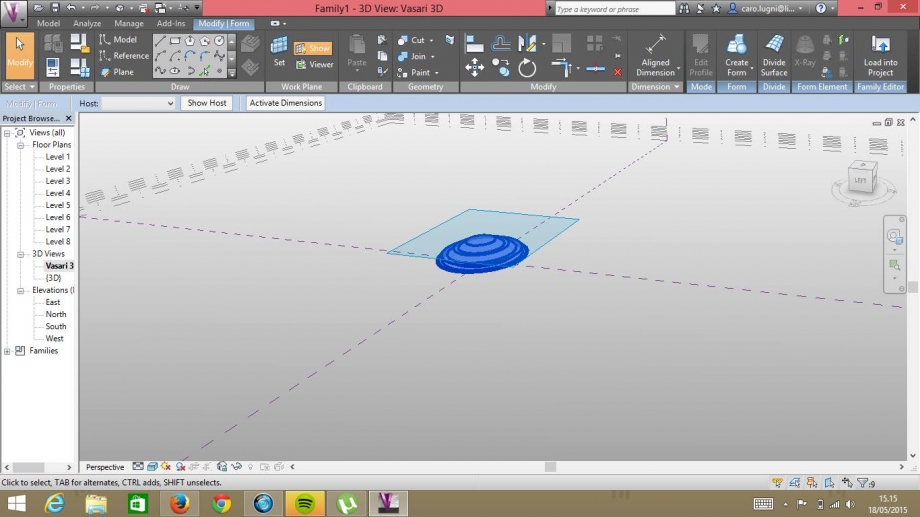
Dopo la creazione dei livelli si passa alla realizzazione delle sezioni circolari del nostro albero. Per ogni sezione selezioniamo il comando “Circle” e creiamo delle circonferenze per ogni livello variando la dimensione del raggio a seconda della sezione.

Cambiamo livello e realizziamo una nuova circonferenza concentrica alla prima di raggio differente e così per tutte le sezioni. Cliccando sul livello possiamo ottenere una vista dall’alto, il che ci permette di disegnare da sopra, ma per evitare di disegnare su altre quote bisogna assicurarsi che il comando “Work on Workplane” sia attivo.

Per creare il tronco selezioniamo solo la circonferenza delle giuste dimensioni ed estrudiamo usando il comando “Create Form”. Per quanto riguarda la chioma , selezioniamo solo le circonferenze corrispondenti e creiamo una massa. Selezioniamo “Create Form” così da realizzare un solido.

PARAMETRI
Dal momento che gli alberi subiscono delle variazioni , a seconda dell’età e della stagione, Vasari ci permette di esaminare questi due fondamentali parametri, relativi uno alla crescita dell’albero e uno alla visibilità della chioma. Importante prima di iniziare con lo studio dei parametri è di premere sul comando “Align” e selezionare prima il livello e poi la sezione del livello corrispondente e chiudere il lucchetto.
1. Crescita

Per prima cosa dobbiamo rendere l’altezza permanente. Andiamo su “Family Types” e creiamo su questo livello un relativo parametro e clicchiamo su “Add” per aggiungere il parametro. Ogni parametro, nelle proprietà deve avere la spunta “Type”.

Successivamente si aggiungono i parametri per le crescita dell’albero, perciò aggiungiamo nuove dimensioni.

2. Visibilità
Selezioniamo la massa che rappresenta la chioma e nelle proprietà spuntiamo “Visible” e cliccando accanto aggiungiamo un parametro di tipo Family e selezioniamo “Istance”, diamo un nome al parametro e premiamo Ok.

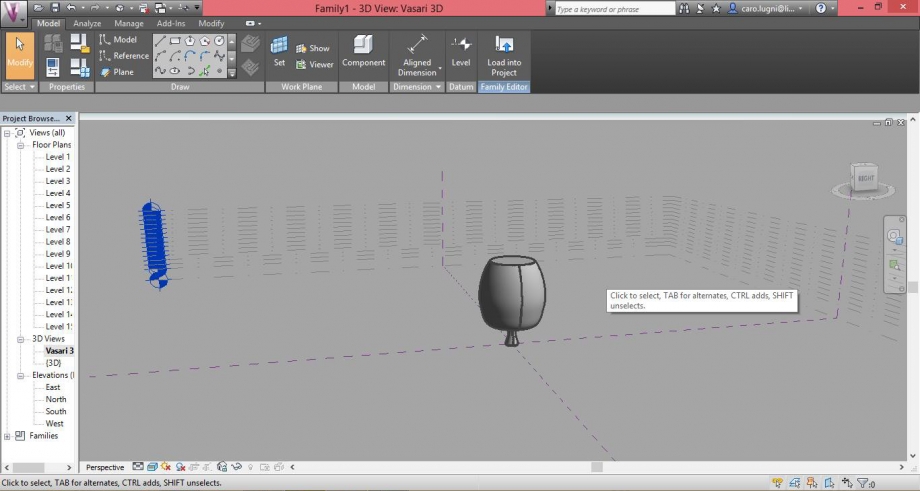
IMPORTARE ALBERO
Infine abbiamo importato il solido nel nostro progetto di Via Balduina. Abbiamo aperto il file e su “Model” , clicchiamo “Place Mass”.

Andiamo su “Load Family” e selezioniamo il file scelto.

*Importante, prima di esportare, bisogna vedere le la chioma è selezionata.

Dopo aver inserito l’albero ci siamo soffermate sul suo comportamento rispetto all’edificio precedentemente studiato.

EQUINOZIO DI PRIMAVERA alle ore 17:00


Dalla nostra analisi abbiamo constatato che la vegetazione non impatta tanto sul nostro edificio e sui viali circostanti, fatta eccezione per il periodo estivo ,quando alle ore 18:00 Via Vincenzo Ambrosio resta particolarmente in ombra, il che crea una situazione gradevole durante il periodo estivo.
Tuttavia d'inverno il nostro edificio risente dell'ombreggiamento degli alberi che coprono le facciate esposte a sud-est incidendo sul comfort termico degli ambienti che qui affacciano.
SOLSTIZIO D'INVERNO alle ore 12.00

 BONANNO_CARLETTI
Lun, 25/05/2015 - 17:07
BONANNO_CARLETTI
Lun, 25/05/2015 - 17:07
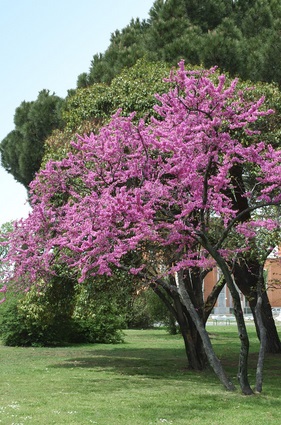
Given the importance of the vegetation in the urban context of Rome we decided to put a common roman tree inside our project area to see the repercution that this vegetation create on the project.
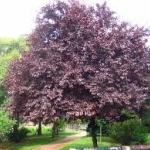
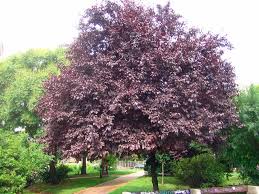
We choose the red prunus that is a very common three in the urban area of Rome and it has a very caratteritic color and shape that match perfectly with our project.
-PROJECT:
The realization of this tree begins with an analysis of the most important dimention of the object: bole diameter,bole height and the diameter of the foliage at various heights,after that we can start the realizzation.
1) CREATE THE MASS.
Open Vasari Beta 3 ant click on "families"- "new Conceptual Mass"
2) Click on mass and start the project
3) Set the project units click on "manage"-"Project Units"
4) set all the paramaters on Meters
5) THE TREE: Now we have to create our tree so start to create some new levels one for each measurement that we've taken on the tree and set the distance of each floor relative to each other
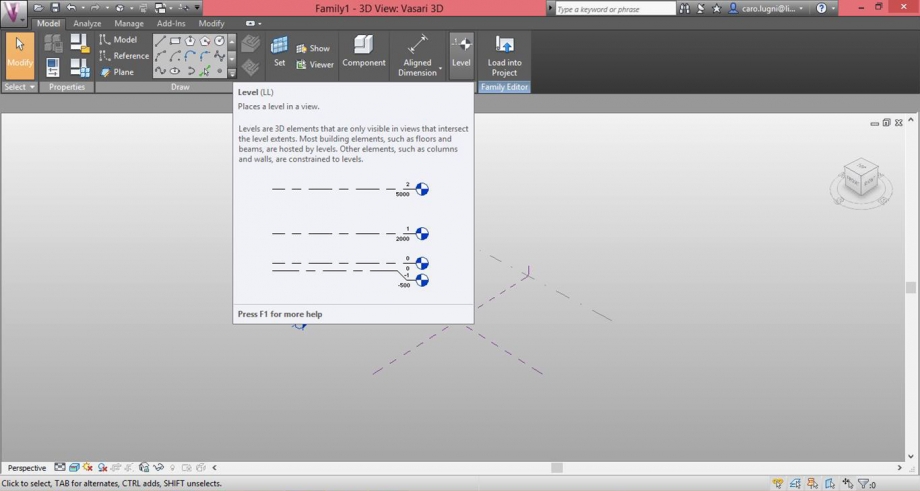
click on level and create each level.
6) TART DROWING:
after that you may have on the right the menu "Project Browser" were you have to click on each level to create the different parts of the tree.
7)After that to return to the normal view click on "Project Browser-"3D views"-"Vasari 3D" and select all the draw part
8) Click on "Create Form"-" Solid Form"
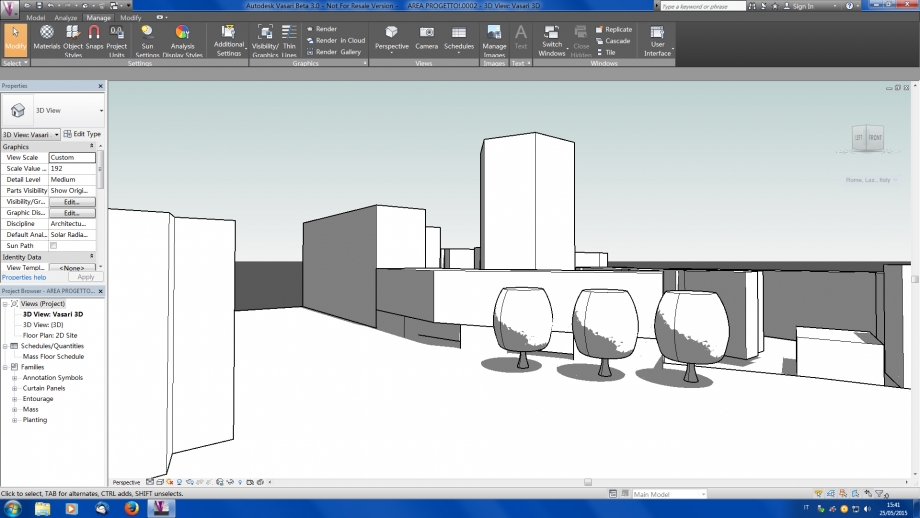
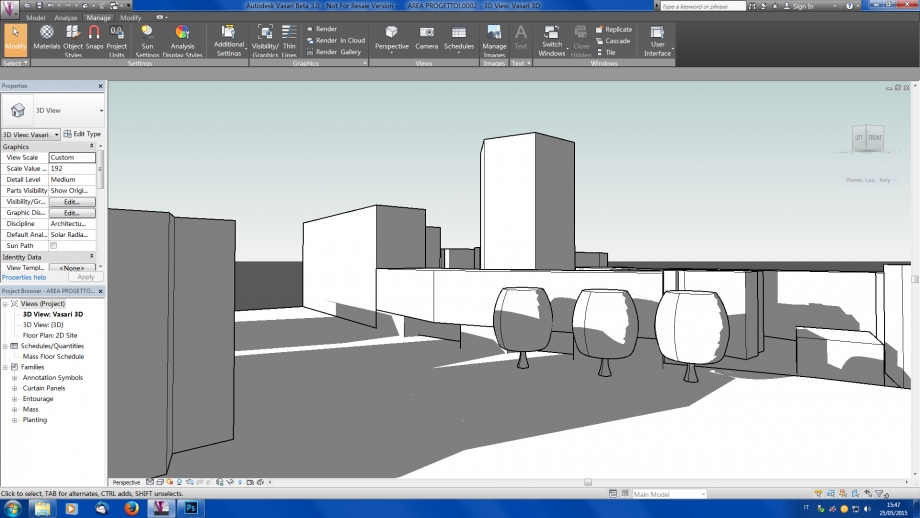
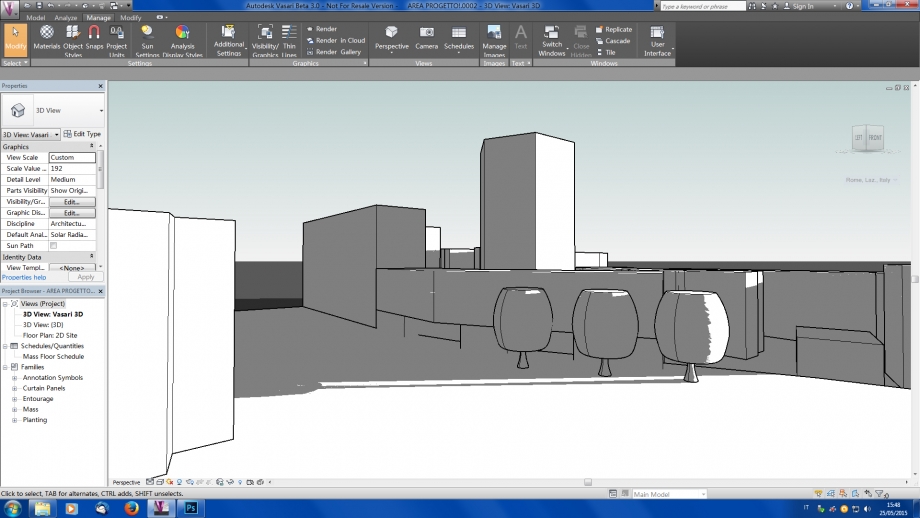
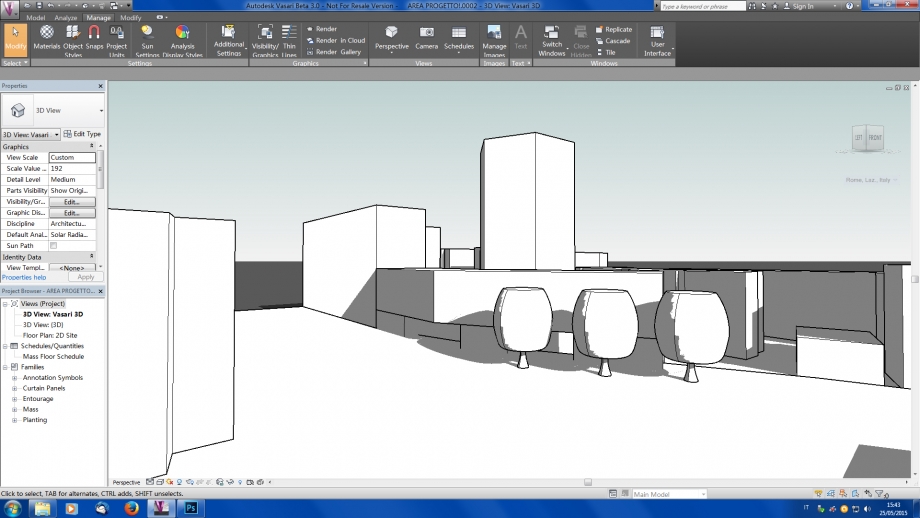
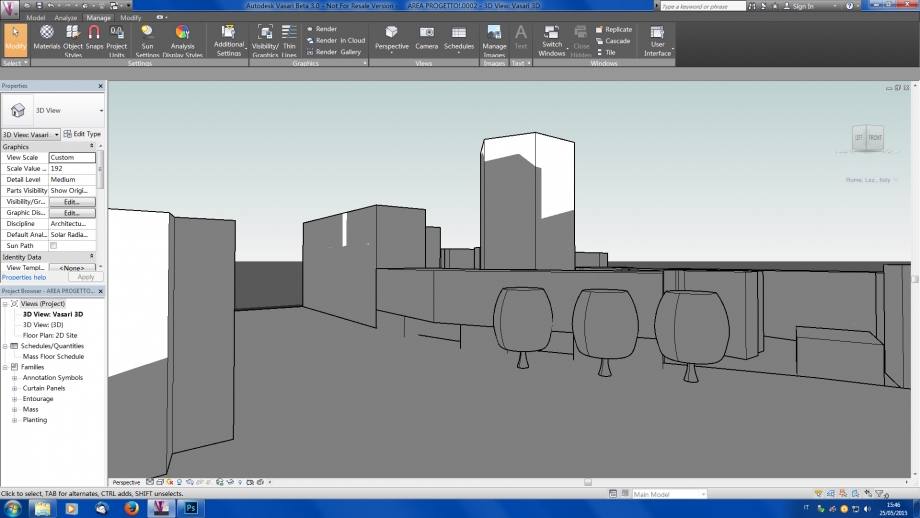
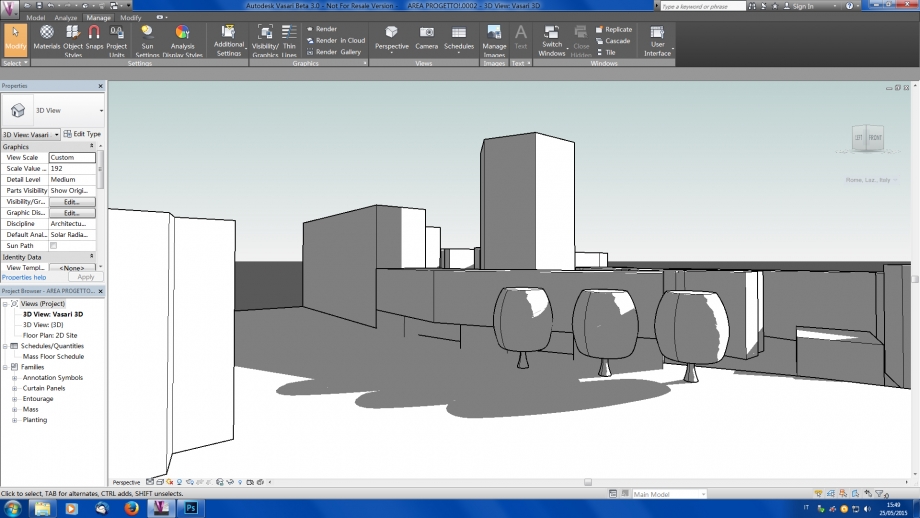
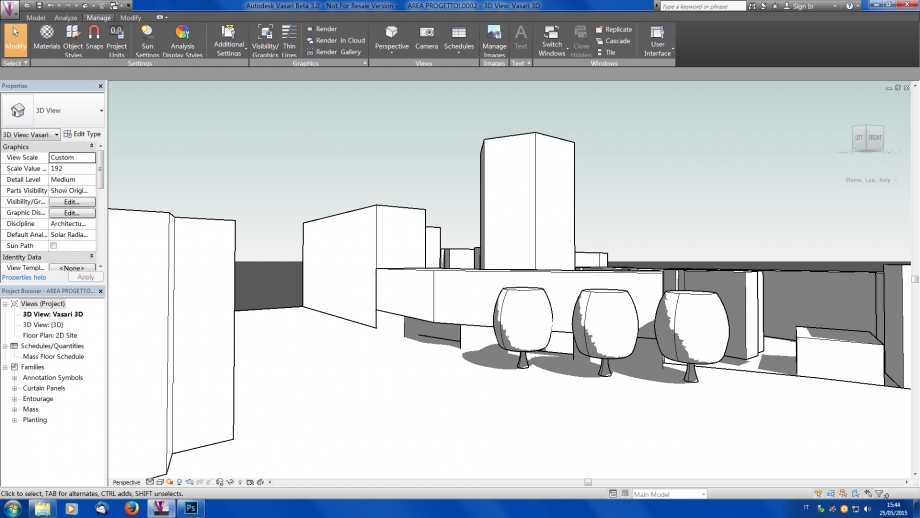
so the tree it's done now we have to put in on the area to se the reflection on the project:
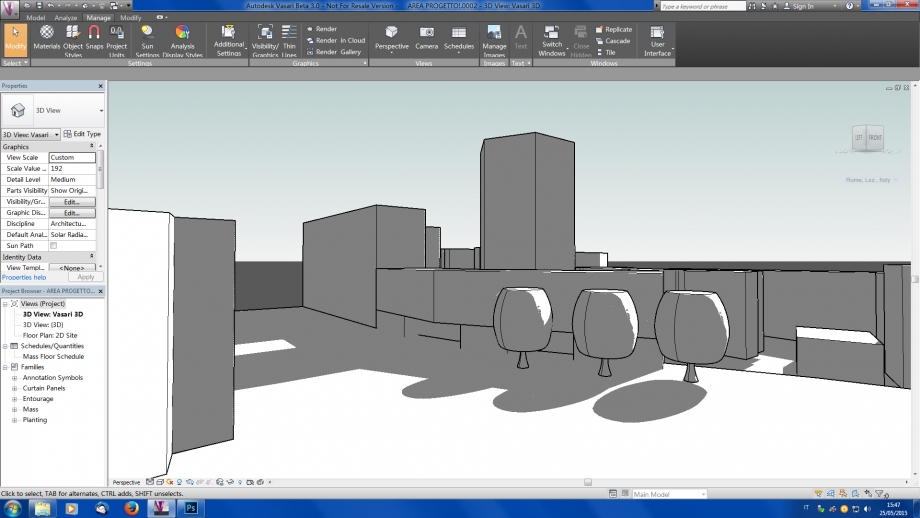
9) We put the trees on the main front of the project along the bigin of Viale Trastevere and we have just analized the shading of the trees on 3 hours of the day ( 8:00, 12:00, 18:00) on soltices and equinox:
SOLTICES:
Summer Solstice
- 8:00
-12:00
-18:00
Winter Solstice:
-8:00
-12:00
-18:00
EQUINOX
-8:00
-12:00
-18:00
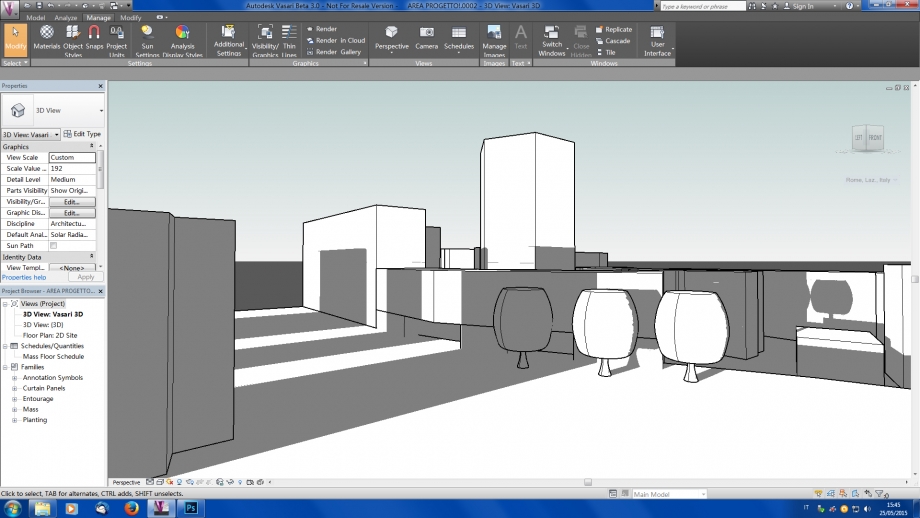
on this analysis we can see that the presence of the trees can modify perception of the project and the road.
Lun, 25/05/2015 - 18:09
 devreux
Lun, 25/05/2015 - 16:00
devreux
Lun, 25/05/2015 - 16:00
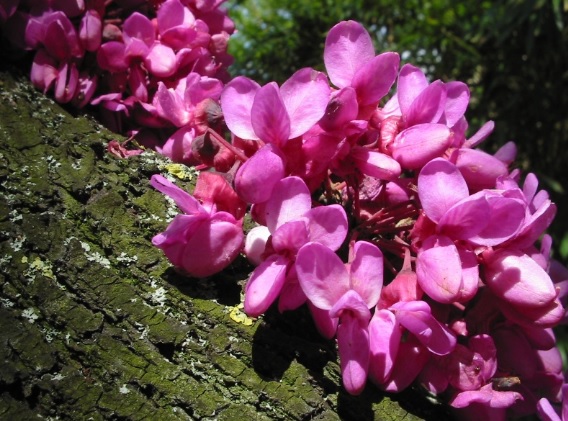
The Prunus Nigra is a species of Prunus native on the eastern North America, brought in the Mediterranean area and that we can frequently find in the city of Rome. It's a tree that can grow over 10 meters with a trunk up to 25 centimeters diameter with the low part dense crowing of stiff rigid branches. The leaves are 5-12 centimeters long and 3-7 centimeters broad, with different kind of shapes: heart, rounded at base or abruptly contracted to a narrow point at the apex.


To create this kind of tree we have to use the "Families" group at the opening screen of the program, clicking on the icon "new" as we did in the first image.

What we are going to find next is a screen that ask us to "Select Template File" with three options. We have to click on the fist one that says "Conceptual Mass" that will open another page with just the option "Mass" that is the one we wanted.

After doing this the usual page of Vasari will show up, but at first, as everytime we have to go up to the command "Menage" and select "Project Units" to change the measures, from Feet to Meters, with wich we have to draw.


Done this we can start to create our tree, but to do this we need to add more levels to draw in so it will be easer to create different forms with different measures. To add levels we need to go always on the command bar and "Model" group of options we can choose "Level" and add them as many as we want with different distances between each other.

Once we have decided how many levels we want (we can also add them when modelling), we have to first of all to create a circle, we can find this option always on che command bar, "Modify"--> "Draw", with the diameter of the trunk, and create a mass for it determinating the height.

Created the trunk we havo to start the foliage using the different levels we have added before. For each level we can create a circle, one on another, always checking the wiew and the cricle position by changing the scree view on top left (the cube). To be sure to draw on the right level and not to the one above or below, click on "Draw on work plane ".


Now we have to create the form, in our case the foliage of the tree, we have to select all the cirles we have done on each level and click on "Create Form" and then on the window below "Solid Form". The result will be an example of the tree as in our picture.

Now that we finished modelling, we have to insert the tree model in our project, and to do this we have at first to open our project file, click on "Model" on the command bar, "Place Mass" and then to insert the tree on "Load Family". After clicking on this command it will open the list of the files where we can select the file of the tree and click "Ok". 


 Delli Carri_Luongo
Lun, 25/05/2015 - 16:58
Delli Carri_Luongo
Lun, 25/05/2015 - 16:58
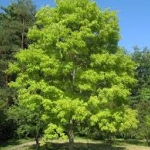
Modeling a tree. Robinia Pseudoacacia
Robinia pseudoacacia, commonly known as the black locust, is a tree of the genus Robinia in the subfamily Faboideae of the pea family Fabaceae. It is native to the southeastern United States, but has been widely planted and naturalized elsewhere in temperate North America, Europe, Southern Africa and Asia and is considered an invasive species in some areas.
With a trunk up to 0.8 m diameter (exceptionally up to 52 m tall and 1.6 m diameter in very old trees), with thick, deeply furrowed blackish bark. The leaves are 10–25 cm long, pinnate with 9–19 oval leaflets, 2–5 cm long and 1.5–3 cm broad.
In Europe it is often planted alongside streets and in parks, especially in large cities, because it tolerates pollution well. The species is unsuitable for small gardens due to its large size and rapid growth, but the cultivar ‘Frisia’, a selection with bright yellow-green leaves, is occasionally planted as an ornamental tree..
Black locust has nitrogen-fixing bacteria on its root system; for this reason it can grow on poor soils and is an early colonizer of disturbed areas.
- As a first step, make an architectural survey of the chosen tree, in order to obtain its height, the diameter of the trunk, and the width of the branches at different levels.
We chose 13 different levels, since the foliage is irregularly shaped.

Now open Vasari and set Families->New conceptual mass…->mass.rft


Set the project units in centimeters trough Manage->Project units->Length->cm

2. Levels
In order to place the levels on which to create the surfaces that will shape our tree select Model->Level. Then set the levels at the chosen distance by clicking on the quotes and changing their values. You can rename the levels by clicking on them on the Project Browser window.


3. To draw the sections select each level and click Model->Circle->Draw on work plane. The radius of the circle can be changed by clicking on the relative quote.


4. Model the tree
First model the trunk, extruding the first circle to the following level.

To shape the foliage select all the remaining sections and select Modify->Create form->Solid form.

5. Set Family Types
Selecting Model->Family types you can set parameter values for your 3D model, like the diameter of each section. Parameters are related to each other, so changing one all the others will change proportionally. This way is possible to change the tree while it grows. For each parameter select Add, then set the value, (rename it), then click Instance->Ok.


6. Draw quotes
To draw the quotes select Modify->X-ray, then Aligned dimension.


7. Place mass
Now that the model is finished, open the file with the chosen area and select Model->Place Mass->Load Family->Open, and place the tree
in the area, in the right position.
In our case, the trees are located by the southern facade, which has no other element to make shadow on it. 
 Joanna Anna Kamerska
Lun, 25/05/2015 - 16:16
Joanna Anna Kamerska
Lun, 25/05/2015 - 16:16
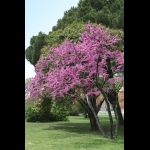
Ho sceto l'abero che si chiama cercis siliquastrum. Altezza di questo albero e' 10m. E un albero che camvia colori mentre altre stagioni. A inverno perdi le foglie. E' pianta che esiste speso a Roma
Fiori di albero nel primavera:
Preparezioni di imagine di albero per modellare

Come ho fatto la modelazione:
1)

2)

3)


4)

5)

6)

7)

E cosi ho gia albero cercis siliquastrum nel 3D.
Lun, 25/05/2015 - 16:44